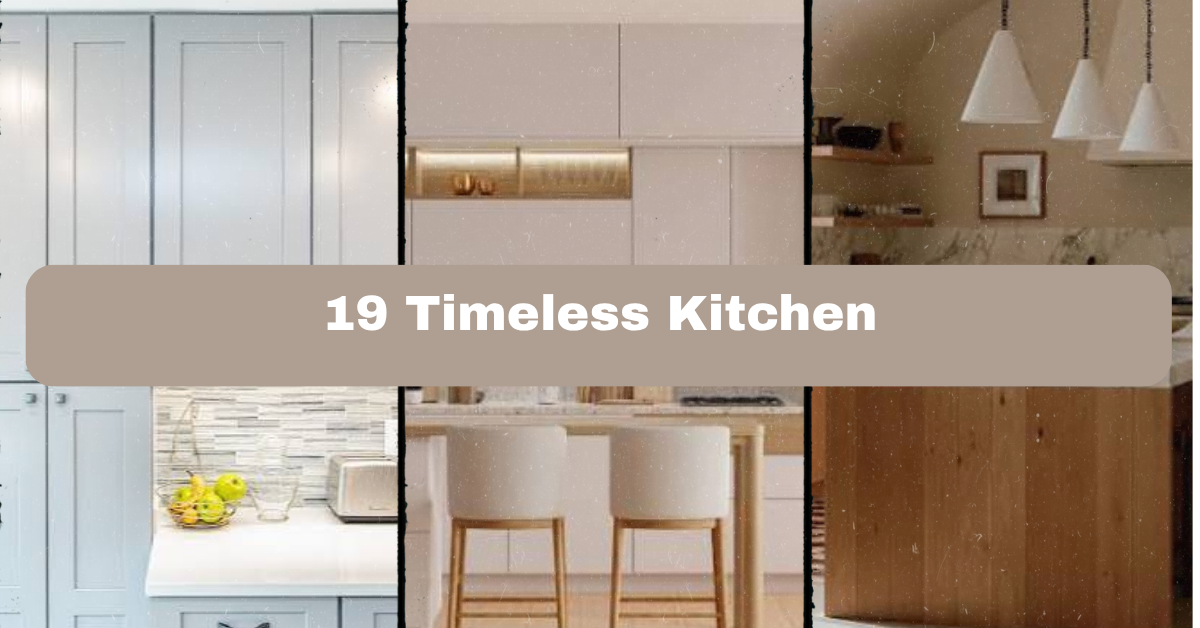
19 Timeless Kitchen ideas can help you create a space that feels current, useful, and welcoming for years to come. I’ve gathered the most dependable choices for cabinets, colors, lighting, materials, storage, and decor so you can plan with confidence.
What are 19 timeless kitchen ideas? They are classic design choices that balance function and beauty, including natural materials, simple cabinets, layered lighting, useful storage, durable finishes, and flexible colors that work across changing home styles.
Keep reading for practical ways to use these ideas without making your kitchen feel plain, dated, or overly matched.
What Makes a Kitchen Timeless?
A timeless kitchen is not stuck in one decade. It has a calm base, strong materials, and details that can change as your taste changes. Think simple cabinet doors, useful work areas, warm lighting, and colors that look good beside both old and new pieces.
I find that the best kitchens feel collected rather than decorated all at once. A vintage bowl can sit beside a modern faucet. Wood can soften crisp white cabinets. Open shelves can display everyday dishes instead of random clutter. The goal is not to follow every trend. It is to make smart choices that still feel right after the excitement of a remodel fades.
1. Choose Shaker Cabinets With Clean, Simple Lines
Shaker cabinets remain a reliable choice because their recessed panels add detail without making the room feel busy. They work in small kitchens, large family kitchens, and open-plan spaces. White is classic, but soft gray, sage green, navy, cream, and natural wood can also look timeless.
I like Shaker doors because they give you room to change the rest of the design later. You can swap hardware, paint the island, or add new lighting without replacing the whole look. Choose solid hinges, smooth drawer glides, and a finish that can handle daily use.
For a practical update, use Shaker doors on the main cabinets and a different wood finish on the island. This idea suits modern farmhouse, traditional, cottage, and transitional homes, which makes it a strong starting point for the next decision.
2. Build Around a Warm Neutral Color Palette
A warm neutral kitchen feels comfortable without looking dull. Try ivory, mushroom, putty, warm gray, tan, or soft greige instead of relying only on bright white. These shades work well with wood, stone, brass, black, and woven textures.
Use one main neutral for the cabinets, one supporting color for walls or the island, and one darker tone for contrast. This simple formula keeps the room balanced. I also recommend testing paint samples in morning, afternoon, and evening light. A color can look creamy in one room and gray in another.
If your kitchen already has cool floors or countertops, warmer walls can make the space feel less stark. This palette adapts easily to coastal, Scandinavian, traditional, and modern styles, and it leads naturally to a closer look at color combinations.
3. Add Natural Wood for Warmth and Balance
Wood keeps a kitchen from feeling too cold or perfect. You can use it on an island, ceiling beams, shelves, bar stools, cutting boards, or a small furniture-style cabinet. Oak, walnut, maple, ash, and reclaimed wood each bring a different mood.
For a clean look, repeat one wood tone in at least two places. For example, match oak shelves with oak stools. You do not need every wood surface to match exactly, but the undertones should work together. Avoid placing several orange-toned woods beside gray cabinets unless you want a strong contrast.
A real wood island top adds character, but it needs regular care and protection from standing water. Use coasters and wipe spills quickly. Natural wood fits farmhouse, mid-century, rustic, Japandi, and contemporary kitchens, so the next layer can be chosen with confidence.
4. Install a Classic Subway Tile Backsplash
Subway tile has lasted because it is simple, affordable, and easy to combine with other materials. A standard 3-by-6-inch tile gives a familiar look, while a longer tile feels more modern. You can change the mood with the layout, grout color, and finish.
White tile with light grout looks soft and clean. Dark grout creates more definition but may show dust and grease. Handmade tile adds movement through uneven edges and gentle color shifts. For a quieter backsplash, choose a matte tile in a warm neutral.
Before installation, place sample tiles beside your countertop and cabinet color. A backsplash should support the room, not compete with it. Subway tile works in traditional, industrial, cottage, and modern kitchens, and the comparison below can help you choose a practical material.
Backsplash Material Comparison
| Material | Best use | Maintenance | Typical visual effect |
|---|---|---|---|
| Ceramic tile | Full backsplash | Low | Clean and flexible |
| Porcelain tile | Heavy-use kitchen | Low | Dense, polished, or stone-like |
| Glass tile | Small backsplash areas | Low to medium | Bright and reflective |
| Marble tile | Elegant focal wall | Medium to high | Veined and classic |
| Stainless steel | Behind a range | Low | Industrial and sleek |
| Beadboard panel | Dry areas away from heat | Medium | Cottage and relaxed |
With the backsplash selected, the next timeless move is to choose a countertop that looks good and works hard.
5. Select Durable Countertops With Gentle Pattern
The best timeless countertop has a useful surface and a pattern you will not tire of seeing. Quartz, granite, butcher block, quartzite, marble, and soapstone all bring different benefits. Your choice should match how you cook, clean, and use the kitchen.
Quartz is low-maintenance and available in many colors. Granite offers natural variation and strong durability. Marble is beautiful but can etch and stain, so it suits homeowners who accept a little patina. Butcher block adds warmth but needs oiling and careful cleaning.
I suggest ordering a large sample, not just a tiny square. Look at it beside your cabinets and backsplash. Avoid overly dramatic veining if you want maximum flexibility. This approach works in sleek city kitchens and relaxed country rooms alike, which brings us to edge details.
6. Use Furniture-Style Details on the Island
A kitchen island can feel more like a piece of furniture when you add legs, inset panels, turned feet, open shelving, or a contrasting finish. This softens a large block of cabinetry and gives the room a more personal look.
Choose an island color that relates to another feature, such as the flooring, dining table, or cabinet hardware. If the kitchen is narrow, avoid an oversized island that blocks movement. Leave about 36 inches for a comfortable walkway, and allow more space where two people regularly work.
Add drawers on the prep side and seating on the opposite side. A furniture-style island fits traditional, farmhouse, transitional, and modern kitchens when the lines stay simple. Once the island has character, lighting becomes the next key feature.
7. Layer Ambient, Task, and Accent Lighting
One ceiling fixture rarely gives a kitchen enough light. A timeless plan uses three layers. Ambient lighting fills the room. Task lighting helps with chopping and cooking. Accent lighting highlights shelves, artwork, or architectural details.
Install under-cabinet lights near the front edge of upper cabinets so the counter does not sit in shadow. Use pendant lights over an island, but choose a size that leaves clear sight lines. Dimmers make every fixture more useful, especially when the kitchen opens into a dining or living area.
Warm white bulbs around 2700K to 3000K usually create a comfortable home feeling. Use brighter task lighting where you work. This layered plan suits compact apartments, large traditional kitchens, and modern open spaces, and the guide below gives useful spacing references.
Kitchen Lighting Guide
| Lighting location | Useful starting point | Main purpose |
|---|---|---|
| Under-cabinet strip | 1 strip per cabinet run | Countertop task light |
| Island pendants | 30 to 36 inches above counter | Focused work and style |
| Pendant spacing | About 24 to 30 inches apart | Even island coverage |
| Recessed ceiling lights | Often 24 to 36 inches from walls | General room light |
| Pantry or cabinet lights | Motion sensor option | Easy access |
| Dimmers | On ambient and pendant circuits | Flexible mood control |
Good lighting reveals the materials you choose, so now it is time to consider hardware and metal finishes.
8. Mix Metal Finishes With a Clear Plan
Mixed metals can make a kitchen feel layered instead of showroom-perfect. You might combine brushed brass cabinet pulls, a matte black faucet, and stainless steel appliances. The trick is to repeat each finish with purpose.
Start with one main metal for cabinet hardware. Add a second finish through lighting or plumbing. A third finish can work, but use it lightly. Keep the sheen in mind. Brushed brass and satin nickel feel softer together than polished chrome and shiny gold.
Place samples in the actual room before buying everything. Some brass finishes become darker over time, while polished surfaces show fingerprints. Mixed metals fit modern, vintage, industrial, and traditional interiors when the forms are related. The next idea adds texture without relying on more hardware.
9. Add a Vintage or Reclaimed Accent
One old or reclaimed piece can give a new kitchen a sense of history. Consider a vintage mirror, antique stool, old cutting board, framed recipe card, salvaged sign, or small wooden cabinet. The item does not need to be expensive. It only needs to feel useful or meaningful.
Keep vintage accents away from areas where water and heat could damage them. A framed print is safer beside a pantry than behind a sink. If you use reclaimed wood, check that it is clean, stable, and free from old paint that may contain lead.
I like pairing one aged piece with mostly simple finishes. This keeps the kitchen fresh rather than themed. The idea works in cottage, industrial, farmhouse, eclectic, and contemporary homes, and it pairs especially well with a well-chosen floor.
10. Install Flooring That Can Handle Real Life
Kitchen flooring must survive spills, dropped utensils, chair movement, and heavy foot traffic. Porcelain tile is hard-wearing and available in wood, stone, and concrete looks. Hardwood adds warmth and can flow into nearby rooms. Luxury vinyl is softer underfoot and comes in many patterns.
Choose a floor color that hides crumbs and small marks between cleanings. Very pale solid floors can show dirt quickly, while very dark glossy floors often reveal dust. Matte or lightly textured finishes usually offer a practical middle ground.
Before buying, order samples and view them beside the cabinets. Check that the pattern does not fight with the countertop. Durable flooring works in coastal, rustic, modern, and classic kitchens, and the material table below can help narrow the field.
Kitchen Flooring Comparison
| Flooring | Comfort | Water resistance | Care level | Strong design match |
|---|---|---|---|---|
| Porcelain tile | Firm | Excellent | Low | Modern, traditional |
| Hardwood | Warm | Medium | Medium | Classic, farmhouse |
| Luxury vinyl | Softer | Very good | Low | Casual, contemporary |
| Natural stone | Firm | Varies by stone | Medium to high | Rustic, elegant |
| Cork | Soft | Medium | Medium | Eco-friendly, relaxed |
| Brick | Firm | Good when sealed | Medium | Industrial, country |
Once the floor is doing its job, a simple rug can make the room more comfortable and inviting.
11. Layer a Washable Runner for Warmth
A runner adds color, pattern, and comfort to a long kitchen walkway. It also gives your feet a break while you cook. Choose a washable cotton rug, low-pile performance runner, or indoor-outdoor style that can handle regular cleaning.
For safety, use a non-slip pad or a rug with a secure backing. A runner should leave enough room for cabinet and appliance doors to open. In many kitchens, a 2.5-by-7-foot or 3-by-8-foot runner works well, but measure first.
Look for muted reds, faded blues, olive, tan, or charcoal if you want a pattern that will age well. A rug fits bohemian, farmhouse, coastal, and modern kitchens when its colors repeat elsewhere. Next, we can make the walls useful as well as attractive.
12. Turn One Wall Into Practical Open Storage
Open shelving works best when it has a clear job. Use it for everyday plates, mugs, cookbooks, or a few plants. Do not treat every shelf as a display case. Useful objects create a more natural look and are easier to maintain.
Install shelves where they will not interfere with cooking steam or grease. A depth of about 10 to 12 inches is usually enough for plates without making the room feel crowded. Leave breathing room between objects, and group items by color or material.
If dust worries you, use one open shelf instead of a full wall. You can also choose glass-front cabinets for a similar display effect with less cleaning. Open storage fits Scandinavian, farmhouse, modern, and cottage kitchens, and the sizing guide can help prevent a cramped result.
Open Shelf Planning Guide
| Shelf item | Recommended depth | Useful spacing |
|---|---|---|
| Mugs and small bowls | 8 to 10 inches | 10 to 12 inches high |
| Dinner plates | 10 to 12 inches | 12 to 14 inches high |
| Cookbooks | 10 to 12 inches | 12 to 14 inches high |
| Small plants | 8 to 10 inches | Leave 4 inches around pot |
| Large serving bowls | 12 to 14 inches | 14 to 16 inches high |
| Floating shelf above counter | 10 to 12 inches | Usually 18 to 24 inches above counter |
Storage should look good, but it also needs to reduce daily effort. The next idea focuses on the inside of the cabinets.
13. Add Deep Drawers and Smart Cabinet Storage
A kitchen can look beautiful and still be frustrating if everything is hard to reach. Deep drawers often work better than low cabinet shelves for pots, pans, plates, and food containers. Pull-out trays can make corner cabinets easier to use.
Use a drawer divider for utensils, a vertical rack for baking sheets, and a narrow pullout for oils or spices. Keep the items you use every day between waist and shoulder height. Save high shelves for occasional serving pieces.
Before ordering cabinets, make a list of your largest items. Measure the stockpot, mixer, blender, and trash bin. This prevents unpleasant surprises later. Smart storage fits every kitchen style because it is mostly hidden, and the next idea makes the sink area both useful and attractive.
14. Choose an Apron-Front or Deep Single-Bowl Sink
A deep sink is practical for washing large pots and baking sheets. An apron-front sink adds a strong visual detail, while an undermount sink creates a quieter countertop line. Fireclay, stainless steel, granite composite, and porcelain each have different care needs.
A stainless steel sink is forgiving and easy to coordinate with appliances. Fireclay feels traditional but can chip if heavy objects are dropped. A single-bowl design gives you more room, while a divided sink may help if you wash and rinse separately.
Place the faucet where it is easy to reach without splashing nearby walls. Add a pull-down sprayer and a small soap dispenser if you want fewer items on the counter. This choice works in farmhouse, transitional, contemporary, and traditional kitchens, leading to another hardworking feature: the pantry.
15. Create a Pantry Zone Instead of Scattered Storage
A pantry does not have to be a separate room. A tall cabinet, built-in shelves, or a set of labeled drawers can create a useful pantry zone. Keep dry goods together so meal prep feels faster and the counters stay clear.
Use clear containers only for foods you buy often. Labels help, but do not transfer every item if it creates extra work. Adjustable shelves are valuable because cereal boxes, jars, and appliances are not the same height.
Leave a little empty space for groceries and seasonal items. A pantry that is packed to the edges will stop working well. This feature suits tiny galley kitchens and spacious traditional homes alike, and it prepares the room for one final organizational detail.
16. Design a Dedicated Coffee or Beverage Station
A beverage station gives frequent-use items a home. It might include a coffee maker, mugs, tea, glasses, a water filter, and a small tray for sweeteners. In a large kitchen, place it outside the main cooking zone so people can serve themselves without blocking meal prep.
Use a short shelf, a small cabinet, or a section of counter. Add an outlet where cords can stay hidden. If the station is near a sink, cleanup becomes easier. Keep only daily items visible and store backup supplies below.
A beverage area can look sleek with flat-front cabinets or charming with open shelves and vintage mugs. It works in modern, cottage, Scandinavian, and farmhouse kitchens. With the practical zones covered, thoughtful decor can now add personality.
17. Display Useful Decor Instead of Random Clutter
The most convincing kitchen decor often has a job. A wooden board can lean against the backsplash. A ceramic pitcher can hold wooden spoons. A large bowl can collect fruit. Linen towels can add color without taking up much space.
Use odd numbers and vary height when styling a counter or shelf. Leave clear work space around the sink and cooktop. I suggest creating one or two decorated zones instead of spreading small objects everywhere.
Choose pieces that relate to the room’s colors, but do not make every item match. A little contrast keeps the kitchen alive. Useful decor adapts to minimalist, rustic, vintage, and maximalist homes, and plants can add another layer of life.
18. Bring in Greenery That Suits the Kitchen
Plants soften hard cabinets, stone, and metal. Herbs such as basil, rosemary, mint, and thyme can sit near a bright window, though they need regular care. For lower maintenance, try pothos, snake plants, or small succulents in suitable light.
Use pots that will not stain the countertop. A tray under plant containers catches water and protects wood. Keep greenery away from hot burners, strong drafts, and areas where leaves may touch food preparation surfaces.
One large plant can have more impact than several tiny pots. Choose a simple ceramic, terracotta, or woven planter that supports the room’s style. Greenery works in nearly every kitchen, and the final idea adds a personal finish through art.
19. Hang Art and Personal Pieces With Restraint
Art makes a kitchen feel connected to the rest of the home. Try a framed botanical print, food illustration, landscape, textile, family photograph, or small collection of ceramic plates. Choose pieces that can handle the room’s conditions.
Avoid hanging valuable artwork directly above a range or sink, where heat, grease, and moisture can cause damage. A wall beside the breakfast table or pantry is usually safer. Use frames that relate to the hardware or wood tones without matching everything exactly.
One large piece often looks calmer than many tiny pieces. If you prefer a gallery wall, keep a consistent frame color or repeat one visual theme. Personal art works in modern, coastal, traditional, eclectic, and farmhouse kitchens, bringing the entire design together.
Tips for Success
- Measure walkways, appliance doors, and drawer clearances before ordering materials.
- Order large samples of flooring, countertops, cabinet colors, and tile.
- Use the kitchen’s natural light to guide paint and finish choices.
- Spend more on items that are difficult to replace, such as cabinets, plumbing fixtures, and flooring.
- Keep at least one clear section of counter for daily prep.
- Repeat colors and materials in small ways instead of making every feature identical.
- Choose finishes based on your cleaning habits, not only on appearance.
- Mix old and new pieces so the kitchen feels personal rather than staged.
Common Mistakes and How to Avoid Them
Choosing style before function
Define this as selecting colors and finishes before considering how the kitchen is used. Fix it by mapping cooking, cleaning, storage, and walking zones first.
Using too many competing materials
Define this as combining several bold stones, woods, metals, and tile patterns in one room. Fix it by choosing one main focal material and keeping supporting finishes quiet.
Ignoring lighting during the remodel
Define this as relying on one ceiling fixture or adding lights after cabinets are installed. Fix it by planning ambient, task, and accent lighting before the walls are closed.
Making open shelves too deep
Define this as installing shelves that collect clutter or block the room visually. Fix it by keeping most shelves around 10 to 12 inches deep and displaying only useful items.
Picking a rug without a safety plan
Define this as placing a loose runner where people turn or where water spills. Fix it with a non-slip pad, washable material, and enough clearance for doors.
Filling every surface
Define this as decorating counters and shelves until there is no easy place to work. Fix it by leaving open space around the sink and cooktop, then rotating decorative items seasonally.
Similar Variations
- Modern Classic Kitchen: Simple cabinets, restrained colors, clean hardware, and one refined focal material.
- Warm Minimalist Kitchen: Pale wood, uncluttered counters, soft lighting, and a small number of carefully chosen objects.
- Classic Farmhouse Kitchen: Shaker cabinets, apron-front sink, natural wood, vintage accents, and practical open shelving.
- Coastal Classic Kitchen: Creamy whites, pale blue or sea glass tones, woven textures, and light oak.
- Organic Contemporary Kitchen: Smooth cabinets, earthy colors, stone surfaces, plants, and sculptural lighting.
- Transitional Kitchen: Traditional cabinet details paired with modern appliances, simple tile, and updated metal finishes.
A timeless kitchen does not need to be plain, expensive, or designed around one strict look. It needs a strong base, durable materials, useful storage, and enough personality to feel like yours. Start with the choices that are hardest to change, then add color, lighting, textiles, art, and small accents over time.
When you balance beauty with real daily needs, these 19 Timeless Kitchen ideas can keep your home welcoming for many years.
Leave a Reply