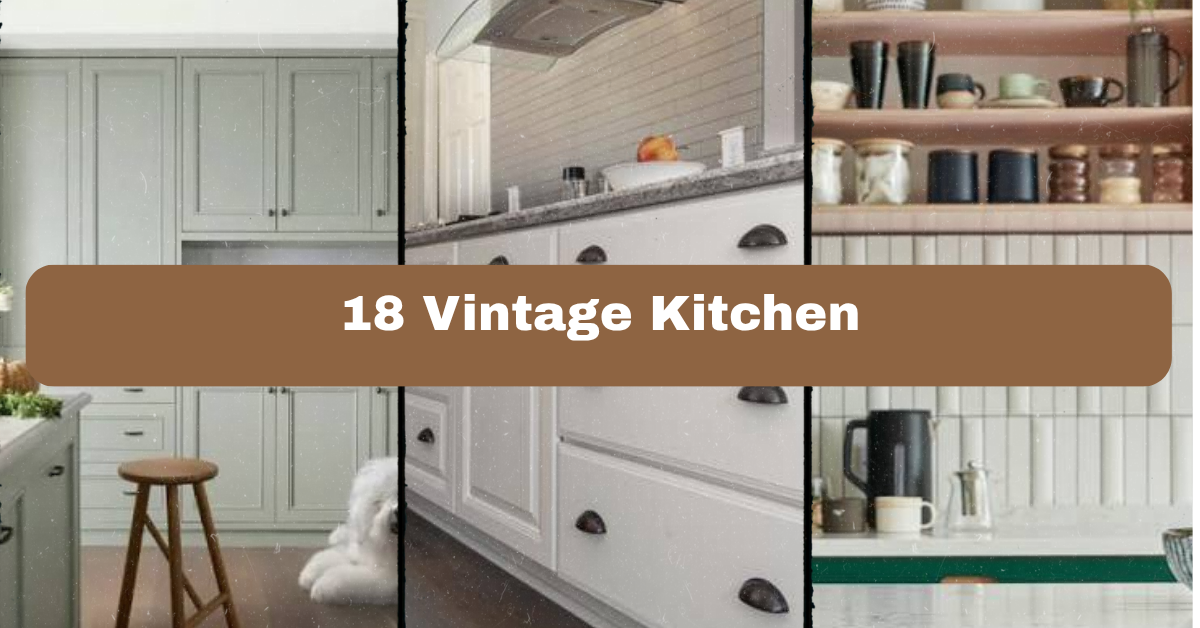
18 Vintage Kitchen ideas can help you bring old-fashioned charm into your home without making the room feel stuck in the past. I’ll show you how to mix color, furniture, lighting, storage, and small details so the space feels warm and useful.
The phrase 18 Vintage Kitchen refers to a collection of kitchen design ideas inspired by past decades. These ideas commonly use painted cabinets, retro appliances, natural wood, classic tile, aged metals, open shelving, and nostalgic accessories.
You’ll find practical ways to create the look on a small budget, plus tips for keeping your kitchen fresh and functional.
What Makes a Kitchen Feel Vintage?
A vintage kitchen feels collected rather than perfectly matched. It may borrow details from the 1920s, 1940s, 1950s, or 1970s, but it does not need to copy one decade from floor to ceiling. I like combining one strong period feature with simple modern comforts.
Think warm colors, honest materials, curved shapes, glass doors, old-style hardware, and useful objects left in view. A vintage look should still support real cooking, easy cleaning, and enough storage. The goal is charm with purpose. Start with the pieces you already love, then add layers slowly. That approach keeps the room from looking like a themed diner or a secondhand shop.
1. Paint Cabinets in a Soft Heritage Color
Paint is one of the fastest ways to give a kitchen vintage character. Cream, dusty blue, sage green, muted yellow, and warm gray all work well. These colors feel softer than bright modern shades, and they pair nicely with wood, brass, and aged ceramic.
For a classic look, paint the lower cabinets a deeper color and keep the upper cabinets light. You can also use one color throughout and let the counters or backsplash provide contrast. Choose a durable satin or semi-gloss cabinet paint so fingerprints and cooking splashes are easy to wipe away.
Try painting a small cabinet door first. Check the color in morning and evening light before committing. In a modern home, this idea softens sharp lines. In a traditional or cottage kitchen, it reinforces the room’s natural warmth. Next, bring in hardware that makes the color feel even more intentional.
2. Install Cup Pulls and Simple Knob Hardware
Hardware can change the age and mood of a cabinet in minutes. Cup pulls, round knobs, latches, and bin handles all have a vintage feel. Brass adds warmth, while black gives the room a more farmhouse or early twentieth-century look. Chrome works well for a 1950s-inspired kitchen.
Choose one main finish for most cabinets, then use a second finish only in small amounts. For example, pair aged brass pulls with a stainless faucet. That mix feels relaxed instead of overly matched. Measure every existing hole before buying replacements. If the spacing differs, you may need to fill and repaint the doors.
Place cup pulls low on drawers and knobs near the upper corner of cabinet doors. This makes them comfortable to use. The idea works in modern kitchens when the shapes stay simple. In coastal spaces, try brushed nickel or pale brass for a lighter effect. With the hardware in place, the backsplash becomes the next major visual layer.
3. Choose Small-Format or Patterned Tile
Vintage kitchens often use tile with a clear pattern or a smaller scale. Subway tile, checkerboard tile, penny rounds, and hexagons are all strong choices. White tile with dark grout creates a crisp old-fashioned look, while colored ceramic tile feels more cottage-like.
Keep the pattern controlled. A busy floor may need a plain backsplash, while patterned backsplash tile can work best with quiet flooring. For a classic result, use white subway tile with a slightly uneven handmade surface. It catches light and feels less flat than perfectly uniform tile.
Before installation, tape sample tiles to the wall and view them from across the room. Check how the grout color changes the pattern. This idea suits modern homes when the tile is clean and minimal. It fits traditional, farmhouse, and cottage homes with more decorative shapes. Now let’s compare a few useful vintage color combinations.
Vintage Kitchen Color Palette Guide
| Palette | Main Color | Supporting Color | Accent Finish | Best With |
|---|---|---|---|---|
| Classic Cream | Warm ivory | Soft black | Aged brass | Wood counters and white tile |
| Cottage Sage | Muted sage | Cream | Brushed nickel | Oak floors and floral fabric |
| Retro Blue | Powder blue | Cherry red | Chrome | 1950s appliances and diner stools |
| Harvest Gold | Mustard yellow | Olive green | Dark bronze | Walnut wood and patterned tile |
| Dusty Rose | Soft pink | Light taupe | Polished chrome | Marble-look counters and glass |
| Coastal Blue | Faded navy | Sandy white | Satin brass | Beadboard and natural rattan |
4. Add a Farmhouse or Butcher-Block Work Surface
Wood counters bring instant warmth to a vintage kitchen. Butcher block is especially useful because it looks practical, not overly polished. Maple, oak, and walnut each create a different mood. Maple is light and casual. Oak has visible grain. Walnut feels richer and more formal.
You do not need wood on every counter. A butcher-block island or a small section beside the stove can provide enough contrast. Seal the surface properly, and follow the care instructions for oiling or refinishing. Never treat it like a cutting board unless it is designed for that use.
I like pairing wood counters with painted cabinets and simple ceramic tile. In a modern kitchen, one wood surface makes sleek cabinets feel friendlier. In a farmhouse or rustic home, it strengthens the existing texture. After adding wood, use lighting to highlight its grain and create a softer evening mood.
5. Hang a Schoolhouse or Milk-Glass Light
Lighting has a big effect on vintage style. Schoolhouse pendants, milk-glass flush mounts, enamel shades, and cone-shaped sconces all recall older kitchens. Look for rounded glass, visible cords, aged metal, or a simple shade with a useful shape.
Hang a pendant about 30 to 36 inches above an island or table, measured from the surface to the bottom of the fixture. Use warm white bulbs around 2700K for a cozy glow. Add under-cabinet lights for food preparation, since decorative fixtures alone may leave work areas dark.
A single schoolhouse light can be enough in a small kitchen. Two matching pendants work better over a longer island. The style adapts easily to modern spaces when the fixture is clean and unornamented. In a traditional room, choose ribbed glass or antique brass. With the room glowing, you can add a furniture piece that gives the kitchen a sense of history.
6. Use a Freestanding Cabinet or Hoosier-Style Hutch
Freestanding storage makes a vintage kitchen feel less like a wall of built-ins. A painted hutch, antique cabinet, baker’s rack, or Hoosier-style cupboard can hold dishes, cookbooks, linens, or small appliances. It also gives the room a focal point.
Check the piece carefully before bringing it indoors. Look for strong hinges, stable legs, and signs of pests or water damage. You can paint it, leave the wood natural, or use a contrasting color to make it stand out. Add shelf liner to protect the inside and install a wall anchor if children may climb nearby.
Use a hutch where a tall cabinet might otherwise feel heavy. In a modern home, choose a simple piece with clean doors. In a cottage or farmhouse kitchen, look for beadboard, glass panels, or turned feet. The next step is making everyday storage visible in a neat and attractive way.
Storage Choices for a Vintage Kitchen
| Storage Piece | Useful For | Recommended Placement | Vintage Detail |
|---|---|---|---|
| Glass-front hutch | Plates, cups, serving bowls | Dining wall or island end | Wavy glass or wood muntins |
| Open shelf | Daily dishes and jars | Above counter | Brackets, beadboard, or aged wood |
| Rolling cart | Produce, appliances, towels | Beside island or pantry | Casters and metal frame |
| Plate rack | Plates and cutting boards | Near sink or prep area | Grooved wood rails |
| Wire basket | Onions, linens, packaged food | Lower shelf or wall | Black or aged brass finish |
| Freestanding pantry | Dry goods and small appliances | Empty corner | Louvered or paneled doors |
7. Display Everyday Dishes on Open Shelves
Open shelving works well in a vintage kitchen because it puts useful objects on view. Stack white plates, blue transferware, striped bowls, or handmade mugs where you can reach them. Add one or two decorative pieces, but avoid filling every inch.
Install shelves at a height that feels comfortable for the people using the kitchen. A common starting point is 18 inches above the counter, though the right distance depends on appliances and ceiling height. Use strong brackets and wall anchors. Heavy dishes need real support.
Group items by color or purpose. A row of cream plates looks calmer than a random pile of every shade. This idea can feel modern when the shelves are thick and the display is spare. In a rustic or cottage kitchen, use reclaimed wood and more varied ceramics. Once your dishes are visible, small textiles can add softness without taking up much space.
8. Layer in Checked, Striped, or Floral Textiles
Textiles are an easy way to make a kitchen feel lived-in. Use cotton tea towels, gingham curtains, ticking stripes, floral seat cushions, or a simple runner. These patterns connect strongly with farmhouse, cottage, and mid-century kitchen design.
Choose two related patterns instead of mixing many competing ones. For example, pair a blue check towel with a small blue floral cushion. Keep the background colors similar so the room feels connected. Washable fabrics are the smartest choice near food, sinks, and busy walkways.
A café curtain can cover the lower half of a window while still allowing light inside. If the kitchen already has patterned tile, use solid textiles to prevent visual overload. In a modern home, one striped runner adds vintage flavor without changing the architecture. In a country kitchen, layered fabric can become part of the room’s main character. Next, let the floor carry some of the nostalgic detail.
9. Try a Checkerboard or Worn-Look Floor
A checkerboard floor is one of the clearest vintage kitchen signals. Black and white is bold, but softer pairings often feel more relaxed. Try cream with terracotta, pale gray with white, or muted green with ivory. You can use tile, luxury vinyl, painted wood, or a patterned sheet material depending on your budget and floor condition.
Use large squares for a calmer look and small squares for a stronger retro feeling. Before installation, mark the centerline of the room so the pattern does not end in awkward slivers along both walls. Choose a matte or low-sheen finish if you want an aged appearance.
This design works in a modern kitchen when the cabinets and walls stay simple. In a 1940s or farmhouse setting, it feels naturally at home. Coastal rooms can use sandy white with faded blue. With the floor set, it is easier to choose a rug that adds comfort without hiding the pattern.
Flooring Material Comparison
| Material | Typical Look | Maintenance | Best Use | Vintage Effect |
|---|---|---|---|---|
| Ceramic tile | Crisp, classic, durable | Sweep and mop; grout care | Busy kitchens | Strong and authentic |
| Porcelain tile | Dense and refined | Low maintenance | High-traffic floors | Clean traditional look |
| Luxury vinyl | Warm and forgiving | Easy wipe-down | Budget renovations | Can mimic old tile |
| Painted wood | Casual and historic | Touch-ups over time | Dry kitchen areas | Cottage and farmhouse |
| Linoleum | Soft underfoot | Regular sweeping and damp mopping | Retro renovations | Excellent mid-century feel |
| Sealed concrete | Simple and sturdy | Re-seal as needed | Modern vintage mix | Industrial and rustic |
10. Bring in a Classic Range or Retro-Style Appliance
A vintage-style range can become the kitchen’s main feature. Some people choose a restored antique stove, while others prefer a new appliance with rounded corners, colorful enamel, chrome knobs, and visible controls. Both options can work, but safety and function come first.
Measure the opening, ventilation needs, gas or electrical connections, and door clearance before buying. Restored appliances may need specialized service. A new retro-style range usually offers easier maintenance and modern safety features.
You do not have to replace every appliance. A cream refrigerator or colorful range can stand beside simpler stainless appliances if the finishes share a visual link. In a modern kitchen, one retro appliance adds personality. In a traditional kitchen, several classic shapes can create a more complete period look. After the appliances, soften their strong lines with natural wood accents.
11. Add Wooden Cutting Boards and Useful Countertop Objects
Vintage kitchens often feel warm because practical items are visible. Lean a few wooden cutting boards against the backsplash. Add a ceramic crock for utensils, a stoneware bowl for fruit, or a glass jar for flour and sugar. These objects provide texture while staying useful.
Choose items in a limited range of materials. Wood, ceramic, glass, and enamel work well together. Avoid placing too many small decorations beside the stove or sink, where grease and water can create extra cleaning work. Keep the objects you use most within easy reach.
I suggest grouping countertop pieces in threes, such as a cutting board, crock, and small bowl. Vary their heights so the arrangement looks natural. In a sleek modern kitchen, these pieces add needed warmth. In a rustic space, they support the room’s practical character. Once the counters feel balanced, consider a sink with the right shape and finish.
12. Select an Apron-Front or Deep Ceramic Sink
A deep ceramic sink instantly suggests an older home. Apron-front sinks are especially popular in farmhouse and cottage kitchens, while porcelain or fireclay basins can suit many vintage styles. Their broad front adds visual weight and makes washing large pots easier.
Check the cabinet size, counter support, faucet reach, and plumbing before selecting one. Fireclay is durable but heavy, so the cabinet may need extra reinforcement. Porcelain can chip if hit with hard cookware. A stainless apron-front sink offers a lighter, more modern interpretation.
Pair the sink with a bridge faucet, cross handles, or a simple gooseneck shape. Use a small drying rack or wood sink board to make the deep basin more practical. This look works in modern homes when the lines are clean. In farmhouse and traditional kitchens, it feels natural. Next, let the walls carry a little more personality.
Sink and Faucet Pairings
| Sink Type | Best Faucet Style | Color Pairing | Practical Note |
|---|---|---|---|
| White fireclay apron-front | Bridge faucet | Aged brass | Needs strong cabinet support |
| Porcelain drop-in | Cross-handle faucet | Chrome | Works well in smaller kitchens |
| Stainless apron-front | High-arc faucet | Brushed nickel | Easier to coordinate with appliances |
| Copper farmhouse sink | Simple gooseneck | Oil-rubbed bronze | Develops a changing patina |
| Colored enamel sink | Straight lever faucet | Matching or chrome | Use gentle cleaners |
| Small ceramic bar sink | Wall-mount faucet | Brass or black | Useful for a pantry or island |
13. Cover One Wall in Beadboard or Wood Paneling
Beadboard gives a kitchen a cottage or early farmhouse feel. Use it as a backsplash, on the side of an island, or across one dining wall. Painted white beadboard feels bright and coastal. Soft green, cream, or pale blue creates a more traditional mood.
Choose moisture-resistant material behind a sink and seal the seams carefully. Keep the grooves easy to clean. You can also use narrow vertical paneling for a less decorative, more updated version.
Do not cover every wall unless the room is large and well lit. One focused area usually makes a stronger statement. In a modern kitchen, panel the island only for a subtle vintage reference. In a coastal or cottage kitchen, full-height beadboard can feel cheerful and relaxed. With the wall texture established, add wall art that feels personal rather than mass-produced.
14. Hang Food Signs, Botanical Prints, or Framed Recipes
Wall art can make a vintage kitchen feel like part of the home instead of a showroom. Try botanical prints, old-style food labels, framed recipe cards, fruit illustrations, or simple typography. Choose art that connects to cooking, gardening, or family memories.
Frame delicate paper behind glass, especially near the stove or sink. Hang a small gallery above a breakfast nook, or place one large print between cabinets. Keep at least a few inches of space from heat sources. If you use several frames, repeat one color such as black, walnut, or brass.
A modern home can use one antique-looking print as a focal point. A traditional kitchen can handle a fuller collection. In a farmhouse space, handwritten recipes and produce illustrations fit naturally. The next idea adds color and life without needing another renovation.
15. Grow Herbs in Enamel Pots or Terracotta Planters
Fresh herbs make a vintage kitchen look active and useful. Place basil, thyme, rosemary, mint, or parsley near a sunny window. Use enamel pots, old crockery, terracotta containers, or a narrow wooden plant stand to support the look.
Make sure each container has drainage, then place a saucer underneath to protect the sill or counter. Mint grows quickly and is best kept in its own pot. Rotate plants every few days so they grow evenly toward the light. If the kitchen is dark, use a small grow light with a warm-toned bulb.
Keep plants away from hot burners and strong drafts. In a modern kitchen, one herb pot adds a natural break from hard surfaces. In a cottage kitchen, a full windowsill garden feels right at home. Once greenery is in place, a mirror can help reflect light and make the room feel larger.
Herb Container Guide
| Herb | Light Need | Watering Pattern | Good Container | Kitchen Benefit |
|---|---|---|---|---|
| Basil | 6 to 8 hours of bright light | Keep soil lightly moist | Enamel or ceramic pot | Fresh leaves for salads and pasta |
| Thyme | Bright light | Let top soil dry slightly | Terracotta pot | Compact and drought tolerant |
| Rosemary | Bright light | Water after soil dries | Deep clay pot | Fragrant and long lasting |
| Mint | Bright to moderate light | Keep evenly moist | Separate glazed pot | Fast growing and refreshing |
| Parsley | 4 to 6 hours of light | Water when surface dries | Window box | Useful in many recipes |
| Chives | Bright light | Moderate, regular watering | Small ceramic pot | Mild onion flavor |
16. Create a Small Breakfast Nook
A breakfast nook gives a vintage kitchen a cozy place to pause. Use a round pedestal table, a painted bench, spindle-back chairs, or a built-in corner seat. Round tables are especially useful in small rooms because they improve movement around tight corners.
Choose wipeable upholstery or removable seat cushions. A bench can provide hidden storage for linens, serving pieces, or small appliances. Add a pendant above the table and one piece of artwork nearby to make the nook feel complete.
Keep the table size suited to the space. A 36-inch round table usually works well for two to four people, but always protect walking paths. In a modern apartment, pair a vintage table with simple chairs. In a farmhouse home, use a painted table and mixed seating. The final design idea focuses on the small objects that make the room feel truly collected.
17. Mix Antique Finds With New Functional Pieces
A vintage kitchen does not need to be filled with fragile antiques. Mix old and new. Place a modern coffee maker beside an old bread box. Pair new pans with a secondhand stool. Use reproduction canisters if original ones are hard to clean or unsafe for food.
Look for sturdy pieces at flea markets, estate sales, salvage shops, and local resale stores. Check for rust, cracks, loose handles, and strong odors. Wash anything that touches food with a safe cleaner, and avoid using chipped ceramics for serving.
Limit your display to items with a job or a clear visual purpose. This keeps the room from becoming cluttered. In a modern home, two or three antique accents can create contrast. In a maximalist or cottage kitchen, you can layer more pieces while keeping a repeated color scheme. Now bring the whole room together with a simple styling plan.
18. Build a Balanced Vintage Kitchen Vignette
A vignette is a small arrangement that gives the kitchen a finished feeling. Try a wooden tray with a ceramic pitcher, a folded towel, a small plant, and one cookbook. You might also style a counter corner with a lamp, a framed recipe, and a bowl of fruit.
Use different heights and textures. Place the tallest item at the back, then layer shorter objects in front. Leave empty counter space around the arrangement so it does not look crowded. Keep the vignette away from food prep zones and hot surfaces.
This final layer works with nearly every home style. A modern room benefits from a sparse arrangement. A traditional room can use more pattern and patina. A coastal kitchen might feature pale pottery, driftwood tones, and blue glass. Step back after styling and remove one item if the area feels busy.
Simple Vintage Styling Budget
| Budget Level | Suggested Purchases | Expected Impact | Smart Priority |
|---|---|---|---|
| Under $50 | Towels, knobs, jars, herbs | Adds color and texture | Start with visible surfaces |
| $50 to $200 | Light fixture, rug, art, shelf | Changes the room’s mood | Choose one focal feature |
| $200 to $800 | Faucet, butcher block, hutch | Adds stronger period character | Confirm measurements first |
| $800 to $2,500 | Tile, sink, appliance upgrade | Creates a lasting design shift | Plan plumbing and installation |
| Above $2,500 | Cabinet painting, flooring, range | Supports a full renovation | Build a detailed project budget |
Tips for Success
- Choose a decade or color family as a loose guide, then mix in modern conveniences.
- Measure appliances, shelves, rugs, and furniture before buying anything.
- Use washable rugs, sealed wood, and durable paint in high-use areas.
- Repeat one finish, such as aged brass or chrome, at least two or three times.
- Leave clear counter space beside the sink and stove for cooking tasks.
- Use vintage pieces for display only when they are clean, stable, and safe.
- Add character slowly so the kitchen feels collected instead of staged.
Common Mistakes and How to Avoid Them
Turning the room into a theme kitchen
Use a few strong vintage details, then balance them with plain cabinets, simple walls, and current appliances.
Choosing style before checking function
Measure doors, drawers, walkways, plumbing, and electrical connections before purchasing fixtures or furniture.
Using too many patterns
Pick one main pattern and one supporting pattern. Keep the rest of the room quieter.
Ignoring lighting needs
Combine general lighting, task lighting, and decorative fixtures so the room works at every hour.
Buying damaged secondhand items without inspection
Check for pests, mold, unstable joints, unsafe wiring, chipped food surfaces, and hard-to-remove odors.
Making every finish look artificially old
Allow some new surfaces to stay clean and simple. Real contrast makes the vintage pieces look more believable.
Similar Variations
- 1950s Retro Kitchen: Uses pastel appliances, chrome trim, diner stools, rounded shapes, and bold checkerboard floors.
- English Cottage Kitchen: Combines painted cabinets, floral fabrics, ceramic dishes, brass hardware, and cozy open shelving.
- Vintage Farmhouse Kitchen: Features apron-front sinks, butcher block, beadboard, sturdy furniture, and practical storage.
- Coastal Vintage Kitchen: Mixes faded blue, white, natural wood, rattan, glass, and light cotton textiles.
- Industrial Vintage Kitchen: Pairs aged metal, exposed shelving, brick, dark wood, and old factory-inspired lighting.
- Mid-Century Vintage Kitchen: Uses walnut, slim hardware, geometric tile, warm colors, and clean furniture profiles.
A successful vintage kitchen is not about copying the past piece by piece. It is about choosing details that feel warm, useful, and personal. Start with paint or hardware, add one memorable feature, and build the room in layers.
The best 18 Vintage Kitchen design feels like your home first and a time capsule second.
Leave a Reply