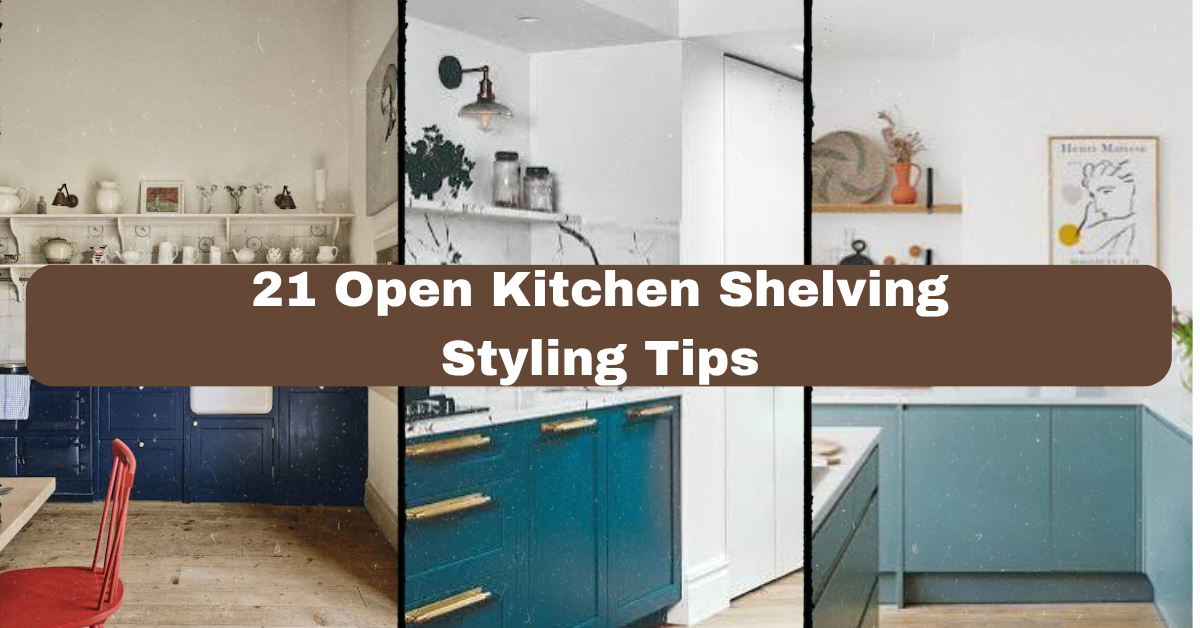
21 Open Kitchen Shelving Styling Tips can help you turn plain wall storage into a useful, polished part of your kitchen. I’ll walk you through practical choices for shelves, dishes, color, lighting, and everyday use.
How do you style open kitchen shelves? Choose sturdy shelves, group useful dishes with a few decorative pieces, repeat two or three colors, leave open space, and place frequently used items within easy reach. Balance beauty with safe, practical storage.
You’ll also learn how to avoid clutter, mix materials, and make open shelving work in modern, farmhouse, coastal, and traditional kitchens.
What Open Kitchen Shelving Adds to a Room
Open shelves make a kitchen feel lighter and more open because they do not create a solid wall of cabinet fronts. They also let you see the items you use every day. That can be helpful, but it means the styling needs a little planning.
I like to think of each shelf as a small display with a job. Plates should be easy to grab. Mugs can add color. Art and plants can bring personality. The trick is to mix practical kitchen storage with just enough decoration.
Before styling, check the wall, shelf depth, weight limit, and distance from the cooktop or sink. Then choose a simple color story. A calm base makes even a small shelf arrangement look intentional.
1. Start With a Simple Color Palette
Choose two main colors and one small accent color for your open shelves. For example, white dishes, warm wood, and small touches of sage green create a relaxed look. Black, cream, and brass feel sharper and more modern.
Start by gathering everything you might use. Remove items that clash with the room or rarely serve a purpose. Then keep the strongest pieces and repeat their colors across each shelf.
A practical tip is to photograph the shelves before you finish. Your phone will show uneven color or crowded spots more clearly than your eyes often do.
This idea works in any home style. Use soft neutrals for Scandinavian rooms, rich tones for traditional kitchens, or bright accents for eclectic spaces. Next, choose a shelf material that supports your palette.
2. Match Shelf Material to the Kitchen’s Fixed Features
Open shelves should relate to something already in the kitchen. Match wood shelves to the floor, island, or cutting boards. Match metal brackets to cabinet pulls, faucets, or light fixtures. This small connection makes the room feel planned.
Wood adds warmth and hides minor dust. Metal shelves create a clean, industrial look. Thick painted shelves blend well with walls and can make a small kitchen feel less busy.
Before buying, measure the wall and check how much weight the brackets can hold. Use studs when possible. For dishes, a shelf around 10 to 12 inches deep is often useful, but always measure your own items first.
Modern kitchens suit slim shelves, while farmhouse rooms look good with chunky wood. In a coastal space, pale oak or painted shelves keep the mood airy. Now let’s make sure the shelves are easy to use.
3. Keep Everyday Dishes on the Lower Shelves
The best open shelving is not only pretty. It saves time. Put plates, bowls, glasses, and everyday mugs on the lower shelves where you can reach them without stretching.
Keep heavier items low. A stack of dinner plates is safer and easier to lift from a shelf near the counter. Place lighter serving pieces and small decorative objects higher up.
Try grouping dishes by use rather than by random color. Put breakfast bowls near mugs, or keep plates beside the area where you serve food. This creates a natural kitchen workflow.
This method fits busy family kitchens, minimalist homes, and even small apartments. In a traditional kitchen, use matching dishes. In a casual cottage kitchen, mix simple ceramic pieces. Next, we’ll create visual balance around those useful items.
4. Vary Heights and Shapes
A shelf filled with objects that are all the same height can look flat. Mix tall pitchers, medium bowls, short jars, and low stacks of plates. Different shapes help your eye move across the display.
Use one tall item as an anchor. A ceramic vase, cutting board, or narrow crock works well. Place shorter objects nearby instead of lining everything up at one level.
A quick tip is to arrange pieces in small groups of three or five. Odd-numbered groupings often feel more relaxed, but do not force the rule if it makes the shelf less useful.
This approach works with modern, vintage, farmhouse, and boho decor. Keep shapes clean for a modern room and use handmade or curved forms in a rustic space. The next step is choosing a useful mix of storage and decoration.
Shelf Styling Size Guide
| Item | Useful shelf position | Suggested quantity | Practical note |
|---|---|---|---|
| Dinner plates | Lower shelf | 6 to 10 | Stack by size and keep weight low |
| Cereal or soup bowls | Lower or middle shelf | 4 to 8 | Nesting shapes save space |
| Mugs | Middle shelf | 4 to 6 | Leave handles visible |
| Pitcher or vase | End of a shelf | 1 | Use as a height anchor |
| Cutting boards | Back of shelf | 2 to 4 | Lean securely and vary sizes |
| Small plant | Middle or upper shelf | 1 to 2 | Choose a low-maintenance variety |
| Art or framed print | Upper shelf | 1 | Keep it away from steam and splashes |
5. Mix Useful Items With Decorative Pieces
Open shelves can become messy if every object is decorative. They can also feel dull if every item is only practical. Aim for a mix.
A useful formula is about two-thirds kitchen items and one-third accents. Add a framed recipe card, small vase, candleholder, or sculptural bowl between stacks of dishes. The accents should support the room, not compete with the kitchen.
I like using decorative pieces that still have a purpose. A large wooden board can serve as art and food prep. A pretty ceramic jar can hold tea bags or wooden spoons.
This idea adapts easily. Use handmade pottery in a rustic kitchen, simple glass in a modern room, or woven baskets in a coastal space. With the mix in place, we can add texture without making the shelves feel crowded.
6. Add Texture With Baskets and Woven Containers
Baskets soften the hard lines of wood, metal, and ceramic. They also hide small items that do not look attractive in open storage. Use one or two baskets for napkins, tea towels, snack packets, or extra utensils.
Choose baskets that fit the shelf without pressing against the wall or edge. Natural seagrass brings a coastal feeling. Dark wire baskets suit industrial kitchens. Small fabric bins can work in a family-friendly space.
Do not fill every shelf with baskets. Their texture is strongest when balanced with smooth dishes and clear space.
A simple tip is to measure the basket opening before shopping. Make sure your hand can reach inside comfortably. Baskets work in farmhouse, boho, coastal, and modern kitchens when their color stays controlled. Next, let’s use books in a practical way.
7. Stack Cookbooks as Low Display Risers
Cookbooks add color, personality, and height. Stack two or three books horizontally under a bowl, small plant, or serving piece. The stack becomes a display riser while keeping the books available.
Choose books with covers that match your palette. If the colors are too strong, turn them so the pages face outward, or use only one colorful book as an accent.
Avoid tall stacks that become unstable. Keep heavy books on lower shelves, and never place them near water or direct heat. You can also use a cookbook stand on a counter below the shelves.
This works in traditional, cottage, modern, and eclectic kitchens. Use vintage cookbooks for charm or clean-lined books for a contemporary look. Now we can bring in greenery for a fresher shelf arrangement.
8. Use Small Plants for a Fresh Accent
A small plant can make open kitchen shelving feel alive. Herbs, pothos, spider plants, and small succulents are common choices, but the best plant depends on your light and watering habits.
Place plants where they will not drip onto dishes or sit too close to the stove. Use a saucer under every pot. If the shelf gets little natural light, choose a low-light plant or use a realistic faux option.
Repeat the planter color with another kitchen detail, such as a black faucet or terracotta bowl. One or two plants are usually enough. Too many can make the shelf look like a greenhouse.
Plants fit almost every style. Terracotta works in rustic rooms, white pots suit modern spaces, and woven planters support coastal or boho decor. Before adding more objects, check the balance with a quick shelf audit.
Styling Budget Tiers
| Budget | Suggested materials | Best purchases | Expected result |
|---|---|---|---|
| Under $50 | Existing dishes, thrifted jars, paper prints | Small accents and storage jars | Fresh styling without new shelving |
| $50 to $150 | Pine shelves, basic brackets, baskets | One shelf update and texture pieces | Noticeable change with modest cost |
| $150 to $350 | Hardwood or painted shelves, ceramic pieces | Better materials and coordinated decor | More polished, lasting display |
| $350 and above | Custom shelves, lighting, quality hardware | Built-in look and durable accessories | Full feature-wall transformation |
9. Leave Deliberate Empty Space
Empty space is not wasted space. It gives the eye a place to rest and helps useful items stand out. A packed shelf makes every object look less important.
Try leaving a few inches between groups. You can also leave one section of a shelf mostly open. This is especially helpful in small kitchens, where too many visible items can make the room feel tight.
A practical method is to remove one item from each crowded group. Then step back and look from the doorway. If the arrangement still feels full, remove another small piece.
This works particularly well in minimalist and modern kitchens, but it also helps traditional and farmhouse displays look calmer. Once the shelves can breathe, use grouping to make them easier to read.
10. Group Items by Function
Create clear zones instead of scattering similar objects across the wall. Keep coffee mugs near coffee supplies, baking bowls near measuring tools, and serving dishes near the dining area.
Functional groups make the kitchen faster to use. They also make the styling look more natural because each group has a reason to exist.
Place the most-used items at shoulder or chest level. Reserve high shelves for pieces used once in a while. If children use the kitchen, keep safe cups and bowls at an easy height.
This approach suits apartment kitchens, family homes, and open-plan spaces. In a sleek kitchen, use matching groups. In a cottage kitchen, let each group have a little variety. Next, we’ll build depth with layered pieces.
11. Layer Cutting Boards Behind Dishes
Cutting boards are some of the easiest kitchen items to display. Lean two or three boards against the back wall, then place a bowl, jar, or small utensil crock in front.
Use different sizes, but keep the colors related. A large walnut board beside a pale oak board adds contrast without looking random. Avoid leaning boards where they can slide forward.
Place a small rubber grip or clear shelf liner under the boards if the surface is slick. Keep wood away from standing water and wipe it regularly.
Layered boards suit farmhouse, rustic, Mediterranean, and modern kitchens. Choose smooth, simple boards for a contemporary room and worn wood for a country look. With the back layer set, we can add a little art.
12. Include Small Art or Framed Recipes
A small piece of art can make shelves feel personal. Try a botanical print, vintage food label, handwritten recipe, or simple line drawing. Lean it against the wall instead of hanging it if you want an easy arrangement to change.
Keep frames narrow and lightweight. Avoid placing paper art beside the stove, sink, or any area exposed to grease and steam. Glass frames are easy to wipe, but acrylic may be safer on lower shelves.
Use artwork to repeat a color already found in the room. A green print can connect to plants, while a warm red print can echo a kettle or dish towel.
This idea works in traditional, eclectic, cottage, and modern kitchens. Keep the art quiet in a minimalist space and more playful in a colorful kitchen. Now let’s compare materials before adding more accessories.
Open Shelf Material Comparison
| Material | Main strength | Care needs | Style match | Best use |
|---|---|---|---|---|
| Solid wood | Warm, durable appearance | Seal and wipe spills quickly | Farmhouse, rustic, traditional | Dish storage and display |
| Bamboo | Light and renewable-looking | Keep dry and avoid harsh cleaners | Scandinavian, coastal | Small shelves and light items |
| Painted MDF | Smooth, affordable finish | Protect from chips and water | Modern, cottage | Decorative storage |
| Stainless steel | Heat and moisture resistance | Shows fingerprints | Industrial, modern | Near sinks or work zones |
| Tempered glass | Visually light and easy to clean | Check weight limits | Contemporary | Displaying small dishes |
| Iron or steel | Strong, graphic look | Watch for rust if finish chips | Industrial, eclectic | Brackets and open frames |
13. Repeat One Metal Finish
A repeated metal finish ties the shelf display to the rest of the kitchen. If the faucet is brushed brass, use brass brackets or a small brass container. If the room uses matte black hardware, repeat black in a frame or tray.
You do not need every metal to match perfectly. The goal is connection, not strict uniformity. Still, too many finishes can make a small kitchen look scattered.
Pick one main metal and one optional supporting finish. Keep the supporting finish limited to a small object, such as a candleholder or picture frame.
This works in industrial, modern, traditional, and transitional spaces. Warm brass suits classic rooms, while black steel feels crisp and casual. Next, we’ll soften the display with textiles.
14. Add Folded Towels for Color and Function
A folded kitchen towel brings softness to a shelf full of hard surfaces. Choose cotton or linen towels in a color already used in the room. Fold them neatly and place them in a basket or stack them beside a cutting board.
Keep towels away from the cooktop and avoid placing damp fabric directly on wood. Rotate them often so the display stays clean and useful.
Stripes, checks, and simple botanical patterns work well because they add interest without taking over. Solid towels are better if the shelves already contain patterned dishes.
This tip fits farmhouse, coastal, Scandinavian, and traditional kitchens. Use linen for a relaxed look or crisp cotton for a cleaner style. With textiles added, let’s make the display feel more collected.
15. Mix New Pieces With Vintage Finds
A few vintage items can give open shelving character. Look for old crocks, small pitchers, enamel cups, wooden utensils, or glass jars. You do not need a full antique collection. One or two pieces can be enough.
Check vintage items for cracks, rough edges, lead-based finishes, or signs of mold before using them for food storage. Decorative use is often safer for questionable pieces.
Balance an aged object with something simple and new. For example, place a vintage pitcher beside plain white bowls. The contrast keeps the arrangement from looking like a themed display.
This idea suits cottage, farmhouse, traditional, and eclectic kitchens. In a modern home, use one vintage item as a strong focal point. Next, we’ll make the shelves feel wider and more organized.
16. Use Trays to Contain Small Items
A tray gives small objects a visual home. Place oils, salt, pepper, and spices on a narrow tray near the cooking area. Use another tray for coffee mugs or tea supplies.
Choose a tray that leaves room to lift it easily. Wood warms a plain shelf, while metal or acrylic creates a cleaner look. Do not use a tray as an excuse to keep items you never use.
Keep the tray close to the task it supports. A coffee tray belongs near the kettle, not across the kitchen. Wipe spills quickly, especially on unfinished wood.
Trays work in every style when their shape and finish fit the room. A round woven tray feels coastal, while a rectangular black tray feels modern. Now we’ll consider lighting, which can change the whole display.
Shelf Spacing and Placement Guide
| Shelf location | Recommended clearance | Items to store | Items to avoid |
|---|---|---|---|
| Above a counter | 16 to 20 inches above work surface | Plates, mugs, jars | Very tall decor |
| Above a sink | 18 to 24 inches above sink area | Glasses, small plants | Paper art without protection |
| Near a cooktop | Follow appliance instructions | Heat-safe dishes | Flammable textiles and plants |
| Between upper cabinets | Match cabinet width | Coordinated dish groups | Oversized objects |
| High display shelf | At least comfortable viewing height | Rarely used serving pieces | Heavy stacks |
| Lower open shelf | Keep clear of splash zones | Heavy cookware, baskets | Breakable items in busy paths |
17. Add Under-Shelf Lighting
Under-shelf lighting helps you see dishes and creates a softer kitchen mood at night. Slim LED strip lights or puck lights are common options. Choose warm white light, usually around 2700K to 3000K, for a comfortable home feeling.
Hide cords along the back edge or use rechargeable lights when wiring is difficult. Test the light before permanently attaching it. You want even illumination, not bright spots shining into your eyes.
Keep lights away from water unless they are rated for damp areas. Follow the product instructions and ask an electrician for hardwired work.
This suits modern, transitional, industrial, and traditional kitchens. Concealed strips look sleek, while small visible fixtures can support a vintage style. With lighting handled, let’s make the shelf display easier to maintain.
18. Choose Easy-Care Decorative Items
Open shelves collect dust, so choose items you can wipe or wash. Glazed ceramics, glass jars, metal trays, and washable baskets are usually easier to care for than delicate fabric or highly textured decor.
Keep rarely used decorative pieces on upper shelves. Store food-contact items in a way that protects them from dust. If you dislike frequent cleaning, use fewer objects and larger pieces.
Set a regular five-minute shelf reset. Wipe one section, return items to their groups, and remove anything that no longer belongs. Small habits prevent a large cleaning job.
This works for busy family kitchens and low-maintenance modern homes alike. Traditional spaces can still feel detailed without using fragile accessories. Next, we’ll create a focal point.
19. Give Each Shelf One Visual Anchor
A visual anchor is the item your eye notices first. It might be a large pitcher, a colorful serving bowl, a framed print, or a stack of bold plates.
Place the anchor slightly off center. Then balance it with smaller pieces on the opposite side. Centering every large object can make the shelves feel stiff.
Choose only one main anchor per shelf section. Several large focal points compete and make the display confusing. If the shelves are long, divide them into two or three small zones.
This idea works in all styles. Use a sculptural vase in a modern kitchen, a crock in a farmhouse room, or a bright ceramic bowl in a Mediterranean space. Once the focal point is set, we can refine the overall rhythm.
20. Repeat Shapes Across the Shelves
Repeating a shape creates unity. Round bowls can echo a round tray. Rectangular frames can relate to stacked plates or straight shelf edges. Curved pitchers can soften a display filled with square containers.
Look for shapes you already own before shopping. Move similar forms into different shelf groups so they are not all crowded in one spot.
Keep the repetition subtle. You want the room to feel connected, not overly matched. One repeated shape and one repeated color are often enough.
This works in minimalist, traditional, coastal, and eclectic kitchens. Clean circles and rectangles suit modern rooms, while irregular handmade shapes feel natural in rustic spaces. Our final idea focuses on changing the shelves with the seasons.
Style Formula by Kitchen Type
| Kitchen style | Shelf material | Color direction | Decorative accents | Best overall mood |
|---|---|---|---|---|
| Modern | Black metal, glass, pale wood | White, charcoal, one accent | Sculptural vase, simple art | Clean and edited |
| Farmhouse | Reclaimed or stained wood | Cream, green, warm brown | Crocks, baskets, enamelware | Relaxed and useful |
| Coastal | Light wood, white-painted shelves | White, blue, sand | Woven trays, glass, shells used lightly | Bright and breezy |
| Traditional | Finished wood, brass brackets | Cream, navy, muted green | China, framed art, brass pieces | Polished and classic |
| Scandinavian | Pale wood, slim brackets | White, gray, soft tan | Simple ceramics, plants | Calm and functional |
| Boho | Wood, iron, woven materials | Terracotta, cream, olive | Textiles, pottery, plants | Layered and personal |
21. Refresh Small Details by Season
You do not need to redesign the whole kitchen four times a year. Change a few small items instead. Try yellow flowers in spring, blue glass in summer, warm wood in fall, and evergreen touches in winter.
Keep the everyday dishes in place. Swap only towels, plants, art, or one decorative bowl. This saves money and prevents the shelves from becoming overfilled.
Store seasonal pieces together in a labeled box. Before adding anything, remove one item that no longer fits the current display. That one-in, one-out rule keeps the shelves under control.
Seasonal touches work with every style. Keep them subtle in a modern kitchen or more layered in a farmhouse and boho room. Now let’s review the habits that make the whole arrangement work.
Tips for Success
- Measure shelf depth before buying dishes, baskets, or decor.
- Use wall studs or proper anchors for heavy open shelves.
- Keep heavy stacks low and breakable pieces away from busy edges.
- Repeat colors, materials, or shapes to connect separate shelf sections.
- Leave open space so the display can breathe.
- Keep items you use every day at a comfortable height.
- Wipe shelves and decorative pieces regularly, especially near the stove.
- Use shelf liner or small grips under objects that slide easily.
- Test lighting at night before choosing its final position.
- Remove items that look nice but make the kitchen harder to use.
Common Mistakes and How to Avoid Them
Overloading every shelf
Remove a few pieces and create clear gaps between groups. Open space makes the items you keep look more intentional.
Storing heavy dishes too high
Move plates, cast iron, and large bowls to lower shelves. High shelves are better for light decor and rarely used serving pieces.
Ignoring the cooking zone
Keep paper, fabric, plants, and delicate finishes away from heat, grease, and splashing water. Use heat-safe materials near the range.
Using too many colors
Choose two main colors and one accent. Repeat them across the shelves instead of adding a new color with every object.
Buying shelves before checking wall support
Find studs or use anchors rated for the shelf and its contents. A beautiful shelf is not useful if it cannot safely hold your dishes.
Making the display too precious
Include items you really use. A kitchen should feel comfortable, not like a store window that no one can touch.
Similar Variations
- Modern Open Shelving: Slim shelves, simple dishes, black or brass accents, and very little visual clutter.
- Farmhouse Open Shelving: Warm wood, white ceramics, woven baskets, crocks, and useful vintage pieces.
- Coastal Open Shelving: Pale wood, white dishes, blue accents, glass, and light woven textures.
- Scandinavian Open Shelving: Pale finishes, neutral colors, simple shapes, and practical storage.
- Boho Open Shelving: Handmade pottery, plants, natural baskets, layered textiles, and warm earthy colors.
- Traditional Open Shelving: Finished wood, classic dishware, framed art, brass details, and balanced arrangements.
Open kitchen shelves look best when they support real life. Start with useful dishes, add a clear color plan, then layer in texture, art, plants, and a few personal pieces. The strongest display is edited, safe, and easy to maintain.
You do not need expensive decor or a perfect collection. A few thoughtful changes can make the wall feel warmer and the kitchen easier to use. Keep these 21 Open Kitchen Shelving Styling Tips nearby as you style, edit, and enjoy your shelves.
Leave a Reply