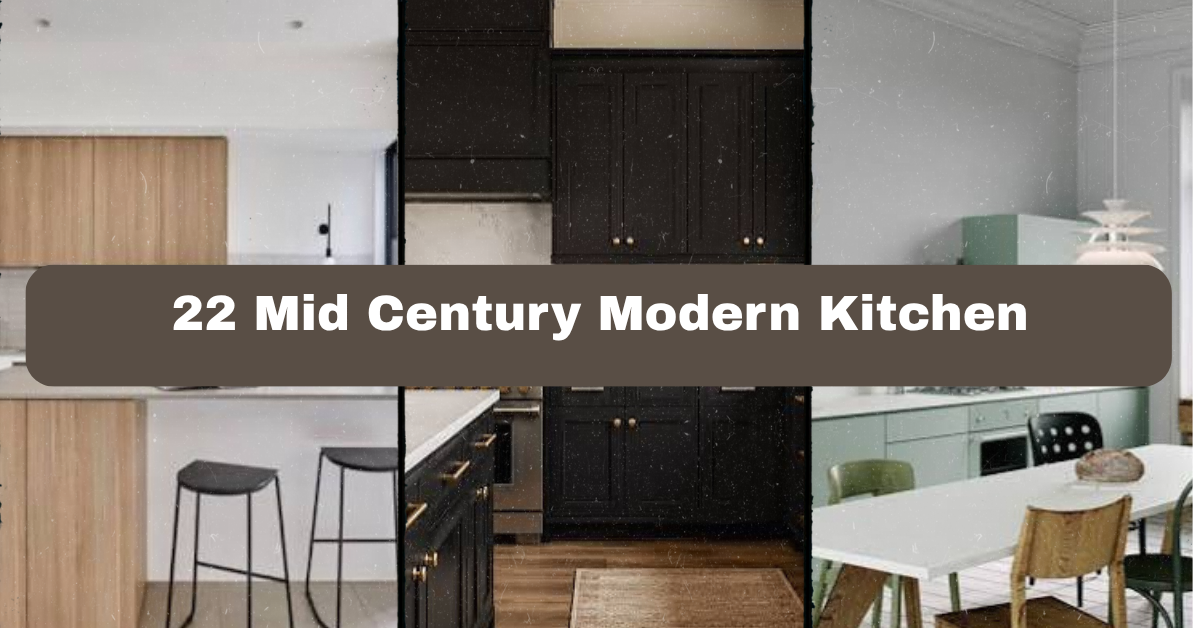
22 Mid Century Modern Kitchen ideas can help you create a space with clean lines, warm wood, bold color, and practical storage. I’ll walk you through the best layouts, materials, lighting choices, and finishing details so your kitchen feels stylish without looking stuck in the past.
What defines a mid century modern kitchen, and how can it be designed today? It uses simple geometric forms, natural wood, flat or slab cabinetry, tapered furniture legs, practical layouts, and select colors such as olive, mustard, teak, walnut, white, and charcoal.
Keep reading for 22 approachable ideas that work in large kitchens, small apartments, open floor plans, and older homes. I’ll also share ways to avoid a space that feels too plain or overly themed.
What Makes a Mid Century Modern Kitchen?
When I picture a mid century modern kitchen, I see a room that feels bright, useful, and relaxed. It is not fussy. It does not need lots of decoration to make an impression.
The style became popular from the 1940s through the 1960s. It favors clean cabinet fronts, natural materials, simple furniture, and clever use of space. Common details include walnut or teak wood, colorful laminate, globe lights, open shelving, and vintage-inspired appliances.
The trick is balance. Too much wood can make the room feel dark. Too many retro colors can make it look like a costume set. I like to combine one strong period detail with modern conveniences, such as a quartz countertop, quiet dishwasher, or hidden trash pullout.
These ideas will help you build that balance one choice at a time.
1. Choose Flat-Panel Wood Cabinets
Flat-panel cabinets are one of the clearest ways to bring mid century style into a kitchen. Their smooth doors have no raised trim, deep molding, or decorative carving. This keeps the room looking clean and calm.
Walnut, teak, oak, and warm-toned birch all work well. If real wood is outside your budget, try a high-quality wood veneer. Pair it with a simple white, cream, or pale gray wall color so the grain stays visible without making the room feel heavy.
For a practical update, use slab doors on the lower cabinets and lighter painted cabinets above. Add small pulls in brass, bronze, or black rather than ornate handles.
This idea also fits Scandinavian, contemporary, and transitional homes because the cabinet shape is simple and flexible. Next, use the hardware to add a little personality.
2. Add Slim Brass or Black Cabinet Hardware
Hardware may be small, but it changes the whole mood of a kitchen. Long, slim pulls create a clean mid century look, while round knobs bring a softer vintage touch.
I like brushed brass with walnut cabinets because the pairing feels warm and polished. Matte black works better when you want stronger contrast. For a lighter kitchen, try satin nickel or aged pewter.
Measure your existing holes before buying replacement hardware. If the new pulls do not match, you may need to fill and repaint the cabinet doors. On new cabinets, choose pulls that are easy to grip, especially on wide drawers.
Keep the shapes simple. Avoid oversized decorative pieces that compete with the cabinet grain. The same hardware works in modern farmhouse, minimalist, and industrial kitchens when the finish is adjusted. From here, the countertop becomes the next major design decision.
3. Use a White or Speckled Countertop
A light countertop can keep a wood-heavy kitchen from feeling too dark. White quartz, creamy solid surface, pale terrazzo, and speckled laminate all fit the era-inspired look.
For a more authentic feel, choose a surface with small flecks rather than dramatic marble veins. Mid century kitchens often used practical materials with simple patterns. A countertop with tiny gray, tan, or brown chips can add interest while staying quiet.
Think about maintenance, too. Quartz is low maintenance, while natural stone may need sealing. Laminate can be budget-friendly and comes in many retro colors.
Before ordering, bring a cabinet sample home and view it in morning and evening light. This quick step can prevent a costly color mistake. A light countertop sets the stage for a stronger backsplash choice.
4. Install a Small-Scale Geometric Backsplash
A geometric backsplash adds visual energy without covering the entire room in pattern. Consider square tiles, stacked rectangles, hexagons, diamonds, or small mosaic shapes.
For a calm look, use cream tile with tan grout. For more character, try mustard, olive, rust, teal, or muted orange. Keep the pattern smaller if your kitchen is compact. Large, busy shapes can make a small wall feel crowded.
I recommend sampling grout colors before installation. White grout looks fresh but shows stains more quickly. A warm gray or beige grout is easier to live with and suits natural wood.
This approach can also support coastal, eclectic, or vintage kitchen styles by changing the tile color and layout. Once the backsplash has shape, the floor can add another layer of period character.
Color and Material Pairings for a Mid Century Kitchen
| Cabinet finish | Countertop | Backsplash | Best accent colors |
|---|---|---|---|
| Walnut | Warm white quartz | Cream square tile | Mustard, olive, rust |
| Natural oak | Speckled laminate | Pale gray mosaic | Teal, black, white |
| White slab doors | Terrazzo | Green subway tile | Walnut, brass, orange |
| Teak veneer | Beige solid surface | Terracotta tile | Cream, charcoal, avocado |
| Charcoal cabinets | White quartz | White geometric tile | Wood, brass, burnt orange |
5. Lay Down Warm Wood or Patterned Flooring
Flooring should support the kitchen instead of fighting with it. Warm oak, walnut-toned laminate, cork, and wood-look porcelain are strong choices for a mid century modern space.
Cork is especially useful if you want a soft surface underfoot. It has natural texture and a warm color that works with vintage furniture. Wood-look porcelain is a practical choice for busy homes because it handles spills and moisture well.
If you already have hardwood floors, refinish them rather than replacing them. A medium honey finish often feels more period-appropriate than a very dark espresso stain or a pale gray wash.
Use a runner in front of the sink for comfort and color. This idea also adapts to traditional, rustic, and Scandinavian homes with only a change in floor tone. Next, let the dining area connect naturally to the kitchen.
6. Bring in a Tapered-Leg Dining Set
Tapered legs are a small detail with a big effect. Choose a dining table, counter stool, or breakfast chair with legs that narrow toward the floor. This shape gives furniture a light, lifted appearance.
A round or oval table can soften a kitchen filled with straight cabinet lines. Walnut, teak, and medium oak are classic choices. For seating, try molded plastic chairs, upholstered seats, or simple wooden chairs with curved backs.
Leave enough room for movement. A dining table should not block cabinet doors or appliance paths. In a tight breakfast nook, a wall bench can save space while still feeling authentic.
This furniture style works in modern, boho, coastal, and traditional rooms because tapered legs are visually simple. With the seating chosen, you can now make the lighting feel more distinctive.
7. Hang a Globe Pendant Over the Island
A globe pendant adds instant mid century character. Look for opal glass, frosted glass, aged brass, brushed nickel, or black metal. One large globe can work over a small island, while two or three smaller pendants suit a longer counter.
Hang the bottom of the fixture about 30 to 36 inches above the countertop. This range usually provides light without blocking conversation or sight lines. Always confirm the measurement with your electrician and the height of the people using the kitchen.
Choose warm white bulbs around 2700K to keep wood tones inviting. Dimmable bulbs make the room easier to use during cooking, meals, and evening gatherings.
Globe lighting can also suit art deco, minimalist, and contemporary kitchens. For a more layered plan, combine the pendant with focused task lighting.
8. Layer in Under-Cabinet Task Lighting
A beautiful kitchen still needs useful light. Under-cabinet lighting brightens the work surface and makes chopping, reading recipes, and cleaning easier.
LED strip lights are a clean choice because they hide beneath the cabinet edge. Select a warm white tone that works with your pendant fixtures. If you use puck lights, space them evenly so you do not create bright circles and dark gaps.
Install the switch in an easy-to-reach spot. Dimming is helpful when you want a softer glow at night. If you are remodeling, have the wiring placed before the backsplash goes in. For a quick update, plug-in strips can work without opening the wall.
This lighting plan fits nearly every home style because it focuses on function. Once the practical lighting is handled, decorative art can bring the personality.
Lighting Guide for Common Kitchen Areas
| Area | Recommended fixture | Suggested brightness | Useful placement |
|---|---|---|---|
| Island | Globe pendant or linear fixture | 800 to 1,600 total lumens | 30 to 36 inches above counter |
| Sink | Small pendant or recessed light | 500 to 800 lumens | Centered over sink |
| Cabinet worktop | LED strip | 300 to 600 lumens per meter | Near front cabinet edge |
| Dining nook | Pendant or sconce | 600 to 1,000 lumens | Centered over table |
| Pantry or tall cabinet | Motion-sensor LED | 200 to 500 lumens | Inside or above shelves |
9. Display One Large Retro-Inspired Print
Wall art helps the kitchen feel collected rather than purely functional. A single large print often works better than many tiny pieces.
Look for abstract shapes, botanical drawings, vintage food advertisements, simple line art, or color blocks in mustard, rust, olive, cream, and teal. A walnut, black, or thin brass frame can connect the art to the rest of the room.
Keep artwork away from direct heat and heavy cooking splatter. A dining wall, breakfast nook, or open area beside the cabinets is safer than the space directly behind the range.
Use the print to repeat a color already found in the backsplash, rug, or chairs. This makes the room feel planned without matching every item. The same display idea works in eclectic, retro, and contemporary homes. Next, consider open shelving with restraint.
10. Install One or Two Open Wood Shelves
Open shelving can show off pottery, glassware, cookbooks, and small plants. In a mid century kitchen, wood shelves add warmth and echo the cabinet finish.
Do not cover every wall with shelves. One short run is often enough. Place everyday items within easy reach, and avoid stacking too many colors together. A simple mix of cream ceramics, clear glass, and one accent color looks more intentional.
Use strong brackets or concealed supports, and check the wall before drilling. Shelves near a range may collect grease, so a wall beside the cooking area is often easier to maintain.
This feature also works in farmhouse, industrial, and coastal kitchens when you change the shelf material and displayed objects. Open storage looks good, but closed storage keeps the overall room calmer.
11. Add a Tall Pantry Cabinet for Clean Storage
A tall pantry cabinet can hide the clutter that weakens a mid century design. Use it for dry food, small appliances, paper goods, and serving pieces.
A full-height slab door keeps the outside simple. Inside, adjustable shelves and pullout baskets make deep storage easier to use. If you have room, add a narrow vertical section for baking sheets, cutting boards, and trays.
Match the pantry finish to the lower cabinets, or paint it a contrasting olive, cream, or charcoal. A contrasting cabinet can act like a furniture piece and give the kitchen more visual structure.
This storage idea adapts well to modern, traditional, and small-space kitchens. After hiding the clutter, you can choose one appliance finish that supports the entire color plan.
12. Mix Vintage Color With Stainless Steel
You do not need a full set of retro appliances to create a period-inspired kitchen. A colorful range, refrigerator, or small appliance can provide a focal point, while stainless steel keeps the room practical and current.
Try olive green, pale blue, cream, orange, or mustard on one appliance. Keep the other large appliances quiet so the color feels deliberate. If you prefer stainless steel, use colored accessories, a painted island, or a bright backsplash instead.
Before choosing a finish, check the appliance dimensions and ventilation needs. A pretty range is not useful if it does not fit the opening or meet local requirements.
This combination works in industrial, modern farmhouse, and eclectic interiors. The next step is adding a counter stool that makes the island feel more like furniture.
Appliance and Accent Finish Planning
| Main appliance finish | Cabinet color | Hardware | Helpful accent |
|---|---|---|---|
| Stainless steel | Walnut | Brushed brass | Olive range hood |
| Cream enamel | Natural oak | Black | Teal tile |
| Matte black | White | Brass | Rust pendant |
| Pale blue | Warm white | Nickel | Walnut shelves |
| Olive green | Cream or oak | Aged brass | Terracotta accessories |
13. Select Molded or Upholstered Counter Stools
Counter stools should be comfortable, sturdy, and visually light. Molded plastic seats, curved plywood, woven backs, and simple upholstered cushions all fit a mid century kitchen.
Choose a seat height based on your counter. Most kitchen counters need counter-height stools, while taller bar surfaces need bar-height stools. Leave enough space between stools so people can sit without bumping elbows.
A colored seat can repeat the backsplash or artwork. For a calmer room, use cream, tan, walnut, or black. Upholstery adds comfort, but performance fabric is easier to clean around food and drinks.
This seating choice works with Scandinavian, coastal, modern, and vintage homes. Once the stools are selected, a small plant can soften the harder surfaces nearby.
14. Use Plants to Soften Straight Lines
Plants bring life into a kitchen filled with tile, metal, glass, and cabinetry. Choose varieties that handle your light level and do not spread into walkways.
A small herb pot near a bright window is both decorative and useful. Snake plants, pothos, and rubber plants can work in other areas, though you should check care needs before buying. Place them in ceramic, woven, or simple colored planters.
Avoid putting large plants beside the stove, where heat and grease can cause problems. Use a saucer under every pot to protect shelves and counters from water.
Plants fit mid century, boho, coastal, and farmhouse kitchens with ease. After adding natural greenery, a patterned textile can bring another soft layer into the room.
15. Place a Low-Pile Runner Near the Sink
A runner adds comfort, color, and movement to a kitchen. Choose a low-pile washable rug so crumbs and spills are easier to manage.
Geometric patterns, faded diamonds, stripes, and abstract shapes all support a mid century look. Pick colors that repeat the room’s main palette, such as rust with cream, olive with tan, or teal with walnut.
Measure the walkway first. The rug should not interfere with appliance doors or create a trip hazard. A non-slip pad helps keep it steady, especially on smooth flooring.
This idea also suits bohemian, traditional, and coastal rooms when you change the pattern. With the floor softened, you can use the walls for practical display and storage.
16. Add a Slim Rail for Everyday Utensils
A wall rail gives frequently used tools a proper home. Choose a simple black, brass, or stainless steel rail with matching hooks. Hang wooden spoons, a small whisk, a towel, or a pair of measuring cups.
Keep the display edited. Five or six useful items usually look better than a crowded collection. Place the rail away from the stove if splatter is a concern, and make sure it is mounted into a stud or with proper wall anchors.
This practical feature suits industrial, contemporary, Scandinavian, and retro kitchens. It is especially helpful when drawer space is limited. Now, one final material detail can make the kitchen feel warmer and more finished.
Kitchen Rug Size Guide
| Kitchen layout | Useful rug size | Placement advice |
|---|---|---|
| Single-wall kitchen | 2.5 by 7 feet | Center along the cabinet run |
| Galley kitchen | 2.5 by 6 to 8 feet | Leave clear space at both ends |
| Small L-shaped kitchen | 3 by 5 feet | Place at the sink or corner |
| Island kitchen | 3 by 5 feet | Use beside the sink, not under doors |
| Large open kitchen | 4 by 6 or 5 by 7 feet | Define the dining or prep zone |
17. Choose Cork, Wood, or Leather Accessories
Small natural accessories keep the kitchen from feeling cold. Cork trivets, wooden cutting boards, leather drawer pulls, and woven baskets all add texture without visual noise.
Use a large wooden board as a leaning display against the backsplash. Keep it away from standing water and heat. A leather handle on a pantry door can look great, but select thick, sealed leather that can handle regular use.
Cork is useful for coasters and hot pads because it is lightweight and warm in color. Woven baskets can hold napkins, produce, or extra towels.
These materials work in rustic, modern, coastal, and Scandinavian kitchens. The key is to repeat the texture two or three times instead of scattering it everywhere. That same rule applies to metal finishes.
18. Limit the Room to Two Metal Finishes
A controlled metal palette makes the kitchen look more thoughtful. Choose one main finish for hardware and one supporting finish for lighting or plumbing.
For example, use brushed brass cabinet pulls with black pendants. Or pair matte black hardware with stainless appliances and nickel faucets. You do not need every piece to match exactly, but the finishes should look related.
Avoid adding brass, copper, chrome, black, bronze, and nickel all at once. That mix can feel accidental. Before buying, make a simple list of each metal already in the kitchen.
This strategy works across modern, traditional, industrial, and transitional homes. After the finishes are controlled, a colorful island can become the room’s main feature.
19. Paint the Island in Olive, Mustard, or Teal
A colored island brings energy to an otherwise quiet kitchen. Olive green feels earthy, mustard adds warmth, and muted teal creates a lively vintage note.
Use the island as the only large painted statement if the cabinets are wood. Pair it with a pale countertop and simple stools so the color stays balanced. For a smaller kitchen, paint only the island base and keep the upper area light.
Test paint samples at different times of day. Colors change under warm bulbs, daylight, and nearby wood tones. Use a durable cabinet enamel with a washable finish.
This idea can suit farmhouse, coastal, eclectic, and contemporary kitchens by changing the color intensity. One more strong detail, such as a hood, can complete the room’s visual structure.
20. Give the Range Hood a Simple Sculptural Shape
A range hood does not have to disappear. A slim wood-trimmed hood, rounded metal hood, or painted box hood can act as a clean focal point.
Keep the shape simple. Mid century design is more about proportion than decoration. A hood with a gentle curve can soften a straight kitchen, while a rectangular hood can reinforce a crisp, modern layout.
Check the required hood width, depth, and ventilation power before focusing on appearance. The hood should be wide enough for the cooktop and installed at the correct height according to the manufacturer.
This approach works in minimalist, contemporary, traditional, and retro spaces. With the main elements in place, the last two ideas focus on layout and finishing balance.
Paint Color Starting Points
| Color family | Visual effect | Works well with |
|---|---|---|
| Olive green | Earthy and relaxed | Walnut, brass, cream |
| Mustard yellow | Cheerful and warm | Teak, black, white |
| Muted teal | Fresh and retro | Oak, nickel, terracotta |
| Burnt orange | Rich and playful | Cream, walnut, charcoal |
| Charcoal | Strong and grounded | White, brass, natural wood |
21. Keep the Work Triangle Clear
Good design is not only about appearance. The path between the refrigerator, sink, and cooktop should feel natural and free from obstacles.
Avoid placing a stool, trash bin, or freestanding cart where it blocks that route. Store the most-used tools close to the prep area. Put plates near the dishwasher and cooking pans near the range to reduce extra steps.
In an open kitchen, use an island to separate work zones from the dining area. In a narrow kitchen, keep cabinet doors and appliance doors from colliding.
This planning principle works in every home style because it improves daily use. Once movement feels easy, the final step is editing the decoration.
22. Edit the Decor for a Calm Retro Look
The best mid century modern kitchen does not display every retro item you can find. It uses a few strong details and gives them room to breathe.
Choose a small group of meaningful pieces, such as a vintage clock, ceramic vase, colorful canister, framed print, or sculptural bowl. Keep daily clutter hidden in drawers, cabinets, and pantry storage.
Step back and remove anything that feels repetitive. If you already have a bold backsplash, colorful appliance, and patterned rug, the countertop may need to stay simple. A quiet surface can make the stronger details look better.
This edited approach works with minimalist, eclectic, coastal, and traditional homes. It is the easiest way to keep a themed kitchen personal rather than predictable.
Tips for Success
- Start with the cabinet and flooring colors before buying decor.
- Choose one main statement, such as a colorful island or patterned backsplash.
- Bring home physical samples because wood, tile, and paint shift in different light.
- Keep work surfaces mostly clear so the room stays practical.
- Use warm lighting to make walnut, oak, and teak look inviting.
- Mix vintage-looking details with modern appliances for easier daily living.
- Measure every walkway, stool, rug, and appliance opening before ordering.
Common Mistakes and How to Avoid Them
Using too much dark wood
: Balance walnut or teak with light walls, pale counters, and bright task lighting. Use wood as a feature instead of covering every surface.
Choosing several bold patterns
: Limit busy patterns to one main area, such as the backsplash or floor. Keep nearby textiles and accessories quieter.
Treating decoration as storage
: Display only items you use or enjoy seeing. Add closed cabinets, drawers, and pantry storage for the rest.
Ignoring appliance clearances
: Check door swings, ventilation space, aisle width, and countertop depth before finalizing the layout.
Mixing too many metal finishes
: Select one dominant finish and one supporting finish. Repeat both several times so the choices feel connected.
Making the kitchen look like a museum
: Use period-inspired shapes, but include current appliances, durable surfaces, and storage features that fit your real routine.
Similar Variations
- Scandinavian Mid Century: Uses pale wood, soft white walls, simple lighting, and fewer saturated colors.
- California Mid Century: Adds indoor plants, open layouts, warm wood, natural light, and relaxed earthy tones.
- Desert Mid Century: Combines clean furniture with terracotta, sand, rust, cactus green, and textured pottery.
- Coastal Mid Century: Uses light oak, muted blue, cream, woven accents, and breezy natural fabrics.
- Modern Retro: Keeps the classic forms but adds sleek appliances, durable quartz, and stronger graphic color.
- Japandi Mid Century: Blends warm wood, low visual clutter, soft neutrals, and carefully chosen handmade pieces.
A successful mid century kitchen is built on simple forms, warm materials, useful storage, and a few confident color choices. I would begin with the layout and cabinet finish, then layer in lighting, tile, furniture, and personal objects slowly.
You do not need a perfect vintage replica. You need a kitchen that feels welcoming, works well, and carries the spirit of the era in your own way, which is the heart of a 22 Mid Century Modern Kitchen.
Leave a Reply