Blog

  • 14 Sunken Living Room Ideas That Bring Back a Retro Favorite

    14 Sunken Living Room Ideas That Bring Back a Retro Favorite

    I’ve been obsessed with 14 sunken living room designs ever since I saw one in an old magazine my mom kept in a box in the attic. This trend from the 60s and 70s is making a huge comeback, and I want to show you exactly why it’s worth considering for your own home.

    A sunken living room is a section of flooring dropped below the rest of the house, usually by one or two steps, creating a defined lounge area called a conversation pit. This design adds visual interest, cozy separation, and a sense of drama without needing extra walls.

    Stick with me and I’ll walk you through 14 fresh ways to bring this look into your own space, plus some real talk on what to watch out for.

    What Exactly Is A Sunken Living Room?

    Okay so here’s the deal. A sunken living room, sometimes called a conversation pit, is just a part of your floor that sits lower than the rest of the room. Think of it like a little pit dug out just for lounging. You step down into it, and suddenly you’re in this cozy, tucked-away spot that feels totally different from the rest of the house.

    I think that’s the magic of it honestly. It’s not about adding more square footage. It’s about using the space you already have in a smarter, more interesting way. Architects loved this idea decades ago, and now it’s back because people want their homes to feel less flat and boring.

    1. Go Bold With A Classic Conversation Pit

    Story Pin image
    Credit: Deco Sphere

    This is the OG sunken living room move. You drop a section of the floor and fill it with built-in seating that wraps around the edges. No random couches floating around, just one connected seating area facing a center point like a fireplace or coffee table.

    I love this because it forces people to actually talk to each other instead of staring at their phones in separate corners. Try adding low-profile cushions in warm, earthy tones like rust or olive for that retro feel.

    Practical tip: keep the steps down to two max, or it starts feeling like a hazard instead of a design choice.

    This style fits mid-century modern homes perfectly, but you can soften it for coastal spaces with lighter fabrics and driftwood tones. Next up, let’s talk about how lighting changes everything in a pit like this.

    2. Use Layered Lighting To Highlight The Drop

    Story Pin image
    Credit: Kisaf

    A sunken area needs lighting that shows off the change in level, not just brightens the room. I always tell people to think in layers here. You want a mix of overhead lighting, wall sconces, and maybe a floor lamp tucked into a corner.

    Recessed lighting along the edge of the step is a smart move too. It acts like a soft guide so nobody trips going down. Warm bulbs, not cold white ones, keep the space feeling inviting instead of clinical.

    Quick tip: install a dimmer switch so the pit can go from bright movie-night mode to soft cozy-chat mode in seconds.

    Modern homes can go sleek with hidden LED strips, while farmhouse styles might prefer exposed bulb fixtures for warmth. Once your lighting is sorted, the next thing to nail down is color.

    3. Pick A Color Palette That Grounds The Space

    Credit: West Pear Interiors

    Because a sunken living room already stands apart physically, the color scheme needs to tie it back into the rest of your home. I like picking one or two anchor colors and repeating them in both the pit and the surrounding floor level.

    Color Palette Ideas For Sunken Living Rooms

    StyleWall ColorSeating ColorAccent Color
    Mid-Century ModernWarm WhiteBurnt OrangeWalnut Brown
    CoastalSoft Blue-GreyCreamSeafoam Green
    IndustrialCharcoal GreyBlack LeatherRust Metal
    BohemianTerracottaMustard YellowDeep Teal

    Pick colors that show up in your rugs, throw pillows, and even wall art so the pit feels connected, not isolated. Now let’s get into furniture, because this is where most people mess up.

    4. Choose Low-Profile Furniture That Fits The Scale
    Credit: Inspiration For Home

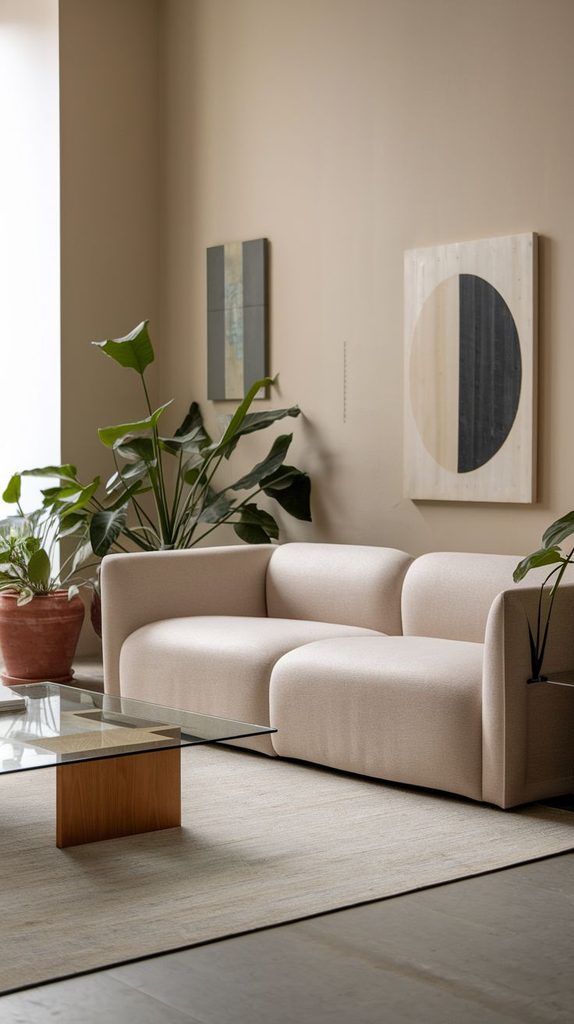
    Here’s a mistake I see a lot. People drop a section of floor and then throw in tall, bulky furniture that makes the space feel cramped. Sunken rooms need furniture that’s low to the ground. Think platform sofas, floor cushions, or low sectional pieces.

    The goal is to keep sightlines open across the room. When furniture sits low, the whole space feels bigger and more open, even though you’ve technically taken away floor height.

    Actionable tip: measure the ceiling height above the pit before buying anything. If it’s lower than the rest of the room, low furniture is basically required, not optional.

    Traditional homes might use tufted low benches, while modern spaces prefer clean-lined platform seating. Speaking of seating, let’s talk about how to arrange it for actual conversation.

    5. Build Seating That Faces Inward

    Story Pin image
    Credit: Home Comfort

    The whole point of the conversation pit idea was, well, conversation. So arrange your seating so people face each other instead of all pointing at a TV. A U-shape or full circle works great here.

    I know TVs are basically required in living rooms now, so you can still add one on a swivel mount or place it just outside the pit’s main sightline. That way, movie night and chat night both work in the same space.

    Practical tip: leave at least three feet of walking space around the seating so people can get in and out without climbing over each other.

    This inward-facing setup works in almost any style, from farmhouse to ultra-modern, because it’s about function, not aesthetics.

    6. Add A Fire Feature As The Focal Point
    Credit: Maria Faller

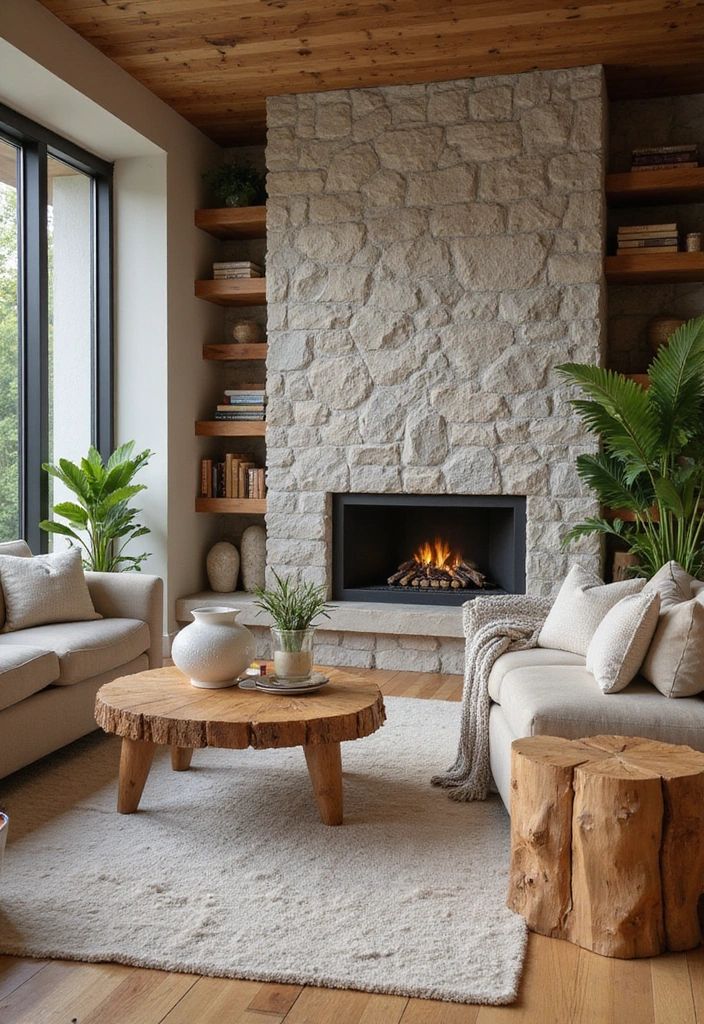
    Nothing says cozy quite like a fire pit or fireplace sitting right in the middle of your sunken area. This was actually super common in the original 70s designs, and it still works today.

    A small gas fire pit table in the center gives off warmth and light without needing a full chimney setup. If you want something more permanent, a built-in fireplace along one wall of the pit works beautifully too.

    Quick tip: keep flammable materials like rugs or curtains at least two feet away from any fire feature, just to be safe.

    Rustic and cabin-style homes practically demand this feature, but even sleek modern spaces can pull it off with a linear gas fireplace design.

    7. Use Rugs To Soften The Hard Step Edges
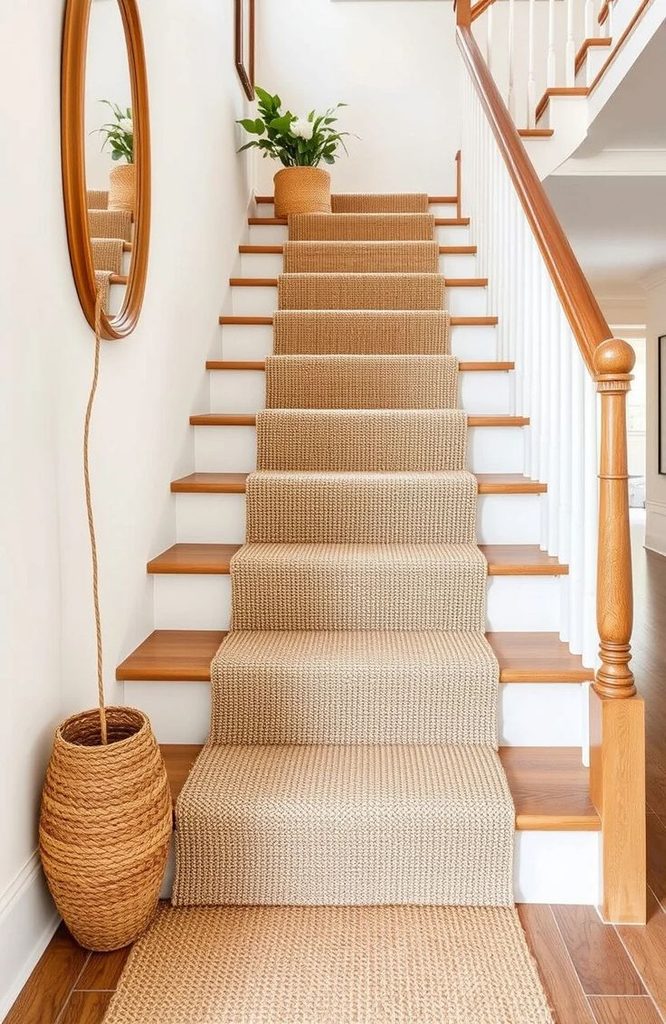
    credit: Ostrali

    Steps down into a sunken area can feel harsh if they’re bare concrete or wood. Adding a rug right at the base softens that transition and adds texture underfoot.

    I always suggest choosing a rug that’s slightly darker than your flooring so the step edge stays visible for safety. You don’t want guests missing that step in dim lighting.

    Actionable tip: go for a low-pile rug in high-traffic pits since thick shag rugs can actually become a tripping hazard on stairs.

    Bohemian homes might layer a few patterned rugs together, while minimalist spaces do best with one solid, neutral rug.

    8. Frame The Pit With A Statement Railing Or Wall

    Credit: Espaces Atypiques

    Some sunken living rooms use a low wall, railing, or even built-in bookshelf to frame the drop. This adds a nice visual boundary and can double as extra storage or display space.

    I really like this option if you have kids or pets running around, since it adds a subtle barrier without blocking the open feel of the room.

    Practical tip: keep railings under three feet tall so they don’t block sightlines across the room.

    Modern farmhouse homes often use wood railings, while contemporary spaces might go with glass panels for a sleek, open look.

    Framing Material Comparison

    MaterialBest ForAverage Cost Per Linear FootMaintenance
    WoodFarmhouse, Rustic$20-$45Medium
    Glass PanelModern, Minimalist$60-$120Low
    Metal RailingIndustrial$35-$70Low
    Built-In ShelvingTraditional, Eclectic$50-$150Medium

    Now that the boundary is sorted, let’s talk about how texture plays into all of this.

    9. Mix Textures To Keep The Pit From Feeling Flat
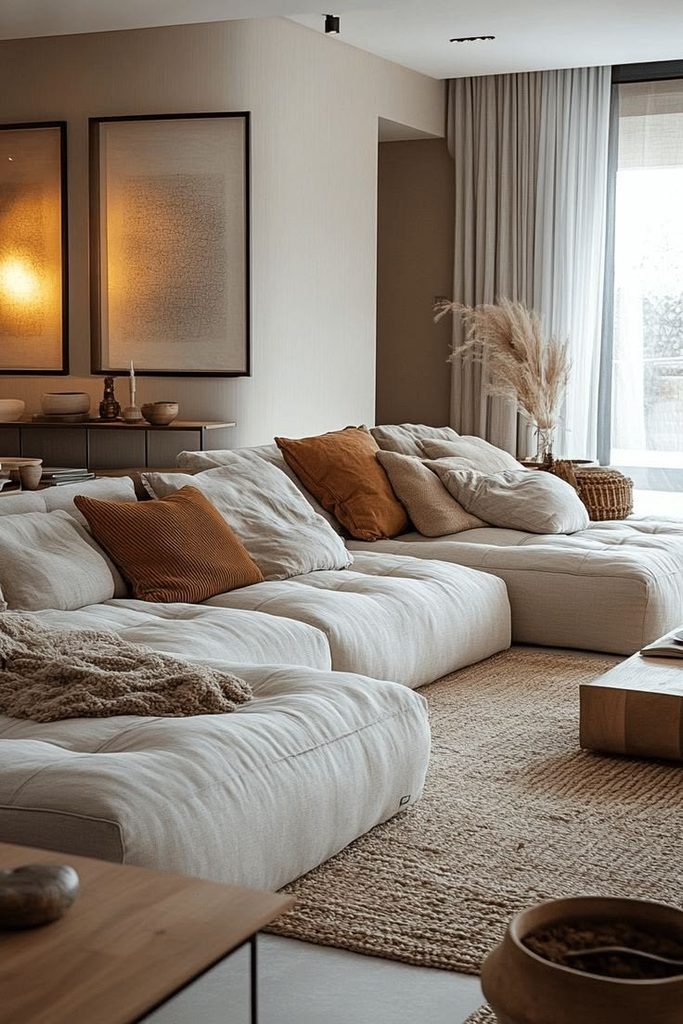
    Credit: Pinterest

    A sunken area can look a little sterile if everything is the same smooth material. I always recommend mixing in a few different textures like woven baskets, chunky knit throws, or a leather ottoman.

    This trick works because it gives your eyes something to explore even in a small, enclosed space. It also just feels nicer when you’re sitting there for hours watching movies or chatting with friends.

    Quick tip: aim for at least three different textures in the pit, like smooth leather, soft wool, and rough wood.

    Coastal homes lean into natural fibers like jute and rattan, while industrial spaces might mix leather with raw metal accents.

    10. Add Built-In Storage Under The Steps

    Story Pin image
    credit: Nestora Living

    This is such an underrated idea. The steps leading down into your sunken living room can actually hide drawers or cubbies for extra storage. Blankets, board games, remote controls, all of it can tuck away neatly.

    I think this is genius because sunken living rooms don’t always have a ton of extra room for bulky furniture like media consoles. Built-in storage solves that problem without adding clutter.

    Practical tip: use soft-close drawer hardware so nothing slams loudly when someone’s relaxing in the pit.

    This works especially well in modern and minimalist homes where hidden storage keeps the whole space looking clean.

    11. Use Skylights Or Big Windows To Add Depth
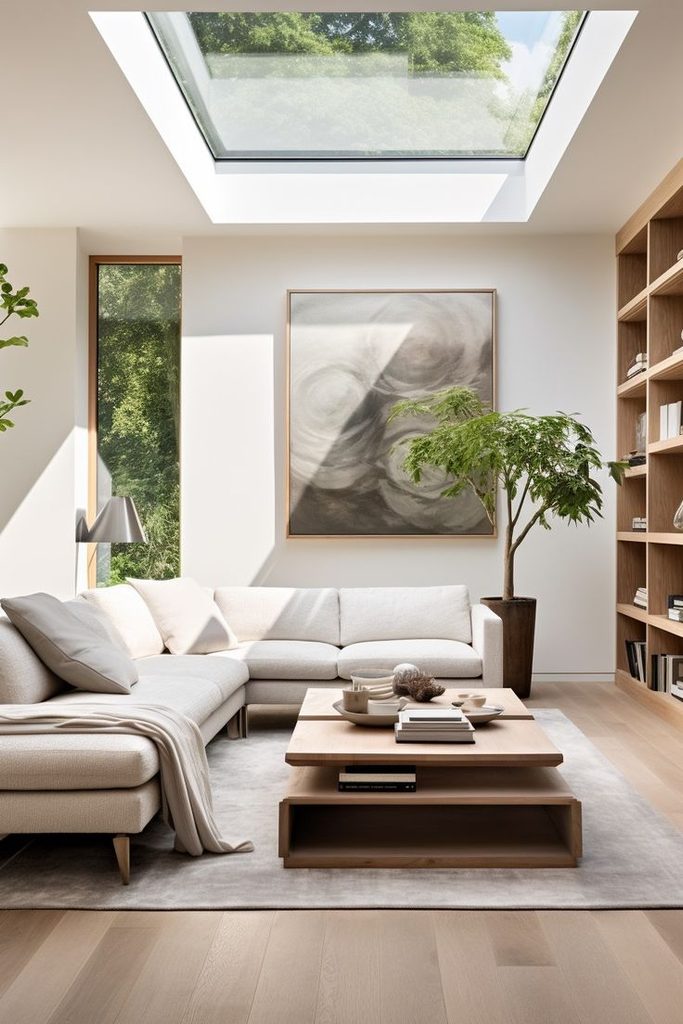
    Credit: IJfke Geerkens

    Since a sunken living room is already lower than the rest of the house, adding a skylight or oversized window above it can make a huge difference. Natural light pours down into the pit and makes it feel less like a hole and more like an intentional feature.

    I’ve noticed this works especially well in basements or lower-level sunken rooms where natural light is limited otherwise.

    Actionable tip: place skylights directly above the seating area, not off to the side, so the light actually reaches the people sitting there.

    Modern and Scandinavian-style homes benefit the most from this trick since they already lean into bright, airy spaces.

    12. Add Plants To Bring Life Into The Pit
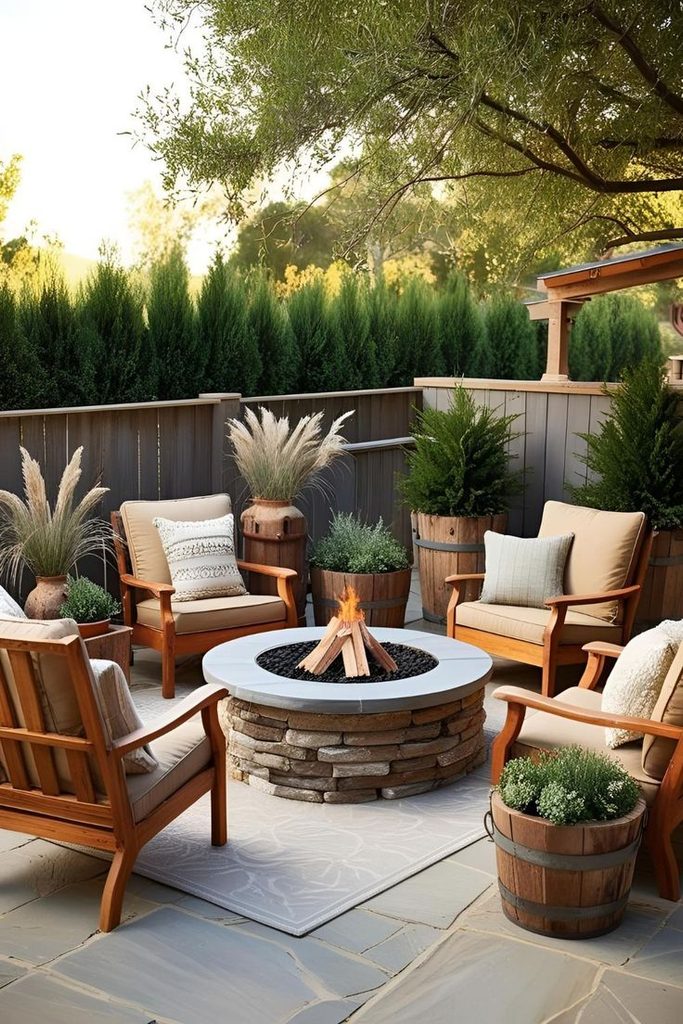
    Credit: RectifyHome

    A sunken living room can sometimes feel a little cave-like since it’s tucked below the main floor. Adding a few large plants around the edges brings in color, texture, and a fresh feeling.

    I always suggest plants with big leaves like a fiddle leaf fig or monstera since they make a bold statement even from a lower vantage point.

    Quick tip: place plants near the top edge of the pit so they don’t block sightlines for people sitting down low.

    Bohemian and coastal homes go all in on plants, while modern spaces might stick to just one or two statement plants for a cleaner look.

    13. Create A Multi-Level Sunken Design

    Story Pin image
    Credit: Achu

    If you really want to get fancy, consider adding more than one level to your sunken area. A small step down to a mid-level lounge area, then another step down to the deepest conversation pit, creates a layered, dramatic effect.

    This works great in larger homes with open floor plans since it breaks up the space visually without needing walls.

    Practical tip: use consistent flooring material across all levels so the space still feels connected, not chopped up.

    This idea shines in contemporary and luxury-style homes where making a statement is part of the design goal.

    14. Add A Sunken Reading Nook Instead Of A Full Living Room
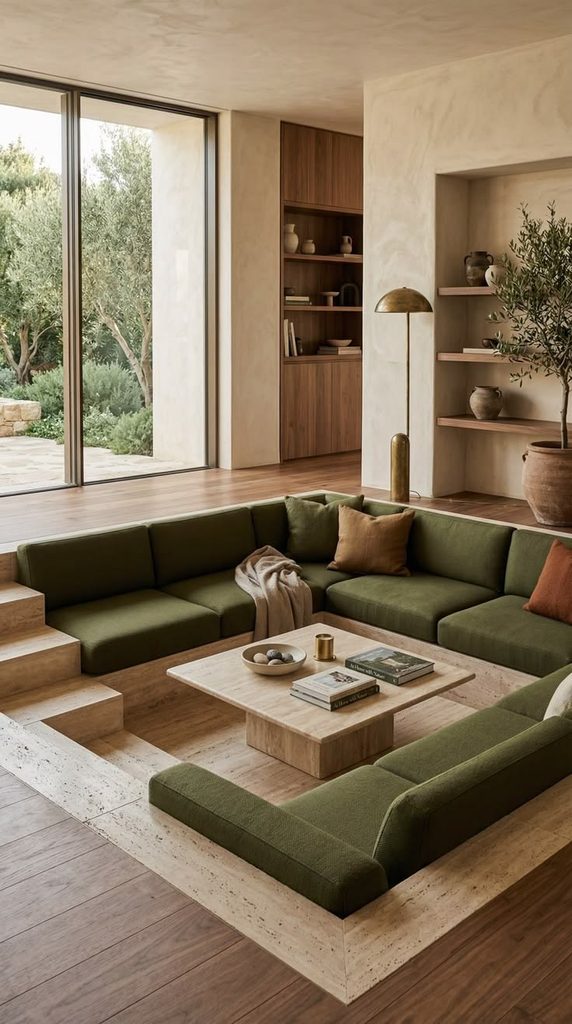
    Credit: Heather

    Not everyone has room for a full sunken living room, and that’s totally fine. A smaller sunken reading nook gives you that same cozy, tucked-away feeling on a smaller scale.

    Add a single comfy chair, a small bookshelf, and soft lighting, and you’ve got a little retreat that feels special without a huge renovation.

    Actionable tip: keep the nook close to a window for natural light during daytime reading.

    This idea works in literally any home style since it’s such a small, flexible addition.

    Tips For Success

    • Always check local building codes before adding a sunken floor since some areas have specific rules about step height and railings.
    • Mark the edge of the step with a contrasting color or strip so it’s easy to see, especially at night.
    • Keep at least one wide, easy pathway in and out of the pit for accessibility.
    • Test your furniture layout with painter’s tape on the floor before buying anything.
    • Choose materials that match humidity levels if your sunken area is near a basement or lower level.
    • Don’t skip proper drainage planning if the sunken area is close to any water source or exterior wall.
    • Get a contractor’s opinion on structural support before cutting into an existing floor.

    Common Mistakes And How To Avoid Them

    Skipping proper railing or edge marking
    : Add a railing, contrasting trim, or subtle lighting strip so nobody trips going in or out.

    Choosing furniture that’s too tall
    : Stick with low-profile pieces so the room doesn’t feel cramped or unbalanced.

    Ignoring natural light
    : Add a skylight or large window above the pit to keep it from feeling like a dark hole.

    Overcrowding the space with too much furniture
    : Leave breathing room around seating so people can move freely.

    Forgetting about accessibility
    : Consider a gentle ramp option alongside steps if accessibility is a concern in your household.

    Using the wrong rug thickness
    : Pick low-pile rugs for stairs and transitions to avoid tripping hazards.

    Similar Variations

    • Split-Level Living Room – a gentler version of the sunken look using half-flights of stairs between rooms instead of a deep pit.
    • Raised Platform Lounge – the opposite approach, raising a section of floor instead of lowering it for a cozy nook.
    • Sunken Dining Area – the same dropped-floor concept applied to a dining space instead of a lounge.
    • Courtyard Conversation Pit – an outdoor version of the sunken living room, often built into patios or garden spaces.
    • Sunken Media Room – a smaller, tech-focused version designed specifically around a home theater setup.

    I really think a sunken living room is one of those design choices that instantly makes a house feel more interesting and lived-in. It takes a little planning and maybe a contractor’s help, but the payoff is a cozy, standout space that feels totally different from a flat, boring living room. Whether you go big with a full conversation pit or start small with a sunken reading nook, these 14 sunken living room ideas give you plenty of ways to bring this retro trend into your own home.
  • 22 Japandi Living Room Ideas That Actually Feel Like Home

    22 Japandi Living Room Ideas That Actually Feel Like Home

    I’ve spent way too many hours scrolling through design inspiration, and honestly, putting together this list of 22 Japandi living room ideas taught me more than any other project I’ve tackled. If you’re tired of rooms that look either too cold and minimal or too cluttered and busy, you’re in the right place.

    Japandi is a design style that blends Japanese minimalism with Scandinavian coziness, using neutral colors, natural materials, and clean lines to create calm, functional living spaces. It focuses on simplicity without feeling empty, and warmth without feeling cluttered.

    Stick around, because I’m about to walk you through 22 specific ways to bring this look into your own living room, no design degree required.

    What Is Japandi Style, Anyway?

    So here’s the deal with Japandi. It’s basically two design philosophies shaking hands. Japan brings the “less is more” mindset, that quiet, intentional feeling you get in a tea room. Scandinavia brings the cozy factor, think chunky knit blankets and warm wood tones. Put them together and you get a living room that feels calm but not cold, simple but not boring.

    I like to think of it as minimalism with a heartbeat. It’s not about having an empty room. It’s about only keeping things that matter, and making sure everything left behind feels good to look at and touch.

    1. Start With a Neutral Color Foundation

    Neutral Living Room: How to Add Color to Your Space
    Credit: Ballard Design

    Every good Japandi room starts with the walls and floors. Think warm whites, soft beige, oatmeal, and light gray. These colors act like a blank canvas that lets your furniture and textures do the talking.

    Skip the stark white you’d see in a modern minimalist space. Japandi wants warmth, so go for creamy off-whites instead.

    Practical tip: Test paint swatches at different times of day since natural light changes how neutral tones read on your walls.

    This idea works in almost any home style, from farmhouse to mid-century, because neutral bases are endlessly flexible. Once your foundation is set, it’s time to think about what sits on top of it.

    2. Choose Low-Profile Wooden Furniture

    48 Living Room Layout Ideas That Make the Most of Your Space
    Credit: Bhg

    Japandi furniture tends to sit low to the ground. Think low coffee tables, floor-adjacent seating, and sofas with slim wooden legs instead of bulky frames. This creates an open, airy feeling even in smaller rooms.

    Light woods like oak, ash, and bamboo are the go-to choices. They keep things feeling fresh rather than heavy.

    Actionable tip: Measure your existing furniture height. If your coffee table is over 18 inches tall, consider swapping it for something closer to 14-16 inches to get that grounded Japandi look.

    Coastal homes can lean into this with bleached woods, while traditional homes might mix in a few darker wood accents for contrast. Next, let’s talk about what goes on top of that furniture.

    3. Layer in Natural Textures Like Linen and Wool

    15 Natural Living Room Ideas with Wood and Organic Elements | Wisal
    Credit: Wisal

    Texture is what keeps Japandi from feeling sterile. Linen throw pillows, wool blankets, and woven baskets add depth without adding visual clutter.

    I always tell people to touch fabrics before buying them. If it feels rough or synthetic, skip it. Japandi loves anything that feels soft and lived-in.

    Quick tip: Mix at least three different textures in your seating area, like a linen sofa cover, a chunky wool throw, and a jute rug.

    This layering trick translates beautifully into coastal or bohemian spaces too, just swap in different color tones. Now let’s get into lighting, because it changes everything.

    4. Use Warm, Soft Lighting Instead of Harsh Overheads

    How do you make overhead lighting less harsh? | Livingetc
    Credit: Livingetc

    Bright overhead lighting kills the Japandi vibe fast. Instead, use table lamps, floor lamps, and even paper lanterns to create soft pools of light around the room.

    Warm bulbs, around 2700K to 3000K, mimic candlelight and make the space feel cozier at night.

    Practical tip: Add a dimmer switch to your main light source so you can adjust brightness depending on the time of day.

    Modern farmhouse and traditional homes both benefit from this softer lighting approach since it makes any space feel more inviting. Speaking of inviting, let’s talk about what to put on your walls.

    5. Hang Minimal, Nature-Inspired Wall Art

    Best Wall Decor for Living Room | AboutWallArt
    Credit: About Wall Art

    Japandi walls aren’t bare, but they’re not busy either. Think one or two pieces of art showing landscapes, botanical prints, or abstract shapes in muted tones.

    Avoid gallery walls with a dozen frames. That’s more of a maximalist move.

    Tip you can use today: Choose art with a matte finish and thin wood or black metal frames to keep things looking intentional rather than random.

    This idea shifts easily into Scandinavian or modern homes since both styles already favor simple wall decor. Now, let’s move to something every living room needs, a good rug.

    6. Ground the Room With a Natural Fiber Rug

    31 Ideas How to Style Your Living Room with Jute Rug
    Credit: DressMyCrib

    A jute, sisal, or wool rug adds warmth underfoot and helps define your seating area. Stick to neutral tones or simple geometric patterns in muted colors.

    Avoid shiny synthetic rugs. They clash with the organic feel Japandi is going for.

    Actionable tip: Size your rug so all four legs of your sofa can sit on it, this creates a more cohesive, grounded look.

    Coastal living rooms can use a similar jute rug but pair it with lighter, beachy accents. Once your rug is down, let’s talk plants.

    7. Add Greenery With Simple, Structural Plants

    15 Best Indoor Trees to Add Leafy Accents to Your Home
    Credit: Bhg

    Plants bring life into a Japandi room without breaking the minimalist vibe. Go for plants with clean lines, like snake plants, olive trees, or bamboo.

    Skip the overly leafy, wild-looking plants. You want structure, not chaos.

    Tip: Use simple ceramic or woven planters in neutral tones instead of colorful pots.

    This works in almost every design style since greenery is basically universal. Now let’s talk about a Japandi staple, the shoji-inspired screen.

    8. Bring In a Shoji-Style Room Divider

    Shoji Room Divider - Natural – Haven Homestore
    Credit: Haven Homestore

    A shoji screen, or a modern version with a wood frame and rice paper panels, adds subtle Japanese influence while creating separation in open floor plans. It softens light beautifully too.

    Tip: Use one to hide a home office corner or separate your living room from a dining area without building a wall.

    This idea fits open-concept modern homes especially well, since it solves a functional problem while adding style. Next, let’s chat about seating arrangements.

    9. Create a Low, Floor-Level Seating Nook

    10 Sunken Living Room Ideas That Prove This Throwback Trend Is Here to Stay
    Credit: Elle Decor

    If you have extra space, add a small floor cushion or low bench seating area near a window. This nods to Japanese floor-seating traditions while giving you a cozy reading nook.

    Tip: Use a flat, firm cushion covered in linen or cotton for comfort without sinking too low.

    Bohemian and eclectic homes can adapt this with more colorful cushions and layered textiles. Let’s move on to something practical, storage.

    10. Choose Storage Furniture With Hidden Compartments

    19 Hidden Living Room Storage Ideas | Extra Space Storage
    credit: extra space storage

    Clutter is the enemy of Japandi. Look for storage ottomans, low sideboards, or TV consoles with closed cabinet doors instead of open shelving.

    Tip: Before buying new furniture, do a quick declutter pass. You might not need as much storage as you think once things are pared down.

    Modern and transitional homes can use the same trick, closed storage keeps any room looking calmer. Now, let’s talk about a detail people often skip, window treatments.

    11. Use Simple Linen or Bamboo Window Coverings

    Why are bamboo blinds so favoured by interior designers? | House & Garden
    Credit: House and Graden

    Heavy drapes feel out of place in a Japandi room. Instead, go for light linen curtains or bamboo roman shades that let soft light filter through.

    Tip: Choose curtains in a color close to your wall color so they blend rather than stand out.

    Coastal and farmhouse homes already lean toward light, breezy window treatments, so this transition feels natural in those spaces. Speaking of natural, let’s discuss ceramics next.

    12. Display Handmade Ceramic Pieces as Decor

    Long-Weekend Goals: Beautiful Ways to Display Your Pottery | Houzz NZ
    Credit: Houzz

    A few imperfect, handmade ceramic bowls or vases add that “wabi-sabi” charm Japandi is known for, the beauty of imperfection. Look for pieces with visible texture or slightly uneven shapes.

    Tip: Place one or two on your coffee table or shelf, not a whole collection. Less really is more here.

    This works well in rustic and farmhouse spaces too, since handmade pottery already fits those aesthetics. Let’s look at color combinations next with a quick reference table.

    Japandi Color Palette Guide

    Palette NameWall ColorFurniture ToneAccent ColorBest For
    Warm NeutralOatmeal BeigeLight OakTerracottaSmall living rooms
    Cool CalmSoft GrayAsh WoodSage GreenNorth-facing rooms
    Deep ContrastWarm WhiteWalnutCharcoal BlackLarge open spaces
    Coastal JapandiPale SandBleached OakDusty BlueBeach or lake homes

    13. Mix Matte Black Accents Into Your Decor

    Top Design Ideas for Incorporating Matte Black Accents in Your Home | Build Beautiful
    Credit: Toll Brothers

    A little contrast goes a long way. Matte black picture frames, a black metal side table, or dark iron light fixtures give the room some visual weight against all those light woods and neutrals.

    Tip: Limit black accents to two or three spots in the room so it reads as intentional, not overwhelming.

    Industrial and modern homes can lean harder into this black accent trend, while traditional homes should use it sparingly. Now let’s talk about something cozy, throw blankets.

    14. Layer Chunky Knit Throws Over Your Sofa

    How To Style A Throw Blanket 10 Attractive Ways - StoneGable
    Credit: StoneGable

    A folded wool or chunky knit throw draped over your sofa arm instantly adds that Scandinavian coziness Japandi is known for. Stick to cream, oatmeal, or soft gray tones.

    Tip: Fold it in thirds and drape it loosely rather than perfectly, this keeps the look relaxed instead of staged.

    Farmhouse and cottagecore homes already love this styling trick, so it transitions easily. Let’s move into flooring choices next.

    15. Consider Light Wood or Bamboo Flooring

    Know Your Flooring: Bamboo | Houzz AU
    Credit: Houzz

    If you’re doing a bigger renovation, light wood flooring sets the tone for the entire Japandi look. Bamboo is a sustainable option that fits the philosophy behind this style too.

    Tip: If new flooring isn’t in the budget, a large light-toned area rug can mimic the same effect over darker existing floors.

    This works across nearly every home style since light flooring is a popular, flexible base. Next, let’s talk about something small but important, hardware finishes.

    16. Swap Hardware for Brushed Brass or Matte Black

    Mixed Metals Done Right: Brass, Chrome & Matte Black + Frame Matching
    Credit: Rossetti Art

    Small details matter. Cabinet handles, curtain rods, and light fixture finishes should stick to brushed brass, matte black, or aged bronze rather than shiny chrome.

    Tip: You can usually swap cabinet hardware yourself in an afternoon for under fifty dollars total.

    Modern farmhouse and transitional homes use these same finishes, making this an easy crossover update. Let’s discuss furniture layout next.

    17. Arrange Furniture to Encourage Conversation

    Expert Eye: 7 Ways to Arrange a Living Room for Conversation | Houzz AU
    Credit: Houzz

    Japandi rooms often use a simple, symmetrical furniture layout, like two matching chairs facing a sofa across a low coffee table. This setup encourages conversation and keeps the room feeling balanced.

    Tip: Leave at least 30 inches of walking space between furniture pieces so the room doesn’t feel cramped.

    Traditional and transitional homes already favor this symmetrical approach, so it’s an easy style to borrow. Now let’s cover something a lot of people forget, scent and ambiance.

    18. Add Subtle Scent With Incense or Candles

    General Wax & Candle | Mastering the art of home scents and scented candles - General Wax & Candle – General Wax Candles
    Credit: Generalwax

    Japandi isn’t just visual, it’s sensory too. A simple ceramic incense holder or unscented soy candle adds to that calm, spa-like feeling without overwhelming the room.

    Tip: Stick to woodsy or subtle green scents like hinoki, cedar, or sandalwood instead of sweet or floral options.

    This idea fits wellness-focused or minimalist homes especially well. Let’s look at budget considerations next with another quick table.

    Japandi Living Room Budget Tiers

    Budget LevelTotal RangeWhere to SpendWhere to Save
    Starter$500-$1,000Rug and lightingDIY shelving, thrifted decor
    Mid-Range$1,500-$3,500Sofa and coffee tableWall art, throw pillows
    Full Refresh$5,000-$10,000Flooring and custom furnitureCeramics, small decor

    19. Keep Decorative Objects to Odd Numbers

    The Power of Odd Numbers: Why Styling in Threes and Fives Works - Design Hunter
    Credit: Design Hunter

    There’s a design trick where grouping decor items in odd numbers, like one, three, or five, feels more visually balanced than even numbers. Try this with candles, vases, or small sculptures on a shelf.

    Tip: Vary the heights slightly when grouping objects so your eye moves naturally across the display.

    This trick works in literally any design style, it’s one of those universal decorating rules. Let’s talk about a bigger structural idea next, exposed beams.

    20. Highlight Natural Architectural Details

    41 Modern Traditional Living Room Ideas
    Credit: Bhg

    If your home has exposed wood beams, brick, or stone, let them shine instead of covering them up. Japandi celebrates natural materials in their raw form.

    Tip: If you don’t have these features naturally, a single reclaimed wood accent wall can create a similar effect.

    Rustic and industrial homes already value exposed materials, so this idea overlaps nicely with those styles. Now, let’s think about balance between open and closed shelving.

    21. Balance Open Shelving With Closed Storage

    Living room shelving ideas: 16 beautiful ways to display books and trinkets | Homes and Gardens
    Credit: House and Garden

    A mix of open shelves for a few curated items and closed cabinets for everything else keeps your room from feeling either too bare or too cluttered.

    Tip: Follow a 70/30 rule, keep 70 percent of storage closed and 30 percent open for display.

    Scandinavian and modern homes use this same ratio trick, making it easy to borrow. Finally, let’s wrap up with one last detail that pulls everything together.

    22. Repeat One Signature Material Throughout the Room

    41 Modern Traditional Living Room Ideas
    Credit: BHg

    Pick one material, like a specific wood tone or a certain type of woven fiber, and repeat it in at least three spots around the room. This could be your coffee table, a shelf, and a picture frame all sharing the same oak finish.

    Tip: Walk through your room and count how many times your chosen material appears. Three to five repetitions usually feels intentional without being matchy.

    This repetition trick is honestly one of the easiest ways to make any room, in any style, feel more pulled together.

    Tips for Success

    • Start with the biggest items first, sofa and rug, before worrying about small decor pieces.
    • Take a photo of your room and edit it in black and white to check if your color balance feels right.
    • Buy one quality piece at a time instead of filling the room all at once.
    • Keep a small “maybe” box for decor you’re unsure about, revisit it in a month before deciding.
    • Shop secondhand for wood furniture since aged pieces often have more character than new ones.
    • Stick to a three-color max rule for your whole room to avoid visual chaos.
    • Live in the space for two weeks before hanging art, you might realize you need less than you think.

    Common Mistakes and How to Avoid Them

    Too much matching furniture
    : This makes a room feel like a showroom instead of a home. Mix wood tones slightly and vary furniture shapes for a more natural feel.

    Overdoing the minimalism
    : An empty room feels cold, not calm. Add texture through textiles, plants, and a few personal objects to keep warmth in the space.

    Choosing cool white paint instead of warm white
    : Cool whites can make a Japandi room feel clinical. Always test warmer, creamier whites first.

    Ignoring lighting temperature
    : Bright white bulbs clash with the cozy Japandi mood. Stick to warm bulbs in the 2700K to 3000K range.

    Skipping texture in favor of just color
    : A room can be neutral and still feel flat without texture. Always include at least three different natural materials in your main seating area.

    Similar Variations

    • Wabi-Sabi Living Room: Focuses even more on imperfect, handmade objects and asymmetry.
    • Scandi-Minimalist: A lighter, brighter take on Japandi without as much Japanese influence.
    • Modern Zen: Leans harder into Japanese elements like tatami mats and shoji screens.
    • Coastal Japandi: Adds beachy blues and bleached woods to the classic Japandi base.
    • Organic Modern: Similar neutral palette but with curvier furniture shapes instead of low, linear pieces.

    Putting together a Japandi living room really comes down to balance. You want calm without emptiness, and warmth without clutter. Pick a few ideas from this list that fit your space and budget, and build from there rather than trying to do everything at once.

    At the end of the day, the best 22 Japandi Living Room ideas are the ones that actually feel like your home, not just a picture from a magazine.

  • 14 Retro Living Room Ideas That Bring Back the Good Old Days

    14 Retro Living Room Ideas That Bring Back the Good Old Days

    I’ve put together this guide on 14 retro living room ideas after digging through dozens of design sources, old catalogs, and real home makeovers to find what actually works. This isn’t a rushed list. I wanted to give you something you can actually use, not just eye candy that looks good in a photo but falls apart in real life.

    A retro living room is a space designed using furniture, colors, and decor styles from past decades, typically the 1950s through 1980s. It mixes bold hues, curved furniture, and nostalgic patterns to create a warm, lived-in feel that modern minimalism often lacks.

    Stick around and I’ll walk you through specific ideas, real color combos, budget breakdowns, and the mistakes that trip up most people trying this look.

    What Even Is a Retro Living Room Style?

    Okay, so let’s talk about what “retro” actually means before we get into the fun stuff. Retro isn’t just “old furniture thrown together.” It’s a specific vibe that borrows from the 50s, 60s, 70s, and sometimes early 80s. Think shag rugs, boomerang patterns, mustard yellow couches, and wood paneling that somehow looks cool again.

    I like to think of retro as nostalgia with intention. You’re not recreating your grandma’s living room exactly. You’re picking the best parts of it and mixing them with things that feel fresh today. That balance is what makes this style so fun to play with.

    1. Start With a Statement Sofa in a Bold Hue

    Grey Couch Rug Color Guide: Pick the Right Mood Quickly | FH
    Credit: Fancy house design

    Your sofa is the anchor of any retro living room, so don’t be shy with color. Mustard yellow, burnt orange, and avocado green were huge in the 70s, and they still pack a punch today. Look for a piece with tapered wood legs and a low-profile back. That silhouette screams mid-century without trying too hard.

    Practical tip: if a full colored sofa feels risky, buy a neutral frame and slipcover it in a bold retro shade. You can swap it out later if you change your mind.

    This idea flexes well across styles too. In a modern space, pair the bold sofa with clean white walls. In a traditional home, let it sit next to darker wood furniture for contrast. Once your sofa sets the tone, the rest of your color choices get a lot easier to pick.

    2. Layer in Geometric or Psychedelic Patterns

    Illusion Psychedelic Area Rug, Trippy Carpet, Black & White Indoor Outdoor Rugs, Optical by Etsy | uFurnish.com
    Credit: uFurnish

    Retro rooms love pattern. Geometric shapes, wavy lines, and psychedelic swirls were everywhere in the 60s and 70s, and they’re the fastest way to signal “retro” without buying a single vintage piece. Think curtains, throw pillows, or even a statement wallpaper wall.

    The trick is balance. Pick one bold pattern as your hero print, then keep everything else simple. If your curtains have a big swirl print, keep your rug solid.

    Quick tip: use pattern on soft furnishings first before committing to wallpaper. It’s cheaper to change a pillow than to strip wallpaper.

    This works in coastal homes too if you swap the psychedelic colors for ocean blues and sandy tans. Once your patterns are set, it’s time to think about texture, because retro rooms are all about mixing materials.

    3. Mix Textures With Shag Rugs and Velvet Pillows

    51 Living Room Rug Ideas - Stylish Area Rugs for Living Rooms
    Credit: Elle Decor

    Texture is what makes a retro room feel cozy instead of costume-like. Shag rugs bring softness underfoot, while velvet or corduroy pillows add a tactile richness that flat cotton just can’t match. The contrast between a smooth leather chair and a fuzzy rug is what sells the whole look.

    I always tell people to touch fabric before buying it online if possible. Retro style relies heavily on how things feel, not just how they look in photos.

    Practical tip: layer a smaller shag rug over a larger flatweave rug for depth without overwhelming the room.

    This idea adapts easily. Farmhouse spaces can use chunky knit textures instead of shag. Once your textures are layered, lighting becomes the next big piece of the puzzle.

    4. Bring In Warm, Ambient Lighting Fixtures

    How to Create Cozy Living Room Vibes with Lighting (Expert Tips & Tricks) | BenQ US
    Credit: BenQ

    Retro lighting has a very specific look: globe pendants, arc floor lamps, and sunburst wall sconces. These fixtures were designed to be sculptural, not just functional. A single arc lamp arching over your seating area can become the visual centerpiece of the whole room.

    Skip harsh overhead lighting. Retro rooms lean on warm bulbs and multiple light sources placed around the room instead of one bright ceiling light.

    Practical tip: use warm white bulbs (2700K) instead of daylight bulbs. It makes a massive difference in how “vintage” the room feels.

    Modern homes can keep the same fixture shapes but finish them in matte black or brass for a cleaner look. Once your lighting is dialed in, let’s talk about the walls themselves.

    Retro Color Palette Combinations

    Palette NameWall ColorAccent ColorsBest Paired With
    Harvest GoldCream whiteMustard, brown, orangeWood paneling, leather chairs
    Avocado DreamSage greenAvocado, burnt orangeShag rugs, wicker accents
    Groovy BluePowder blueNavy, mustard, whiteChrome fixtures, glass tables
    Sunset PopTerracottaPink, orange, creamVelvet sofas, rattan lamps
    Chocolate ModChocolate brownTan, gold, whiteCurved sofas, brass hardware

    5. Add Wood Paneling or Faux Wood Accents

    Designing Your Own Stunning Living Room Accent Wall - Andor Willow
    Credit: Andor Willow

    Wood paneling is one of those things that people either love or hate, but done right, it’s a retro staple that adds instant warmth. You don’t need to panel your entire room. A single accent wall behind your sofa or TV can do the job without making the space feel like a cabin.

    If real wood paneling feels too permanent, peel-and-stick wood panel wallpaper is a solid workaround. It looks convincing from a few feet away and comes off easily if you rent your place.

    Practical tip: choose a lighter wood tone like birch or oak if your room doesn’t get much natural light, so it doesn’t feel cave-like.

    This idea works in cabin and farmhouse styles too, just swap the finish for something more rustic. Once your walls have some warmth, it’s time to bring in the furniture shapes that define this whole style.

    6. Choose Curved, Low-Profile Furniture Shapes

    Curved Furniture: Our Designers' Favorite Trendy Pieces
    Credit: Decorilla

    Mid-century and retro furniture loved curves. Kidney-shaped coffee tables, round ottomans, and curved sectional sofas were everywhere, and they still soften a room in a way that boxy modern furniture just doesn’t. Low profiles were also common, since ceilings back then weren’t always super high.

    When shopping, look for tapered legs, rounded edges, and pieces that sit lower to the ground than typical modern furniture.

    Practical tip: a round coffee table instantly breaks up a room full of straight lines and rectangular furniture.

    Traditional homes can mix in curved retro pieces alongside classic wingback chairs for an eclectic feel. With your furniture shapes locked in, let’s move on to something smaller but just as impactful: wall art.

    7. Hang Vintage-Inspired Art and Sunburst Mirrors

    Gold Sunburst Mirror | Antique Farmhouse
    Credit: Antique Farmhouse

    Retro wall art usually leans into bold typography, travel posters, or abstract shapes in warm color palettes. Sunburst mirrors were also massive in the 60s and 70s, and they still work as a statement piece above a sofa or mantel.

    I like mixing a few smaller framed prints with one larger mirror for balance. It keeps the wall from feeling too busy or too empty.

    Practical tip: thrift stores are goldmines for actual vintage frames and art. You don’t need to buy everything new to get this look right.

    Coastal homes can swap travel posters for vintage surf or beach prints in the same color family. Once your walls are dressed, let’s talk about something people often forget: plants.

    8. Incorporate Retro Houseplants Like Ferns and Palms

    7 Low Maintenance Houseplants That Look Great Even in a Brown Thumb's Home
    Credit: Decorilla

    Plants were a huge part of retro decor, especially big leafy ones like ferns, palms, and spider plants. They added life to rooms full of heavy furniture and dark wood tones. A few large plants in the corner can soften a room instantly.

    Ceramic planters in warm earthy tones (think burnt orange or brown) fit the retro vibe better than plain white pots.

    Practical tip: if you don’t have a green thumb, faux plants have gotten really good. Nobody will know unless they touch the leaves.

    This idea works in boho and coastal spaces too, just swap the planter style. Now that your greenery is in, let’s talk flooring.

    Budget Breakdown for a Retro Living Room Makeover

    Budget TierTotal SpendWhat You GetBest Approach
    Low$300–$700Thrifted furniture, DIY paint, faux plantsFocus on color and textiles first
    Mid$800–$2,500New sofa, statement lighting, real rugsMix new key pieces with thrifted accents
    High$3,000+Custom furniture, wallpaper, vintage originalsHire a decorator or source authentic vintage pieces

    9. Add a Statement Rug With Bold Geometric Patterns

    How To Design Around a Statement Rug | Rugs Direct
    Credit: Rug Direct

    Your floor deserves just as much attention as your walls. A bold geometric rug in warm tones can tie your whole color scheme together and anchor your seating area. Look for shapes like diamonds, chevrons, or overlapping circles in mustard, brown, and cream.

    Practical tip: size your rug so all your furniture legs sit on it, or at least the front legs of your sofa and chairs. A rug that’s too small makes the room feel disconnected.

    This adapts well in modern farmhouse spaces if you tone down the colors to more muted earth tones. Once your rug is placed, small decorative touches will really bring the room together.

    10. Style Open Shelving With Vintage Ceramics and Glassware

    Styling open shelving: 10 ideas for every room | Dimehouse
    Credit: Dimehouse

    Open shelving gives you a spot to show off collected retro items like colorful ceramic vases, glass ashtrays turned into trinket dishes, or vintage record players. This is where personality really shines through.

    Practical tip: group items in odd numbers (three or five) for a more natural, curated look instead of lining everything up evenly.

    This idea works beautifully in eclectic and maximalist homes where more is more. With your shelves styled, let’s talk about one more layer: window treatments.

    11. Use Heavy Drapes or Beaded Curtains for Softness

    22 Curtain Designs for Every Room in Your Home
    Credit: Interior Company

    Retro window treatments were often heavier than what we use today. Thick drapes in bold prints or solid jewel tones added warmth and helped control light. Beaded curtains, though less common now, can add a playful accent in doorways or as room dividers.

    Practical tip: hang curtains higher than the window frame itself to make ceilings feel taller, a trick that works in any style era.

    This adapts to traditional homes easily since heavy drapery was already a staple there too. With windows dressed, let’s finish with the small details that seal the deal.

    12. Add a Vintage Record Player or Retro Tech Accent

    15 Retro Living Room Ideas for Vintage Charm
    Credit: Lorddecor

    Nothing says retro like an actual record player sitting in the corner, even if you mostly stream music. It’s a functional piece and a conversation starter at the same time. Pair it with a small collection of vinyl records displayed nearby.

    Practical tip: place it on a low credenza to keep the retro furniture silhouette consistent throughout the room.

    This idea fits industrial and eclectic homes just as well, especially if the credenza has metal accents. Speaking of furniture pieces, let’s talk about one more classic: the credenza itself.

    13. Use a Mid-Century Credenza for Storage and Style

    What Is a Credenza and How Is It Different From a Sideboard?
    Credit: Bhg

    A credenza is basically the retro version of a TV stand, and it’s incredibly useful for hiding clutter while looking sharp. Look for teak or walnut finishes with brass hardware and tapered legs. These pieces work as TV stands, bar carts, or even dining sideboards depending on your layout.

    Practical tip: measure your TV width before buying so the credenza doesn’t look too small underneath it.

    This piece works in nearly every design style since credenzas have stayed popular across decades. Last but not least, let’s talk about tying the whole room together with accessories.

    14. Finish With Retro-Inspired Clocks and Small Accessories

    Buy Augustus Metal Wall Clock Online At Best Price In India | Wakefit
    Credit: Wakefit

    Small details matter. A starburst wall clock, a set of nesting tables, or colorful glass coasters can pull your whole retro theme together without overwhelming the space. These smaller items are also the easiest and cheapest way to test the style before committing to bigger furniture pieces.

    Practical tip: start collecting small accessories first if you’re on a budget. They let you “try on” the retro look before spending on furniture.

    This works across every style since small accent pieces are low-risk and easy to swap out later.

    Tips for Success

    • Pick one dominant decade (50s, 60s, or 70s) instead of mixing all three, so your room feels intentional, not confusing.
    • Balance bold colors with neutral walls if you’re nervous about commitment.
    • Shop secondhand stores and estate sales for authentic pieces at a fraction of retail cost.
    • Keep at least one modern element, like a TV or lighting fixture, so the room doesn’t feel like a museum.
    • Test paint colors on your actual wall before committing, since retro colors can look very different under artificial light.
    • Don’t rush the room. Retro spaces often come together over months, not days.

    Common Mistakes and How to Avoid Them

    Overloading on pattern
    : Pick one or two hero patterns max, and keep the rest of the room simple to avoid visual chaos.

    Buying fake “vintage” mass-produced furniture
    : Check joinery, materials, and weight before buying. Real vintage pieces feel solid and heavy compared to cheap reproductions.

    Ignoring scale
    : Retro furniture is often lower profile. Mixing in oversized modern pieces can throw off the whole look.

    Using cool-toned lighting
    : Stick to warm bulbs (2700K–3000K) since cool white light clashes badly with retro color palettes.

    Going too costume-like
    : Avoid turning your room into a themed set. Blend eras and styles so it still feels like a real home.

    Similar Variations

    • Mid-Century Modern – A cleaner, more minimalist cousin of retro, focused on function and simple wood furniture.
    • Boho Retro – Combines retro colors with boho textiles like macrame and rattan for a softer, earthier feel.
    • Space Age Retro – Leans into chrome, plastic furniture, and futuristic shapes popular in the late 60s.
    • Hollywood Regency Retro – Mixes retro glam with mirrored furniture and jewel-toned velvet accents.
    • Farmhouse Retro – Softens retro colors with muted earth tones and rustic wood textures.

    Pulling together a retro living room really comes down to picking your favorite decade, committing to a color story, and layering in texture, lighting, and small details until the room feels lived-in rather than staged. It doesn’t have to be perfect on day one. Some of the best spaces I’ve seen came together piece by piece over time. If you start with even two or three ideas from this list, you’ll already be well on your way to a 14 retro living room that feels warm, personal, and just a little bit groovy.

  • 16 Living Room Rug Ideas That Actually Work in Real Homes

    16 Living Room Rug Ideas That Actually Work in Real Homes

    I’ve spent way too many hours staring at rug samples on my living room floor, and I’m guessing you’re doing the same thing right now. If you’re hunting for the best 16 living room rug ideas out there, you’ve landed in the right spot, because I’m about to break down everything that actually works.

    A living room rug is a floor covering placed in the main seating area of a home that defines the space, adds warmth, and ties furniture together visually. The right size, color, and material depend on room shape, furniture layout, and daily foot traffic.

    Stick around, because I’m sharing 16 rug ideas, a few tables to make shopping easier, and mistakes I made so you don’t have to.

    What Makes a Living Room Rug Choice So Tricky

    Picking a rug sounds easy until you’re standing in a store holding three different samples that all looked perfect online. The truth is, a rug is basically the foundation of your whole room. It sets the mood, anchors your furniture, and can make a space feel huge or tiny depending on the size you pick.

    I used to think rugs were just “extra decoration.” Wrong. A rug pulls your couch, chairs, and coffee table into one cohesive picture. Get it wrong and your room feels disjointed, even if every other piece is gorgeous. Get it right and people walk in and just feel comfortable, even if they can’t say why.

    That’s why I’m walking through real, usable ideas below.

    1. Go Oversized for an Open, Airy Feel

    39 Living Room Rug Ideas That You Won't Rug-ret | Rugs Direct
    Credit: Rugs Direct

    Small rugs floating in the middle of a big room make everything look shrunken. I learned this the hard way. My old 5×7 rug looked like a bath mat in my living room.

    The fix is sizing up. A rug should touch at least the front legs of your sofa and chairs, ideally all four legs if your room allows it. Neutral tones like beige, oatmeal, or soft gray work great here because they don’t compete with furniture.

    Tip: Measure your seating area first, then add two feet on each side before buying.

    This trick works in modern lofts and traditional homes alike. It just makes the whole room breathe.

    Next up, let’s talk about what happens when you go the opposite direction with layering.

    2. Layer a Woven Jute Rug Under a Patterned Piece

    7 Stylish Ways to Layer with Jute Rugs
    Credit: Eco Crave

    Layering isn’t just for boho spaces. Put a natural jute or sisal rug down first, then top it with a smaller patterned or textured rug. This creates depth without overwhelming the room.

    The jute base adds warmth and texture, almost like a frame. The top rug becomes your color statement, maybe a Persian-inspired pattern or a bold geometric print.

    Practical tip: keep the top rug at least 12 inches smaller on all sides so the jute border stays visible.

    This works beautifully in coastal, farmhouse, and eclectic homes. Modern spaces can pull it off too if you keep the pattern simple.

    Once you’ve nailed layering, color choice becomes your next big decision.

    3. Pick a Rug Color That Contrasts Your Flooring

    How to Pick Rug Colors for a Cohesive Living Room Look
    Credit: Rug editorial

    If you have dark hardwood floors, a light rug creates instant contrast and makes furniture pop. If you have light floors, a deeper rug grounds the space so it doesn’t feel washed out.

    I always tell people to hold the rug swatch right next to their actual flooring in natural light before buying. Store lighting lies.

    Color families that work well together:

    Rug and Flooring Color Pairings

    Flooring ToneBest Rug ColorsStyle Vibe
    Dark walnut/espressoCream, light gray, soft blueCozy, contrast-driven
    Light oak/blonde woodCharcoal, navy, terracottaBold, grounded
    Gray tile or concreteWarm rust, mustard, forest greenWarm, inviting
    White or whitewashedBlack, deep burgundy, oliveDramatic, modern

    This contrast trick works in every design style. Traditional homes lean toward navy or burgundy, while modern spaces often go charcoal or black.

    Now let’s look at pattern play, because color is only half the story.

    4. Use Bold Geometric Patterns to Modernize a Traditional Room

    51 Living Room Rug Ideas - Stylish Area Rugs for Living Rooms
    Credit: Elle Decor

    Got a room full of antique furniture or classic wood pieces? A geometric rug shakes things up without a full remodel. Think diamonds, chevrons, or angular Moroccan-style prints.

    The trick is balance. If your furniture is ornate, keep the rug pattern simple with two or three colors max. If your furniture is plain, you can go bolder with the rug design.

    Quick tip: snap a photo of your room and hold up rug images on your phone screen before buying. It helps you see the pattern at scale.

    This idea shines in transitional and modern farmhouse homes especially.

    Speaking of farmhouse looks, let’s talk texture next.

    5. Add a Chunky Wool Rug for Cozy Farmhouse Vibes

    5 Ways to Layer Rugs for a Cozy, Stylish Look | Kudenrugs
    Credit: Kuden Rug

    Wool rugs with a thick, chunky weave scream cozy. They’re perfect for farmhouse or cottagecore living rooms where comfort matters more than sleekness.

    Pair a chunky wool rug with a distressed wood coffee table and linen throw pillows. Cream, oatmeal, and soft gray tones keep the look soft and inviting.

    Actionable tip: vacuum wool rugs weekly with a low-suction setting to avoid pulling fibers loose.

    This style adapts well to Scandinavian and coastal homes too, since both lean on natural textures.

    Now let’s flip to something sleeker for modern lovers.

    6. Choose a Low-Pile Rug for Sleek Modern Spaces

    Living Room Rug Ideas: Weaving Comfort and Style Together
    Credit: Decorilla

    Modern and minimalist living rooms usually look best with low-pile rugs. They keep sightlines clean and don’t compete with sleek furniture lines.

    Stick to solid colors or subtle tonal patterns. Gray, black, and white are safe, but a muted sage or dusty blue can add personality without breaking the minimal vibe.

    Tip: low-pile rugs are also easier to vacuum robot-friendly, which matters if you’ve got a Roomba running daily.

    This idea fits mid-century modern and Scandinavian homes especially well.

    Let’s shift gears now and talk about round rugs, because shape matters too.

    7. Try a Round Rug to Soften a Boxy Room

    Round Rugs: How to Choose the Best for your Home - Sonya Winner Vibrant Contemporary Rugs
    Credit: Sonya Winner RUG

    If your living room feels like a box, a round rug breaks up all those hard angles. It works especially well under a round coffee table or in a reading nook corner.

    Round rugs create a natural focal point. Pair them with curved furniture like an arm chair with rounded edges to keep the softness going throughout the space.

    Practical tip: round rugs should extend at least 6 inches beyond the coffee table’s edge on all sides.

    This works great in eclectic and bohemian homes, where mixing shapes is part of the fun.

    Now, let’s talk budget, because not everyone wants to spend a fortune.

    Rug Budget Tiers Compared

    Budget TierPrice Range (8×10 rug)Material OptionsBest For
    Budget$80–$200Synthetic, polypropyleneRenters, kids, high traffic
    Mid-range$200–$500Wool blend, cottonMost living rooms
    Premium$500–$1,200Pure wool, hand-tuftedLong-term investment pieces
    Luxury$1,200+Hand-knotted wool, silk blendStatement rooms, low traffic

    8. Match a Vintage-Style Rug for Old-World Charm

    Vintage Rugs: How to Spot One and Where to Use It – The Rugs
    Credit: The Rugs

    Vintage and distressed-look rugs add instant character. They look like they’ve been in the family for decades, even if you bought them last week.

    These rugs work great with leather furniture, wood bookshelves, and brass accents. The faded, muted colors keep the room feeling lived-in rather than staged.

    Tip: look for rugs labeled “vintage-inspired” or “distressed” if you want the look without the antique price tag.

    This idea is perfect for traditional, eclectic, and even industrial loft spaces.

    Next, let’s talk about a trick a lot of people skip: rug pads.

    9. Never Skip the Rug Pad Underneath

    Simple Ways to Stop a Rug From Sliding on Carpet
    Credit: Jaipur Rugs

    I know this isn’t glamorous, but a rug pad changes everything. It stops slipping, adds cushion, and actually extends the life of your rug by reducing friction against the floor.

    Get a pad that’s slightly smaller than your rug so it stays hidden. Felt pads work great on hardwood, while rubber-backed pads grip better on tile.

    Actionable tip: replace rug pads every 3-5 years since they flatten out and lose grip over time.

    This applies to literally every design style. There’s no home where skipping a rug pad is a good idea.

    Now let’s get into color again, but this time through a bolder lens.

    10. Anchor a Neutral Room With a Colorful Statement Rug

    33 Living Room Rug Ideas for Every Style
    Credit: Bhg

    If your walls and furniture are all neutral, a colorful rug becomes your room’s personality. Think jewel-toned rugs in emerald, sapphire, or ruby red.

    Keep other accessories simple so the rug stays the star. A few matching throw pillows in one accent color tie everything together without overwhelming the space.

    Tip: pull one color from the rug and repeat it in at least two other spots, like curtains or a vase.

    This trick fits maximalist and eclectic homes especially, though even minimalist spaces can handle one bold rug if everything else stays quiet.

    Let’s move into material comparisons next, since that decision affects everything from cost to cleaning.

    Rug Material Comparison

    MaterialDurabilityFeel UnderfootMaintenancePrice Point
    WoolHighSoft, plushModerate, needs occasional professional cleaningMid to high
    Jute/SisalModerateRough, texturedEasy, spot clean onlyLow to mid
    CottonModerateSoft, flatEasy, machine washable (small sizes)Low
    Synthetic (polypropylene)HighVariesVery easy, stain-resistantLow
    Silk blendLowVery soft, luxuriousDifficult, professional cleaning onlyHigh

    11. Use a Striped Rug to Elongate a Narrow Room

    How to Place a Rug in a Living Room- 2024 Edition - 2Modern
    Credit: 2Modern

    Narrow living rooms feel cramped fast. A striped rug running the length of the room tricks the eye into seeing more space than there actually is.

    Horizontal stripes (relative to the room’s width) widen the look, while stripes running the long way stretch the room visually. Stick to two or three colors max so it doesn’t feel busy.

    Tip: measure your room’s longest wall and orient the stripe direction along it for the best effect.

    This works great in modern and coastal homes, especially with navy and white stripe combos.

    Let’s talk about something totally different next: layering rugs by season.

    12. Swap Rugs Seasonally for a Fresh Feel

    Seasonal Refresh: Updating a Room with Rugs & Accessories | Rugs Direct
    Credit: Rugs Direct

    This one’s a game changer I didn’t expect. Keep a lighter, breezier rug (think jute or light cotton) for spring and summer, then swap in a thicker wool or shag rug for fall and winter.

    It’s like changing your wardrobe, but for your floor. This also extends the life of both rugs since they’re not getting constant wear year-round.

    Tip: store the off-season rug rolled up (not folded) in a cool, dry space to avoid creases.

    This works in basically any home style, though it’s especially popular in homes with four distinct seasons and a love for cozy decor.

    Now, let’s cover something practical: pets and kids.

    13. Choose Stain-Resistant Fibers for Pet-Friendly Homes

    Best Rugs for Homes with Pets | Pet-Friendly Tips | Onlinetapijten
    Credit: Onlinetapijten

    If you’ve got dogs, cats, or toddlers, your rug needs to survive real life. Synthetic fibers like polypropylene or nylon resist stains way better than wool or silk.

    Darker colors and busy patterns also hide dirt and pet hair better than solid light colors. I learned this after my dog tracked mud across a cream-colored rug exactly once.

    Tip: look for rugs specifically labeled “stain-resistant” or “pet-friendly” since manufacturers treat these fibers differently.

    This idea matters most in family-focused homes, but honestly, every household with pets should consider it regardless of style.

    Let’s wrap up the pattern talk with something bold: animal print.

    14. Add an Animal Print Rug for Understated Drama

    58 Tasteful Animal Print Home Decor Ideas - DigsDigs
    Credit: DigsDigs

    A zebra or cowhide print rug adds texture and visual interest without shouting for attention. The pattern is busy enough to hide wear but neutral enough to match almost any color scheme.

    Pair it with leather furniture and warm wood tones for a look that feels collected, not trendy. Avoid pairing it with other bold patterns since animal print already carries visual weight.

    Tip: faux animal print rugs are widely available now and cost significantly less than real hide.

    This idea fits eclectic, industrial, and modern farmhouse homes particularly well.

    Next, let’s talk about a rug trick for open-concept spaces.

    15. Define Zones in Open-Concept Rooms With Multiple Rugs

    How to Combine Area Rugs in an Open Floor Plan
    Credit: Houzz

    Open-concept living rooms that flow into dining or kitchen areas can feel like one giant blob without clear boundaries. Using a separate rug for each zone (living room, dining area) creates visual separation without walls.

    Keep colors and materials complementary, not matching. A jute rug in the dining zone and a plush wool rug in the living zone can coexist if the color palette ties them together.

    Tip: leave at least 3 feet of bare floor between zone rugs so they don’t visually collide.

    This works especially well in modern and transitional open-floor-plan homes.

    Last idea coming up, and it’s one people forget about constantly.

    16. Rotate Your Rug Periodically to Prevent Uneven Fading

    The Reasons You Should Be Rotating Your Rugs | Catalina Rug
    Credit: Catalina Rug

    Sunlight fades rugs unevenly, especially near windows. Rotating your rug 180 degrees every six months keeps the fading even and extends its lifespan significantly.

    This tiny habit costs nothing and takes five minutes. Combine it with light curtains or UV window film if your living room gets strong afternoon sun.

    Tip: mark a small note in your calendar every six months as a rotation reminder.

    This applies universally, no matter your home style or rug material.

    Tips for Success

    • Always measure your seating area before shopping, not after you fall in love with a rug online
    • Buy the rug pad at the same time as the rug so you’re not stuck without one
    • Test rug samples in your actual room lighting, not store lighting
    • Choose fiber based on your household’s real life, not just looks
    • Keep one dominant pattern per room to avoid visual chaos
    • Vacuum in the direction of the pile to keep fibers looking fresh longer
    • Save fabric swatches from your furniture when shopping so you can match tones accurately

    Common Mistakes and How to Avoid Them

    Buying too small
    : Size up. Your rug should reach at least the front legs of your main seating pieces.

    Ignoring rug pads
    : Always add a pad. It prevents slipping and adds years to the rug’s life.

    Matching colors too exactly
    : Complementary tones look more intentional than an exact match to your couch or walls.

    Choosing pile height without thinking about lifestyle
    : High-traffic homes need low-pile, durable materials, not plush shag rugs.

    Forgetting to rotate the rug
    : Set a reminder every six months to prevent uneven sun fading.

    Skipping the “hold it in your room” test
    : Store lighting distorts color. Always bring samples home before committing.

    Similar Variations

    • Boho Layered Rug – mixes multiple patterned rugs with fringe details for a relaxed, collected look
    • Scandinavian Minimalist Rug – solid neutral tones with subtle texture, keeping things clean and calm
    • Coastal Striped Rug – navy and white stripes or jute textures that mimic beach house vibes
    • Industrial Loft Rug – distressed or faux hide rugs paired with metal and exposed brick elements
    • Maximalist Statement Rug – bold colors and clashing patterns layered confidently for visual punch
    • Traditional Persian-Inspired Rug – intricate patterns and rich jewel tones for a classic, formal feel

    Picking the right rug really does change how your whole living room feels, from the color balance to the way furniture sits together. Whether you go bold with pattern or keep things simple with texture, the goal is always the same: make the space feel like yours. I hope these 16 living room rug ideas give you enough inspiration to walk into your next shopping trip with actual confidence instead of guesswork.

  • 17 Terracotta Living Room Ideas That Will Warm Up Your Space Instantly

    17 Terracotta Living Room Ideas That Will Warm Up Your Space Instantly

    If you’ve been searching for the best 17 terracotta living room ideas, you’ve landed in the right spot. I’ve dug through design trends, tested color combos, and pulled together everything you need to make this earthy shade work in your own home.

    Terracotta living room design uses warm, clay-based orange-red tones as the dominant color for walls, furniture, or accents, paired with neutral or earthy complements to create a cozy, sun-baked Mediterranean feel. This look works in almost any home style.

    Stick around because I’m about to show you 17 ways to bring this warm, earthy color into your living room without it feeling like a pumpkin explosion.

    What Exactly Is Terracotta Style, Anyway?

    Terracotta means “baked earth” in Italian, and that’s exactly what this color reminds me of. Think old clay pots, sun-dried bricks, and warm desert sunsets. It’s not quite orange, not quite brown, not quite red. It’s this perfect in-between shade that feels grounded and cozy at the same time.

    I love terracotta because it doesn’t scream for attention like bright orange does. It whispers “come sit down and relax” instead. This color has been used in pottery and architecture for centuries, so it already feels timeless before you even add furniture. Now let’s get into the fun part: actually decorating with it.

    1. Paint One Accent Wall in Deep Terracotta

    How to Decorate with Terracotta: 25 Warm and Stylish Home Ideas | Wisal
    Credit: Wisal

    Painting a single wall in terracotta gives you all the warmth without overwhelming the whole room. Pick the wall behind your sofa or the one you see first when walking in. This creates an instant focal point.

    Keep the other walls in a soft white or warm beige so the terracotta wall really pops. A matte finish works better than glossy here because it makes the color feel more like natural clay.

    Practical tip: Test the paint color at different times of day before committing. Terracotta can look more orange in morning light and more brown in evening light.

    This idea works great in modern minimalist homes since one bold wall keeps things simple but striking. Next, let’s talk about what happens when you skip paint altogether.

    2. Use Terracotta Tiles on the Floor

    10 Ways to Integrate Terracotta Tiles Into Your Home | Houzz AU
    Credit: Houzz

    Skip the paint and go straight to the floor. Terracotta tiles have been a staple in Mediterranean and Spanish-style homes for ages, and they still hold up today. The natural variation in each tile means no two spots look exactly the same, which adds character.

    Pair these floors with white or cream walls to keep the space from feeling too heavy. Add a few darker wood furniture pieces to balance out the warmth.

    Rugs in cream or ivory soften the look and make the room feel cozier underfoot. This style fits perfectly into rustic, farmhouse, or Mediterranean-inspired homes. Now, let’s move to furniture, because that’s where terracotta really gets to shine.

    3. Choose a Terracotta Sofa as the Room’s Anchor

    Modern Terracotta Living Room Ideas: Clay-Inspired Designs
    Credit: Fancy House Design

    A terracotta couch instantly becomes the star of the room. It’s bold but still warm enough to feel inviting rather than shocking. Velvet or boucle fabric in this shade adds texture and makes the color feel richer.

    Surround it with neutral walls, wooden side tables, and simple throw pillows in cream or sage green. This keeps the sofa as the main event without competing colors stealing focus.

    Practical tip: If you’re nervous about committing to a full terracotta sofa, start with a loveseat or accent chair instead.

    This idea adapts beautifully to boho, mid-century modern, and even Scandinavian-inspired rooms. Speaking of chairs, let’s talk about smaller seating pieces next.

    4. Add a Statement Terracotta Accent Chair

    Terracotta Interior Design: How to Master the Look
    Credit: Okanly

    Not ready for a full sofa commitment? A single accent chair in terracotta does the trick. It adds a pop of warmth in a smaller, more manageable way. Leather or woven rattan chairs in this shade look especially good because the texture adds depth.

    Place it near a window or in a reading nook to create a cozy little corner. Pair it with a small side table and a warm-toned lamp for extra ambiance.

    This works in almost every design style, from traditional to industrial, because chairs are easy to swap in and out without a big commitment. Now let’s look at how color pairing can make or break this whole look.

    Terracotta Color Pairing Guide

    Pairing ColorVibe It CreatesBest Used For
    Cream/IvorySoft, warm, airyWalls, curtains, large furniture
    Sage GreenEarthy, calmingThrow pillows, plants, rugs
    Navy BlueBold, grounded contrastAccent chairs, artwork
    Mustard YellowRetro, cheerfulSmall accents, vases
    Charcoal GrayModern, sophisticatedFurniture legs, frames
    Warm WhiteClean, minimalistWalls, trim

    Now that you know which colors play nice with terracotta, let’s talk textiles.

    5. Layer Terracotta Throw Pillows on a Neutral Sofa

    How to Match Cushions to Your Sofa | A2Z QLD Guide
    Credit: A2Z Furniture

    If a full terracotta sofa feels like too much, throw pillows are your easy way in. A few pillows in this shade instantly warm up a beige, gray, or white couch. Mix textures like linen, boucle, and woven cotton to keep things interesting.

    I always tell people to use an odd number of pillows, like three or five, because it looks more natural than an even, matchy set.

    Practical tip: Combine terracotta pillows with one patterned pillow in a complementary earth tone to avoid a flat, one-note look.

    This trick works everywhere, from coastal cottages to city apartments. Let’s move on to something a little bigger: rugs.

    6. Ground the Room with a Terracotta-Toned Rug

    Cosy Washable Shaggy Terracotta – Kukoon Rugs Online
    Credit: Kukon Rugs

    A rug in terracotta or rust tones adds warmth right at your feet. This works especially well if your walls and furniture are neutral, since the rug becomes the pop of color in the room.

    Look for rugs with geometric patterns or vintage-inspired designs, since these tend to hide dirt better and add visual interest without being too busy.

    Wool and jute rugs hold color richly and add texture too. This idea fits boho, Southwestern, and traditional homes especially well. Now, let’s talk about walls again, but with a twist this time.

    7. Try Terracotta Limewash for Textured Walls

    Faux Limewash Paint Hack: How to Get the Look | Apartment Therapy
    Credit: Apartment Therapy

    Limewash paint gives walls a soft, cloudy, old-world texture that flat paint just can’t match. When done in terracotta, it looks like something straight out of a Tuscan villa. The uneven texture catches light differently throughout the day, which adds depth.

    This technique costs more than regular paint and takes more skill to apply, but the payoff is huge if you want a truly artisanal look.

    Practical tip: Hire a professional for limewash unless you’ve practiced on a sample board first, since it’s tricky to get even coverage.

    This style shines in Mediterranean, rustic, and Old World-inspired living rooms. Next, let’s bring some greenery into the mix.

    8. Pair Terracotta with Lots of Green Plants

    41 Terracotta And Green Home Decor Ideas - DigsDigs
    Credit: DigsDigs

    Terracotta and green plants are basically best friends. The warm clay tone makes greenery pop, and the plants bring life and freshness into the room. Think fiddle leaf figs, snake plants, or even simple pothos vines.

    Use actual terracotta pots for the plants too. It’s a small detail, but it ties the whole theme together without feeling forced.

    Practical tip: Group plants in odd-numbered clusters of different heights for a more natural, layered look.

    This combo works in boho, Scandinavian, and modern farmhouse spaces alike. Now let’s talk about something a little more unexpected: ceilings.

    9. Paint the Ceiling in Terracotta for a Cozy Cocoon Effect

    How to Decorate with Terracotta: 25 Warm and Stylish Home Ideas | Wisal
    Credit: Wisal

    Most people never think about painting a ceiling in a bold color, but terracotta up top creates a warm, wrapped-in-a-blanket feeling. This works especially well in rooms with lower ceilings since the color makes the space feel intentional rather than cramped.

    Keep the walls lighter so the ceiling doesn’t make the room feel too dark or small. Add warm lighting fixtures like brass or wood pendant lights to complement the tone.

    This bold move fits eclectic, bohemian, and maximalist design styles best. Now, let’s shift to something smaller but just as impactful: curtains.

    10. Hang Terracotta Curtains for Soft, Warm Light

    Living Room Curtain Ideas: 10 Ways to Transform Your Space
    Credit: Diy Blinds

    Curtains in terracotta linen or cotton let in a warm glow when sunlight passes through them. This softens the whole room and adds color without any permanent commitment like paint or flooring.

    Choose lightweight fabrics for a breezy feel or heavier textured fabrics for a more dramatic, cozy vibe.

    Practical tip: Hang curtains close to the ceiling, not just above the window frame, to make the room feel taller.

    This idea works in nearly every style since curtains are one of the easiest things to switch out later. Let’s now look at how art and accessories can carry this color too.

    11. Display Terracotta Pottery and Vases as Decor

    Styling Your Home with Terracotta Pottery | Jamali Garden
    Credit: Jamali Gardens

    Sometimes the easiest way to bring in this color is through actual terracotta objects. Vases, bowls, and small sculptures in this natural clay tone add warmth without any painting or furniture shopping required.

    Group a few pieces together on a shelf or coffee table for a curated, gallery-style look. Mix in some texture, like a rough unglazed pot next to a smooth glazed vase.

    This is probably the easiest, cheapest way to test if you even like this color scheme before committing to bigger changes. It fits every design style imaginable. Now let’s talk budget, because not everyone wants to spend the same amount.

    Terracotta Decor Budget Tiers

    Budget LevelWhat You Can DoEstimated Cost
    Low ($20-$100)Pillows, small vases, candlesUnder $100
    Medium ($100-$500)Accent chair, rug, curtains$100-$500
    High ($500-$2000)Sofa, wall tiles, limewash paint$500-$2000+
    Splurge ($2000+)Full room renovation, custom furniture$2000 and up

    No matter your budget, there’s a way in. Let’s now talk about lighting, which changes everything about how this color reads in a room.

    12. Use Warm Brass or Gold Lighting Fixtures

    Stylish Green and Gold Living Room Ideas | 42 Design Images
    Credit: Fancy House Design

    Terracotta pairs beautifully with warm metals like brass, gold, and copper. Cool metals like chrome or silver can make the color feel flat or clash with its warmth. Brass floor lamps, gold picture frames, and copper light fixtures all enhance the cozy vibe.

    Practical tip: Swap out any silver or chrome hardware in the room for brass or gold to instantly warm up the whole space.

    This small swap works in traditional, boho, and mid-century modern rooms especially well. Next, let’s talk about a design trick that a lot of people overlook: texture mixing.

    13. Mix Rough and Smooth Textures for Depth

    How to Use Texture in Interior Design to Add Depth and Interest to Your Space
    Credit: Decorilla

    A room that’s all one texture feels flat, even if the color is perfect. Pair a smooth terracotta ceramic vase with a rough woven basket. Add a chunky knit throw next to a sleek leather chair.

    This contrast keeps the eye interested and makes the terracotta color feel more dynamic instead of one-note.

    Practical tip: Aim for at least three different textures in any given vignette, like wood, woven fiber, and ceramic.

    This works in literally every design style since texture variety is a universal design rule, not just a terracotta thing. Now let’s talk about a bolder move: terracotta cabinetry.

    14. Add Terracotta Built-In Shelving or Cabinets

    How to Decorate with Terracotta: 25 Warm and Stylish Home Ideas | Wisal
    Credit: Wisal

    If you have built-in shelving or a media cabinet, painting it terracotta turns a boring functional piece into a design feature. This works especially well in rooms where you want color but don’t want to commit to a full wall or big furniture piece.

    Keep the shelves styled simply with books, small plants, and a few decorative objects so the color of the cabinet itself stays the star.

    This idea fits modern, transitional, and even coastal homes when paired with lighter wood tones. Now, let’s talk flooring one more time, but from a different angle.

    15. Layer a Jute or Sisal Rug Under Terracotta Furniture

    31 Ideas How to Style Your Living Room with Jute Rug
    Credit: DressMyCrib

    Natural fiber rugs like jute and sisal bring an organic, earthy texture that complements terracotta without competing with it. These rugs are neutral enough to sit under bold terracotta furniture without clashing.

    They also add a slightly rougher texture underfoot, which contrasts nicely with smoother terracotta ceramics or velvet furniture pieces in the room.

    Practical tip: Layer a smaller patterned rug on top of a large jute rug for extra depth and visual interest.

    This combo fits boho, coastal, and rustic farmhouse styles particularly well. Let’s move to something a bit more architectural next.

    16. Frame Windows or Doorways with Terracotta Trim

    Modern Terracotta Living Room Ideas: Clay-Inspired Designs
    Credit: Fancy House Design

    Instead of painting a whole wall, try painting just the window or door trim in terracotta. This creates a subtle but noticeable pop of color that frames the architecture of the room.

    It’s a smaller commitment than a full wall and works especially well in rooms with white or cream walls, since the trim stands out just enough without overwhelming things.

    This idea shines in traditional and cottage-style homes where trim work is already a focal point. Now, for our final idea, let’s talk about the ceiling’s cousin: the fireplace.

    17. Highlight a Fireplace with Terracotta Tile or Paint

    Eye-Catching Brick Fireplace Ideas for a Whole New Look
    Credit: Fancy House Design

    A fireplace is already a focal point in most living rooms, so why not lean into that? Covering the surround in terracotta tile or painting the brick in this warm tone makes the fireplace feel intentional and cozy rather than just functional.

    Practical tip: If you have existing red brick, a terracotta-toned paint wash can unify uneven brick coloring while keeping some of that natural texture showing through.

    This works beautifully in rustic, farmhouse, and Mediterranean living rooms where the fireplace is already a design centerpiece.

    Tips for Success

    • Start small with pillows or a vase before committing to paint or big furniture.
    • Balance terracotta with plenty of neutral tones so the room doesn’t feel too heavy.
    • Use natural materials like wood, linen, and clay pottery to reinforce the earthy vibe.
    • Bring in greenery, since plants make terracotta look even richer.
    • Test paint samples on your actual walls at different times of day before buying gallons.
    • Don’t be afraid to mix in one or two contrasting colors like navy or sage to break up the warmth.

    Common Mistakes and How to Avoid Them

    Using too much terracotta at once
    : Balance it with neutrals like cream, white, or light gray so the room doesn’t feel like an orange cave.

    Pairing it with cool-toned metals
    : Stick with brass, gold, or copper hardware and fixtures instead of chrome or silver.

    Skipping texture variety
    : Mix smooth ceramics with rough woven baskets and soft textiles so the room doesn’t feel flat.

    Choosing the wrong lighting
    : Warm white bulbs make terracotta look richer, while cool white bulbs can make it look muddy or gray.

    Ignoring natural light levels
    : Rooms with little sunlight may need lighter terracotta shades so the space doesn’t feel dark or cave-like.

    Similar Variations

    • Desert Boho – Terracotta paired with sandy neutrals, woven textures, and cactus greenery for a Southwestern feel.
    • Coastal Terracotta – Softer, sun-bleached terracotta tones mixed with white sand colors and driftwood accents.
    • Tuscan Warm – Deep terracotta combined with olive green and aged wood for an Italian countryside vibe.
    • Modern Clay – Minimalist terracotta accents against clean white or gray backgrounds for a contemporary look.
    • Rustic Farmhouse Terracotta – Terracotta tile floors paired with shiplap walls and vintage wood furniture.
    • Bohemian Sunset – Layered terracotta tones with mustard, rust, and burnt orange for a maximalist boho feel.

    Terracotta is one of those colors that just makes a room feel like a hug. It’s warm, it’s grounded, and it works with almost any style you already love, whether that’s modern, rustic, boho, or somewhere in between. The key is balance: let terracotta be the star, but give it neutral, textured, and green co-stars to shine alongside.

    Whether you paint one wall, swap in a few pillows, or go all-in on tiled floors, there’s a version of this look that fits your space and your budget. That’s really the beauty of trying out 17 terracotta living room ideas. You get to pick and choose what feels right for you, one small change at a time.

  • 23 1910 Kitchen

    23 1910 Kitchen

    A **23 1910 Kitchen** guide gives you a clear way to blend early-20th-century charm with modern comfort, even if your room is small, busy, or newly built. I’ll walk you through the details that make this look feel authentic without turning your kitchen into a museum.

    The phrase “23 1910 Kitchen” refers to 23 kitchen design ideas inspired by kitchens from around 1910. This style uses simple cabinetry, natural materials, vintage fixtures, practical storage, muted colors, and updated appliances for everyday use.

    You’ll see how to choose colors, cabinets, lighting, hardware, and accessories that feel period-inspired but still work for modern cooking. I’ll also share easy ways to adjust the look for different home styles and budgets.

    Understanding the 1910 Kitchen Style

    When I picture a kitchen from 1910, I do not imagine a polished showroom. I see a hardworking room with painted wood, sturdy counters, open shelves, enamel surfaces, and useful tools close at hand. The design is simple, but it has plenty of character.

    A 1910-inspired kitchen usually includes Shaker-style cabinets, white or cream finishes, beadboard, unlacquered brass, porcelain, wood, and old-fashioned lighting. The goal is not to copy every historic detail. Modern plumbing, refrigeration, dishwashers, and safer materials still matter.

    I like to think of this style as “old house practical.” Each item should earn its place. A decorative choice looks best when it also helps the room feel warm, useful, and lived in.

    1. Choose Creamy White Cabinets Instead of Bright White

    16 Stunning 1910 Kitchen Ideas – Styli Casa
    Credit: StyliCasa

    Creamy white cabinets create the soft, welcoming look often linked with early-1900s kitchens. Pure white can feel sharp and modern, while shades such as antique white, ivory, warm linen, and milk paint feel more settled.

    I would choose a simple Shaker door or a narrow recessed-panel door. Both styles have clean lines without looking too sleek. Pair the cabinets with a pale wood floor, aged brass pulls, or a soapstone-style counter.

    For an easy update, paint only the lower cabinets a warm cream and leave the upper walls lighter. This adds depth without making the room feel busy.

    This idea also works in modern farmhouse, cottage, traditional, and Scandinavian homes. Next, let’s add a cabinet detail that gives the room a stronger historic feeling.

    2. Add Furniture-Style Cabinet Feet

    Old-World And Unexpected Kitchen Cabinet "Trends" That We Are Loving And Leaning Into - Ways to Make A "New" Kitchen More Charming - Emily Henderson
    Credit: emilyhenderson

    Cabinet feet make built-in storage look more like freestanding furniture. This small detail can completely change the mood of a kitchen. Use feet beneath an island, a sink cabinet, or a tall pantry unit.

    Look for turned legs, square bun feet, or simple block feet. Keep the shape modest. Overly ornate legs can make the space feel theatrical instead of authentic. Paint them to match the cabinet or stain them to coordinate with wood shelves.

    A practical tip is to leave a small recessed toe-kick behind the feet. You will still have room to stand comfortably while cooking and cleaning.

    The detail fits traditional, farmhouse, English cottage, and updated vintage kitchens. Once the lower cabinets have character, the backsplash can continue that quiet period look.

    3. Install Small Subway Tile With Dark Grout

    How To Install A Subway Tile Kitchen Backsplash | Young House Love
    Credit; youngHouselove

    Small ceramic tile was a practical wall finish because it was easy to clean and could handle heat and splashes. A 2-by-4-inch or 3-by-6-inch subway tile gives you that classic feeling without looking too formal.

    Choose warm white, soft gray, pale sage, or creamy beige. Bright white tile with very dark grout can look too graphic, so I prefer a medium gray or taupe grout. It hides daily mess while keeping the pattern visible.

    Use a simple running-bond layout rather than a complicated geometric pattern. A narrow tile border behind the range can add interest without covering every wall.

    This backsplash works in traditional, industrial, farmhouse, and coastal kitchens. With the walls set, the next choice is a counter that feels sturdy and honest.

    4. Use Soapstone or a Soapstone Look-Alike Countertop

    Why Soapstone Is Ideal For Kitchen Countertops And Sinks
    Credit: Forbes

    Soapstone has a soft, matte surface that suits a 1910 kitchen beautifully. Its deep charcoal color creates contrast against light cabinets, while its natural texture keeps the room from feeling too polished.

    If real soapstone is outside your budget, consider a matte quartz, honed granite, or soapstone-look porcelain slab. Avoid high-gloss finishes. They tend to push the room toward a newer style.

    Real soapstone can darken over time and may show small scratches. Many homeowners enjoy that aging, but you should know what to expect. Ask your installer about sealing and maintenance before ordering.

    This material works with farmhouse, traditional, industrial, and modern kitchens. Now let’s compare several useful countertop and cabinet pairings.

    Color and Material Pairings for a 1910-Inspired Kitchen

    Cabinet colorCounter materialWall colorBest design effect
    Warm ivoryCharcoal soapstoneSoft whiteClassic contrast
    Pale sageHoned white quartzCreamGentle cottage style
    Natural oakWhite marble-look porcelainWarm beigeLight Scandinavian vintage
    Dusty blueButcher blockAntique whiteCasual coastal character
    Mushroom grayHoned granitePale taupeQuiet traditional mood

    5. Select a Deep Apron-Front Sink

    Deep Sink For The Mudroom | Soapstone sink kitchen, Deep apron front sink, Undermount apron front
    Credit: Pinterest

    A farmhouse sink is one of the strongest visual signals in a 1910-inspired kitchen. Its broad front feels substantial, and the deep basin is useful for large pans, baking trays, and everyday cleanup.

    Fireclay gives you a bright, traditional finish, while porcelain-enameled cast iron offers a heavier vintage feel. Stainless steel can also work if you choose a simple, deep model with minimal decoration.

    Before buying, measure the sink cabinet carefully. Apron sinks often require cabinet changes. I would also choose a high-arc faucet with a simple bridge or gooseneck shape.

    This sink style suits farmhouse, traditional, cottage, and industrial rooms. Once the sink is in place, the faucet can reinforce the period-inspired theme.

    6. Pick a Bridge Faucet With a Hand Sprayer

    PROOX Traditional Kitchen Bridge Faucet Pulldown Sprayer - Bed Bath & Beyond - 37186071
    Credit: BedBath&Beyond

    A bridge faucet has two handles connected by a visible horizontal bar. It looks more traditional than a single smooth mixer, yet many current models include modern pull-out sprayers and ceramic cartridges.

    Choose aged brass, polished nickel, oil-rubbed bronze, or brushed stainless steel. Match the finish to your cabinet hardware, but do not worry if every metal in the room is identical. A little variation can look natural.

    Check the faucet’s reach before installation. The spout should land near the center of the sink, not against the back wall or front edge.

    This choice adapts well to Victorian, farmhouse, English country, and transitional kitchens. Next, we’ll use the walls for storage instead of relying only on closed cabinets.

    7. Install Open Shelves for Everyday Dishes

    How To Style Kitchen Shelving | A Blissful Nest
    Credit: Ablissfulnest

    Open shelving can make a small kitchen feel wider and more relaxed. In a 1910-style room, it also reflects the practical habit of keeping often-used dishes within reach.

    Use thick wood shelves with visible brackets, or install painted shelves that match the cabinets. Display white plates, glass jars, wooden cutting boards, and a few bowls. Keep the collection edited. Too many objects create dust and visual clutter.

    Place shelves near the sink or prep area. Store daily dishes there, and keep less attractive items behind closed doors. I recommend a shelf depth of about 10 to 12 inches for most plates and mugs.

    The idea works in modern, coastal, rustic, and cottage kitchens. With shelves added, we can create a more flexible storage plan around them.

    8. Combine Closed Storage With a Tall Pantry

    Kitchen Storage Ideas: Crafting the Perfect Pantry - KraftMaid
    Credit: Kraftmaid

    Older kitchens often needed smart storage because they had fewer built-in cabinets. A tall pantry cabinet brings that same practical spirit to a current home. It can hold dry goods, small appliances, baking supplies, and serving pieces.

    Choose adjustable shelves so the cabinet can change as your needs change. Pull-out shelves are especially helpful because they let you see items in the back. Use labeled glass jars for flour, rice, pasta, and beans.

    For a period look, use a full-height cabinet with furniture-style trim. If the room is narrow, a shallow pantry near the refrigerator may work better than a deep one.

    This storage plan fits farmhouse, traditional, modern, and apartment kitchens. Here are some useful measurements to check before ordering cabinets.

    Helpful Kitchen Measurements

    FeatureRecommended measurementWhy it matters
    Standard countertop height36 inchesComfortable for most prep work
    Open shelf depth10 to 12 inchesHolds plates without crowding
    Pantry cabinet depth12 to 24 inchesShallow storage improves visibility
    Walkway between counters36 inches minimumAllows safe movement
    Work aisle for two cooks42 to 48 inchesReduces bumping and blocked drawers
    Island seating overhang12 inches minimumGives knees enough room

    9. Add Beadboard to the Walls or Island

    Kitchen Island with Beadboard
    Credit: pinterest

    Beadboard adds fine vertical lines and a gentle layer of texture. It feels at home in historic houses, but it can also make a plain island look more finished.

    Use moisture-resistant paneling near sinks and cooking areas. Paint it warm white, pale gray, muted blue, or soft green. You can install it from floor to ceiling, below a chair rail, or only on the island sides.

    I like beadboard on the back of an island because it adds detail without taking up counter space. Seal the lower edge carefully so water cannot reach the paneling.

    This treatment works in coastal, farmhouse, cottage, traditional, and casual modern rooms. Next, let’s give the floor a foundation that feels both old-fashioned and durable.

    10. Choose Wide-Plank Wood or Checkerboard Flooring

    How to choose a checkerboard floor for your home | Harvey Maria
    Credit: harveymaria

    Flooring sets the mood before anyone notices the cabinets. Wide-plank oak, painted wood, brick, slate, and checkerboard tile all suit a 1910-inspired kitchen.

    For wood, choose a matte finish and visible grain. Medium oak or honey brown feels warm without becoming too rustic. For tile, black and white squares are classic, while cream and muted gray create a softer version.

    Make sure the material can handle water and heavy use. Porcelain tile is often easier to maintain than real stone. If you love wood but need durability, consider quality wood-look porcelain planks.

    This idea adapts to farmhouse, industrial, traditional, and contemporary homes. With a strong floor in place, lighting can make the room feel warmer at night.

    11. Hang Schoolhouse Pendant Lights

    Schoolhouse 101: Hanging Pendants & Chandeliers
    Credit: schoolhouse

    Schoolhouse lights have rounded glass shades and simple metal fittings. They echo the practical fixtures found in older public buildings and homes without making the kitchen look outdated.

    Use one large pendant over a sink or two smaller pendants over an island. Opal glass gives off a soft glow and hides the bulb. Choose aged brass, bronze, black, or nickel based on the other finishes in the room.

    Hang island pendants so the bottom sits about 30 to 36 inches above the countertop. Use dimmers to shift from bright cooking light to a softer evening mood.

    The style works with vintage, farmhouse, industrial, and transitional kitchens. Now we can add a second lighting layer that helps with detailed work.

    12. Build a Layered Lighting Plan

    How I created balanced, layered lighting in my open plan kitchen and dining space | Ideal Home
    Credit: Idealhome

    A single ceiling fixture rarely gives a kitchen enough light. I would use three layers: ambient lighting for the whole room, task lighting for counters, and accent lighting for shelves or display areas.

    Install warm LED bulbs around 2700K to 3000K. Under-cabinet strips should sit near the front edge of the cabinet so the counter does not remain shadowed. Small picture lights can highlight art or open shelving.

    Keep switches separate. You may want bright task lighting while cooking but only a few accent lights during dinner.

    This plan suits every kitchen style because it improves function first. The following color combinations can help you coordinate the room without guessing.

    Paint and Accent Color Guide

    Main colorSupporting colorMetal finishMood
    Warm whiteDusty blueAged brassCalm and classic
    CreamOlive greenPolished nickelEnglish cottage
    Pale grayWalnut brownMatte blackSimple and grounded
    Soft sageNatural oakUnlacquered brassFresh vintage
    Butter yellowCharcoal grayBronzeCheerful and warm

    13. Use Unlacquered Brass Hardware

    Unlacquered Brass Hardware | Julie Blanner
    Credit: julieblanner

    Unlacquered brass changes naturally with age. It may become darker near handles and brighter where it is touched often. That living finish makes a new kitchen feel less perfect and more established.

    Choose cup pulls for drawers, small knobs for doors, or bin pulls for a stronger furniture look. Measure existing holes before replacing hardware. If your cabinets have no holes, use a template so every pull lines up neatly.

    Do not use brass on every item. A brass faucet and cabinet pulls may be enough. You can keep appliances in stainless steel or use bronze on a light fixture.

    This finish works in traditional, modern farmhouse, eclectic, and coastal rooms. Once the hardware feels right, textiles can soften the harder surfaces.

    14. Lay Down a Washable Vintage-Style Runner

    Vintage Rug Runners in The Kitchen are So NOW...My Favorite Sources | Classic Casual Home
    Credit: classiccasualhome

    A runner adds comfort underfoot and brings pattern into a kitchen without permanent changes. Look for faded floral designs, small geometric motifs, or muted Persian-inspired patterns.

    Choose a washable rug with a low pile. It should sit flat and have a non-slip pad underneath. Place it along the sink or prep counter, where you stand for long periods.

    Colors such as rust, faded blue, tan, olive, and cream connect well with 1910-inspired materials. Avoid a rug that exactly matches the curtains or towels. Coordinated colors look more natural than a perfect set.

    This works in rustic, bohemian, traditional, and modern kitchens. Next, we’ll make the counter itself feel more useful and visually interesting.

    15. Display Wood Cutting Boards and Ceramic Crocks

    Rustic Antique French Cutting Boards
    Credit; chezpluie

    A few practical objects can act as decoration. Lean wooden cutting boards against the backsplash. Add a ceramic crock for utensils, a stoneware bowl for fruit, or a small tray for oils and salt.

    Choose pieces with different heights and textures. A worn board, smooth crock, and clear glass jar create more interest than three matching accessories. Keep them close to where you use them.

    Use food-safe finishes on cutting boards, and avoid placing wood directly beside a wet sink where it may swell. Rotate decorative pieces so the counter does not become crowded.

    This approach suits farmhouse, cottage, rustic, and contemporary kitchens. With functional objects on display, the room can now benefit from one carefully chosen vintage feature.

    16. Add a Vintage-Style Range or Appliance Paneling

    The Essential Guide to Kitchen Design for Vintage Homes
    Credit; Arciform

    A range with rounded edges, analog-style controls, or a colored enamel finish can become the room’s focal point. You do not need a fully antique appliance. Modern ranges often offer the same visual cues with safer and more efficient performance.

    If a retro range is not practical, panel the refrigerator and dishwasher to match the cabinets. This keeps large appliances from dominating the room. Another option is a stainless range paired with vintage hardware and lighting.

    Measure carefully around doors, ventilation, and clearance zones. Decorative appeal should never interfere with safe installation.

    This idea works in retro, traditional, farmhouse, and modern vintage kitchens. The cost of these choices can vary widely, so the next table gives a starting framework.

    Budget Planning for a 1910-Inspired Kitchen

    Project levelTypical focusGood choices
    Small refreshHardware, paint, textilesCabinet paint, runner, brass knobs
    Moderate updateBacksplash and lightingSubway tile, schoolhouse pendants
    Functional remodelSink, counters, storageFarmhouse sink, pantry, soapstone-look quartz
    Full renovationLayout and all finishesCustom cabinets, new flooring, vintage-style range
    Premium detailSpecialty craftsmanshipReal soapstone, handmade tile, custom millwork

    17. Create a Dedicated Baking Center

    How to Create a Dedicated Baking Station
    Credit: Houzz

    Baking was a common kitchen task, and a small baking center can make the room feel especially useful. Set aside one cabinet for flour, sugar, spices, rolling pins, and measuring tools.

    A lower counter section can be slightly shorter if that feels comfortable for rolling dough. Add deep drawers for mixing bowls and baking pans. Open shelves above can hold cake stands and clear ingredient jars.

    Keep the area away from the main cleanup zone if possible. That way, another person can wash dishes while you work.

    This feature suits farmhouse, traditional, cottage, and family kitchens. Once the work zones are clear, a small seating area can make the kitchen more social.

    18. Add a Small Breakfast Table or Built-In Bench

    Banquette Built-In Benches Add Smart Kitchen Seating | Apartment Therapy
    Credit: ApartmentTherapy

    Not every kitchen needs a large island. A round breakfast table or built-in bench can provide a better place for coffee, homework, and casual meals.

    Choose a painted pedestal table, a simple oak table, or a narrow drop-leaf design. Pair it with Windsor chairs, ladder-back chairs, or a cushioned bench in washable fabric.

    Keep at least 36 inches around the table where people need to walk. In a narrow kitchen, a wall-mounted drop-leaf table can give you seating without blocking the room.

    This idea works in cottage, traditional, Scandinavian, and small-space kitchens. Now let’s bring in a little personality through the walls.

    19. Hang Simple Botanical or Food-Themed Art

    Fruit Print, Kitchen Wall Art Decor, Botanical Illustration Art, Orange Picture, Large Wall Art - Etsy
    Credit: Pinterest

    Art keeps a vintage-inspired kitchen from feeling like a collection of finishes. Try botanical prints, fruit studies, old-style seed illustrations, or hand-painted signs with simple wording.

    Use wood, brass, or painted frames. A small gallery near the breakfast table can feel personal, while one large print above a pantry cabinet makes a stronger statement.

    Keep artwork away from direct steam and splattering oil. Use glass that can be wiped clean, and avoid hanging valuable originals near the range.

    This works with cottage, traditional, eclectic, and modern kitchens. With the walls decorated, let’s look at a classic feature that adds both beauty and storage.

    20. Include a Plate Rack or Dish Display Cabinet

    This charming 19th-century Provincial kitchen hutch features a classic plate rack design framed by rustic wooden bars, great for displaying and organizing plates. Functional and decorative, with a whole lot of French
    Credit; instagram

    A plate rack gives dishes a visible home and adds strong period character. It can be built into upper cabinetry, placed above a counter, or added as a freestanding hutch.

    Use it for plates you actually reach for. White dishes, blue-rimmed pottery, and handmade stoneware all look good here. Make sure the rack is securely mounted and that the shelves can support the weight.

    If open display feels too exposed, choose a glass-front cabinet instead. It offers a similar effect with less dust. Add small lights inside if the cabinet sits in a darker corner.

    This feature suits English country, farmhouse, traditional, and vintage kitchens. The next material guide can help you choose finishes that look right together.

    Material Comparison for Key Kitchen Features

    FeaturePeriod-friendly materialMaintenance levelModern alternative
    SinkFireclayMediumStainless farmhouse sink
    CounterSoapstoneMediumHoned quartz
    FloorPainted woodMedium-highPorcelain wood-look tile
    ShelvesOak or pineLow-mediumStained hardwood veneer
    HardwareUnlacquered brassLow-mediumAged brass with protective finish
    BacksplashCeramic subway tileLowPorcelain subway tile

    21. Use Glass Storage Jars and Labelled Canisters

    How to organize glass food storage containers in the kitchen? – Pearl Jars
    Credit: PearlJars

    Clear jars bring order to a pantry while adding a simple old-fashioned detail. Store flour, oats, beans, pasta, tea, and baking ingredients in matching or loosely coordinated containers.

    Choose wide-mouth jars that are easy to clean. Add plain labels in black lettering, or leave some containers unmarked if you prefer a relaxed look. Keep the heaviest jars on lower shelves.

    Do not store food in decorative containers unless they have airtight lids. Moisture and pests can ruin dry goods quickly.

    This idea works in minimalist, farmhouse, cottage, and industrial kitchens. With storage looking tidy, we can finish the room with a natural touch.

    22. Bring in Herbs and Useful Greenery

    Traditional Kitchen with Hanging Herbs and Rustic Wooden Table Showcasing Preserved Jars and Fresh Greenery in a Warm Stock Image - Image of preparation, spices: 399777001
    Credit: Dreamstime

    Potted herbs add color, scent, and everyday function. Basil, thyme, rosemary, mint, and parsley can sit near a bright window or on a small shelf.

    Use terracotta pots, white ceramic planters, or old metal containers with drainage protection. Place a tray underneath to catch water. Rotate plants if the window receives harsh afternoon sun.

    If natural light is weak, choose low-light plants such as pothos or snake plants for decoration, and grow herbs elsewhere. Do not place greenery beside a hot range where leaves may dry out.

    This detail fits coastal, rustic, modern, and traditional kitchens. Finally, we can make the room feel truly lived in with one well-chosen vintage accent.

    23. Add One Authentic Vintage Focal Point

    1910s Kitchen Design Inspiration - Fine Homebuilding
    Credit; Finehomebuilding

    A single genuine vintage item can give the kitchen more soul than a room filled with reproduction pieces. Try an old wooden stool, a bread box, a wall clock, a metal sign, or a small enamel basin.

    Choose something useful or easy to move. Check wood for pests, metal for unsafe rust, and old paint for possible lead before bringing a piece indoors. Clean gently rather than stripping away every mark.

    Place the focal point where it can be seen but will not interrupt work. A vintage stool beside the island or a bread box on an open shelf can be enough.

    This approach adapts to modern, farmhouse, eclectic, and traditional homes. One meaningful object often does more than a dozen random accessories.

    Tips for Success

    • Start with the kitchen’s layout before shopping for decorative pieces.
    • Choose two main finishes and one accent finish to keep the room connected.
    • Use warm bulbs so cream paint and wood do not look cold at night.
    • Measure cabinet openings, sink bases, appliance gaps, and walkways twice.
    • Mix old-looking details with modern safety features and efficient appliances.
    • Keep open shelves partly empty so the room feels calm instead of crowded.
    • Order samples of paint, tile, counters, and flooring before making final decisions.

    Common Mistakes and How to Avoid Them

    Making every item look antique
    Use modern appliances and current plumbing where needed. Add vintage character through hardware, lighting, color, and one or two meaningful accents.

    Choosing bright white with cold gray everywhere
    Balance cool surfaces with cream paint, warm wood, aged metal, or soft beige textiles.

    Installing open shelves without a storage plan
    Decide what will live on each shelf first. Keep daily dishes there and store clutter behind doors.

    Ignoring lighting layers
    Add under-cabinet task lighting and dimmable fixtures. A beautiful kitchen still fails if food prep areas remain dark.

    Using delicate materials in high-splash areas
    Choose sealed wood, durable tile, or engineered surfaces near sinks and ranges. Save fragile décor for safer locations.

    Crowding the room with period details
    Leave visual breathing room. A few strong details usually feel more believable than a full theme set.

    Similar Variations

    • Modern 1910 Kitchen: Keeps the warm colors and simple cabinets but uses sleek appliances and cleaner lines.
    • English Cottage Kitchen: Adds floral fabrics, painted furniture, stoneware, and soft green or blue cabinets.
    • Farmhouse Vintage Kitchen: Focuses on apron sinks, wide-plank floors, wood accents, and practical open storage.
    • Coastal Heritage Kitchen: Uses creamy white, faded blue, beadboard, natural wood, and polished nickel.
    • Industrial Historic Kitchen: Combines vintage lighting and subway tile with steel shelves, dark counters, and exposed texture.
    • Scandinavian Vintage Kitchen: Uses pale wood, simple cabinetry, soft neutrals, and fewer decorative objects.

    A successful 1910-inspired kitchen is not about copying an old room piece by piece. I find the best results come from combining practical storage, durable materials, warm lighting, and a few details that show the home’s personality.

    Start with the elements you touch every day, such as cabinets, counters, sinks, and lighting. Then add the charm through hardware, textiles, art, and vintage accents. That balance is what makes a 23 1910 Kitchen feel both timeless and ready for real life.

  • 21 Marble Kitchen Ideas for a Timeless, Welcoming Home

    21 Marble Kitchen Ideas for a Timeless, Welcoming Home

    A 21 Marble Kitchen can look polished, warm, and practical when the stone, cabinets, lighting, and daily habits work together. I’ll walk you through the best design choices so you can create a kitchen that feels beautiful without becoming hard to live with.

    A marble kitchen uses natural or engineered marble-look surfaces on counters, islands, backsplashes, or walls. The best designs balance veining, cabinet color, lighting, storage, and maintenance needs for a durable, comfortable cooking space.

    You’ll find ideas for every mood, from bright coastal kitchens to moody traditional rooms. I’ll also share sizing tips, material comparisons, and easy ways to avoid common design mistakes.

    What Makes a Marble Kitchen Work?

    Marble adds movement, texture, and a soft natural glow to a kitchen. Unlike a flat printed surface, real marble has veining that changes across each slab. That variation gives the room character.

    I like marble most when it is not used everywhere. A marble island can be the star while simple cabinets keep the space calm. Or a marble backsplash can create a rich backdrop behind open shelves. The key is balance.

    You also need to think about real life. Marble can scratch, stain, and etch if it is ignored. That does not make it a bad choice. It simply means you should select the right finish, seal the stone, and accept a little natural aging. If you want less upkeep, quartz with a marble pattern may be a better fit.

    1. Build Around a Soft White Marble Island

    Luxury White Marble Kitchen with Waterfall Island, Chevron Wood Flooring, and Glass Cabinets | MAS Collection
    Credit: mascollection

    A white marble island gives the kitchen an instant focal point. Look for slabs with gray, taupe, or pale gold veining rather than a completely blank surface. The subtle movement keeps the island from feeling cold.

    Pair the stone with warm white, light oak, or mushroom-colored cabinets. Add counter stools with woven seats or curved backs to soften the hard surface. For a practical touch, include deep drawers for pots and a small overhang for casual meals.

    Before buying, tape the island’s planned size on the floor. Walk around it with cabinet doors open. I recommend at least 42 inches between the island and surrounding counters for a comfortable work path.

    This idea suits modern, transitional, farmhouse, and coastal homes. Once the island is planned, the next choice is the cabinet color that supports it.

    2. Pair Marble With Natural Wood Cabinets

    Top 20+ Kitchen Countertop Ideas With Oak Cabinets | Marble Systems
    Credit: marblesystems

    Wood cabinets make marble feel warmer and more relaxed. White oak, walnut, ash, and medium-toned maple all work well, but each creates a different mood. Oak feels casual and airy, while walnut looks deeper and more refined.

    For a balanced room, use wood on the lower cabinets and creamy painted cabinets above. You can also choose wood for the full kitchen and let the marble backsplash provide the lighter contrast.

    Keep the hardware simple. Brushed brass adds warmth, while black pulls create a sharper look. A useful tip is to bring a cabinet sample, flooring sample, and marble sample together in the same room before deciding. Wood can look very different in morning and evening light.

    This combination works in Scandinavian, organic modern, rustic, and traditional kitchens. With the cabinet foundation in place, you can decide how much marble the room really needs.

    3. Use a Full-Height Marble Backsplash

    Full-Height Backsplashes are Trending - Marble Granite World
    Credit: marblegraniteworld

    A full-height marble backsplash runs from the counter to the upper cabinets, range hood, or ceiling. It creates a clean visual field and lets the natural veining act like artwork.

    This is especially effective behind a range. Bookmatched slabs, where two pieces mirror each other, can create a dramatic center point. If that feels too bold, use a quieter marble behind the range and a simpler tile on the side walls.

    Ask your fabricator to plan seams carefully. Veining should flow in a way that feels intentional. Also, confirm that outlets can be placed neatly before installation.

    Full-height stone works beautifully in modern, classic, Mediterranean, and contemporary kitchens. After making one wall special, the next idea helps you use marble in smaller, more affordable ways.

    4. Add a Marble-Look Countertop for Lower Maintenance

    16 Beautiful Marble Kitchen Countertops
    Credit; TheSpruce

    If you love marble’s appearance but worry about stains, consider quartz or porcelain with a marble pattern. These materials can mimic white marble, gray marble, or dramatic Calacatta-style veining without requiring the same level of care.

    Use the material on the main counters and reserve real marble for a small pastry area or serving ledge. This gives you the natural stone detail without placing it in every high-use zone.

    Always request a large sample. Small samples often hide how strong the printed pattern will look across a full slab. Check the edge profile, too. A simple eased edge usually looks more natural than a thick, heavily shaped edge.

    This approach fits busy family homes, modern apartments, rental upgrades, and traditional kitchens. Now let’s compare common materials before moving into more decorative ideas.

    Countertop Material Comparison

    MaterialBest featureMaintenanceTypical visual effectGood placement
    Honed marbleSoft, natural finishSeal regularly; wipe spills quicklyMatte and relaxedIsland, baking area
    Polished marbleReflective, elegant surfaceSeal regularly; shows etching moreFormal and brightLow-use island
    QuartzConsistent marble lookLow maintenanceClean and uniformMain counters
    Porcelain slabHeat and stain resistanceLow maintenance; edges need careModern and crispBacksplash or counters
    GraniteStrong natural surfaceSeal as neededMore varied and boldBusy work zones
    SoapstoneHeat resistant and forgivingOil or leave naturalDeep and earthyFarmhouse or vintage kitchen

    5. Choose Honed Marble for a Softer Finish

    HONED VS POLISHED MARBLE COUNTERTOPS
    Credit: cectops

    Polished marble shines under light, but honed marble has a smooth matte finish. I often prefer it in kitchens that should feel relaxed rather than formal. The low sheen also hides small scratches and fingerprints better.

    Honed stone pairs well with shaker cabinets, unlacquered brass, aged bronze, and natural wood. It can make a white kitchen feel less glossy and more lived-in.

    The tradeoff is that honed marble can absorb liquids more easily, depending on the stone. Have it sealed correctly, and keep a soft cloth nearby for coffee, wine, tomato sauce, and citrus.

    Use honed marble in farmhouse, quiet luxury, cottage, and rustic interiors. Once the surface finish is chosen, lighting can shape how the stone looks throughout the day.

    6. Install Layered Lighting Over the Marble

    The Evolution of Layered Lighting: Designing the Fully Illuminated Kitchen with Häfele Lighting - Kitchen & Bath Design News
    Credit: Kitchen&bathdesignnews

    Marble changes appearance under different light. Warm bulbs can bring out beige and gold veins, while cooler bulbs emphasize blue and gray tones. A good lighting plan should include more than one source.

    Use pendant lights over the island, under-cabinet lights along the backsplash, and ceiling fixtures for general brightness. Wall sconces can add charm beside a window or open shelf.

    Choose bulbs around 2700K to 3000K for a warm, comfortable kitchen. Under-cabinet strips should sit near the front edge of the cabinet so they wash the counter instead of creating shadows.

    This lighting plan adapts to contemporary, traditional, industrial, and coastal homes. With the marble glowing properly, you can add contrast through the hardware.

    7. Mix Warm Metal Hardware With Cool Veining

    A Simple Guide to Mixing Metals in the Kitchen – jane at home
    Credit; janeathome

    Gray-veined marble can feel cool, especially beside white cabinets. Warm hardware brings back balance. Brass, bronze, copper, and champagne finishes all add a gentle glow.

    You do not need every metal to match perfectly. I like one main finish for cabinet pulls and a second finish for lighting or the faucet. Keep the shapes related so the room still feels organized.

    For a classic look, try polished nickel with gray marble. For warmth, use aged brass with creamy stone. Matte black creates a graphic contrast and works well with modern or industrial details.

    Order one sample pull and test it against the slab in natural light. This small step prevents expensive surprises. Next, we’ll use color to make the marble feel even more connected to the room.

    8. Add a Muted Color Around White Marble

    Trending Kitchen Marble Color Combinations with a White Countertop A white countertop is timeless but the right marble pairing is what makes your kitchen feel truly elevated. From soft beige warmth to
    Credit: Instagram

    White marble does not require an all-white kitchen. Muted green, clay, blue-gray, taupe, and dusty blue can make the stone feel more personal.

    Choose paint based on the marble’s undertone. A cool gray vein usually works with blue-gray or soft green. Warm beige veins pair better with cream, mushroom, terracotta, or olive.

    Try the paint on a large board and place it beside the slab. Watch it from morning to night. I also recommend repeating the color in small pieces, such as a runner, pottery, artwork, or seat cushions.

    This color strategy suits cottage, English country, coastal, modern, and Mediterranean kitchens. The table below can help you narrow down a palette before you shop.

    Marble Kitchen Color Pairings

    Marble appearanceCabinet colorHardwareAccent color
    Bright white with gray veinsSoft whiteBrushed nickelBlue-gray
    Cream with gold veinsWarm ivoryAged brassOlive green
    White with taupe veinsMushroomBronzeTerracotta
    Dark gray with white veinsNatural oakMatte blackRust or camel
    Green marbleLight beigeAntique brassDusty rose
    Black marble with pale veinsCharcoal or walnutSatin brassCream

    9. Frame the Range With a Statement Hood

    The marble window trim in this kitchen got a lot of love last week, but we can't forget about the range hood! The hood and wall behind it are plaster and we
    Credit: instagram

    A large hood can give a marble kitchen a strong architectural center. Instead of choosing a hood that competes with the stone, use one that supports it.

    A plaster hood feels soft and Mediterranean. A wood hood works with natural cabinets. A simple metal hood suits an industrial or modern room. You can also use marble trim beneath or around the hood for a custom look.

    Make sure the hood is sized for the range and installed at the correct height according to the manufacturer. A beautiful hood that does not remove cooking odors is not a successful design.

    Keep the surrounding shelves or cabinets quieter. This lets the marble backsplash and hood read as one composition. From there, open storage can add the casual detail the room needs.

    10. Style Open Shelves With Useful Objects

    How to style open shelving in a kitchen - 8 tips from design pros | Ideal Home
    Credit: Idealhome

    Open shelves keep a marble backsplash visible while giving you a place for everyday items. Use them for bowls, mugs, cutting boards, cookbooks, and small plants.

    I suggest limiting each shelf to a few groups. Stack plates, lean two boards together, and add one ceramic vase or small piece of art. Leave empty space between groups so the wall does not look crowded.

    Choose shelf material that connects to the room. White oak warms pale marble. Dark walnut adds contrast. Brass brackets can repeat the cabinet hardware.

    Install shelves where items are easy to reach and not directly above a messy cooking zone. This idea works in farmhouse, Scandinavian, coastal, and modern kitchens. Next, we’ll make the floor support the stone instead of distracting from it.

    11. Ground the Room With a Warm Floor

    Marble Flooring: Pros, Cons, Types & Bathroom Guide
    Credit: Rubi

    A warm floor helps prevent marble from making the kitchen feel too cool. Wood, wood-look porcelain, cork, terracotta tile, and warm limestone are strong choices.

    If you already have dark flooring, balance it with lighter cabinets and a pale runner. If the floor is light, deeper wood or patterned tile can add definition beneath a white marble island.

    Consider slip resistance, cleaning needs, and traffic before choosing. Kitchens collect water and crumbs, so very smooth floors may not be the safest option.

    Bring a flooring sample next to the marble and cabinet samples. You want the undertones to relate, not match exactly. This strategy works in rustic, coastal, modern, and traditional rooms. With the floor settled, seating becomes the next chance to add texture.

    12. Select Comfortable Counter Stools

    13 Best Kitchen Bar Stools with Backs 2026: Small Kitchen Seating | The Kitchn
    Credit: TheKitchn

    Counter stools are both furniture and decoration. Their shape can soften a marble island, especially when the counters and cabinets have straight lines.

    For a warm kitchen, try woven rattan, saddle leather, upholstered linen, or curved wood. For a modern kitchen, choose molded seats or slim metal frames. Leave enough knee space beneath the overhang, and avoid stools so large that they block the walkway.

    As a general guide, allow about 24 inches of island width per stool. Seat height should also match the counter. Counter stools are usually around 24 to 26 inches high, while bar stools are taller.

    This idea adapts to coastal, mid-century, farmhouse, and contemporary styles. The next table gives a quick way to plan seating and island proportions.

    Island Seating and Clearance Guide

    Counter heightRecommended seat heightWidth per personComfortable aisle
    36 inches24 to 26 inches24 inches42 inches
    38 inches26 to 28 inches24 to 26 inches42 to 48 inches
    42 inches28 to 30 inches24 to 26 inches48 inches
    Dining-height extension17 to 19 inches24 inches36 to 42 inches

    13. Create a Small Coffee or Baking Station

    How to Create a Dedicated Baking Station
    Credit: Houzz

    A marble kitchen becomes more useful when one area is designed around a daily habit. A coffee station, baking counter, smoothie bar, or beverage nook gives the room a clear purpose.

    Use a short section of marble for this zone. Add a shelf for mugs, a drawer for filters, and an outlet positioned behind the appliance. If you bake often, choose a lower counter height or keep a pullout board nearby.

    Place the station away from the main cooking triangle if possible. This prevents people making coffee from crossing paths with someone preparing dinner.

    A small station works in apartments, large family kitchens, cottage homes, and open-plan spaces. Once function is handled, a carefully chosen backsplash pattern can bring more personality.

    14. Mix Marble With Handmade Tile

    12 Simple Kitchen Marble Design Ideas with Elegant Tiles | Simpolo
    Credit: simpolo

    Marble does not have to be paired with plain subway tile. Handmade ceramic tile adds gentle variation and a more personal feel.

    Use marble on the counter and a small section of handmade tile behind open shelves. Or install marble behind the range and tile on the side walls. Keep one material quieter so the two surfaces do not fight.

    Soft white, pale sage, dusty blue, and sand-colored tiles work well with many marble slabs. Pay attention to grout. A matching grout creates a calm surface, while contrasting grout highlights the pattern.

    Order samples before installation because handmade tile can vary in size, color, and edge shape. This combination fits cottage, Mediterranean, eclectic, and traditional kitchens. Now let’s look at ways to add drama without covering every surface.

    15. Use Dark Marble as a Focused Accent

    10 Spectacular Marble Kitchens That Have the Wow-Factor | Livingetc
    Credit: Livingetc

    Dark marble can make a kitchen feel rich and grounded. Black, charcoal, deep green, and brown stones look especially striking on an island, coffee bar, or backsplash.

    To keep the room from becoming heavy, pair dark marble with light walls, pale oak, creamy cabinets, or warm lighting. Use a honed finish if you want a softer, less reflective mood.

    Dark stone can show dust and mineral marks, so choose placement carefully. A dramatic island may need more frequent wiping than a pale countertop. Ask about sealing and cleaning before committing.

    This look works in modern, art deco, moody traditional, and industrial homes. With one bold surface selected, the remaining details can stay simple and intentional.

    Marble Placement Budget Guide

    Project scopeMain material amountVisual impactBest use
    Small remnant10 to 25 square feetFocused accentShelf, bar, baking area
    Island slab30 to 55 square feetStrong centerpieceIsland countertop
    Counter and short backsplash50 to 80 square feetCohesive updateMedium kitchen
    Full backsplash40 to 100 square feetArchitectural statementRange wall
    Full kitchen package100+ square feetHigh visual impactNew construction or major remodel

    16. Let the Veining Guide the Layout

    Marble Kitchen Islands: Waterfall Edges & Cost Guide MA
    Credit: graniteguy

    Treat marble veining like a design line. It can point toward the range, run along the island, or draw attention to a sink wall.

    Before fabrication, mark the slab layout on paper or use templates. Make sure the most attractive section appears in the area you see most often. Avoid placing a major seam through the center of a busy sink or cooktop if another option is available.

    Bookmatching is dramatic, but it can cost more and requires careful installation. A simpler vein-matched seam may provide a cleaner result.

    This planning method suits luxury, traditional, modern, and minimalist kitchens. Once the slabs are positioned, practical sink and faucet choices can complete the work zone.

    17. Pair the Stone With a Deep, Practical Sink

    How to Pair a Sink with Your Kitchen Countertops - Allied Gallery
    Credit: alliedgallery

    A marble countertop looks best when the sink area is useful and well planned. Undermount sinks create a clean line and make crumbs easy to sweep into the basin. Fireclay sinks bring farmhouse charm, while stainless steel feels modern and forgiving.

    Choose a single large bowl if you wash oversized pans. Select a divided sink if you prefer separate washing and rinsing areas. A low-profile faucet in brass, chrome, black, or bronze can connect the sink to the rest of the room.

    Ask the installer to reinforce the counter around the sink opening. Wipe standing water from the marble edge, especially near seams.

    This idea adapts to farmhouse, contemporary, coastal, and classic kitchens. The sink is practical, but the final layer of texture comes from the objects placed around it.

    18. Bring in Textiles and Natural Texture

    23 Stunning Ideas with White Marble for Kitchen - Worktop Library
    Credit: worktoplibrary

    Stone, metal, and cabinetry need soft materials nearby. A washable runner, linen cafe curtain, woven basket, leather stool, or cotton tea towel can make the kitchen feel comfortable.

    Choose textile colors from the marble’s veining. A taupe runner can connect to beige lines, while a blue-gray towel can echo cooler markings. Avoid using too many patterns in a small room.

    Use flat-weave rugs in busy kitchens because they are easier to clean and less likely to catch underfoot. Place a rug where it will not interfere with cabinet doors or the dishwasher.

    Texture works across boho, coastal, farmhouse, traditional, and modern styles. Next, we’ll use art and accessories to make the kitchen feel like part of the home.

    19. Add Art That Relates to the Marble

    10 Spectacular Marble Kitchens That Have the Wow-Factor | Livingetc
    Credit: livingetc

    Kitchen art does not need to show food or flowers. A small landscape, abstract print, vintage poster, or framed textile can add color and personality.

    Choose art that repeats one quiet tone from the room. If the marble has green veins, a muted landscape may connect naturally. If the kitchen is mostly cream and brass, try a charcoal sketch or warm still life.

    Keep art away from direct heat, steam, and splashing. A wall beside the pantry or dining area is often safer than the space above the range.

    Use simple frames in wood, brass, black, or painted finishes. This approach fits eclectic, traditional, Scandinavian, and contemporary homes. With the walls finished, a few living details can bring the room to life.

    20. Use Plants and Fresh Produce as Decor

    Kitchen plant ideas – the best houseplants and how to style them in a kitchen | Ideal Home
    Credit; idealhome

    Greenery adds life to a marble kitchen without requiring a major remodel. A potted herb near a bright window, a trailing plant on a shelf, or a bowl of lemons can soften the stone.

    Pick plants that suit the available light. Herbs need strong light and regular trimming. Snake plants and pothos are more forgiving in less sunny spots, though all plants need proper care.

    Use trays beneath pots to protect the counter from moisture. Keep plants away from the stove, where heat and grease can damage leaves.

    This idea works in urban, farmhouse, coastal, Mediterranean, and organic modern kitchens. The final idea brings all the surfaces together with a thoughtful visual rhythm.

    Easy Marble Kitchen Care Guide

    TaskRecommended habit
    Wipe spillsClean coffee, wine, oil, and citrus as soon as possible
    Daily cleaningUse a soft cloth and pH-neutral stone cleaner
    AvoidVinegar, lemon cleaners, abrasive powders, and rough pads
    SealingFollow the stone supplier’s recommended schedule
    CuttingAlways use a cutting board
    Hot cookwareUse trivets instead of placing pans directly on stone
    Small scratchesAsk a stone professional about honing or refinishing

    21. Repeat One Marble Detail Throughout the Room

    15 Luxury Marble Kitchen Countertop Ideas for Modern Homes
    Credit: Homelane

    A marble kitchen feels more finished when one detail appears in several places. Repeat the stone on the island, a small shelf, a window ledge, or a serving board. The repeated touch creates connection without making the room feel covered in marble.

    You can also repeat the marble’s colors rather than the material itself. Gray veining might appear in the faucet, rug, or art. Gold lines might connect to brass lighting and warm wood.

    Keep the repetition subtle. Two or three related moments are usually enough. I always recommend choosing one main focal point and letting the other areas support it.

    This approach works in minimalist, traditional, coastal, industrial, and eclectic homes. With the design ideas in place, these final tips will help you make confident choices.

    Tips for Success

    • Order large marble samples instead of relying on tiny showroom chips.
    • Test all colors in both natural daylight and evening lighting.
    • Seal natural marble according to the stone supplier’s instructions.
    • Use cutting boards, trivets, and trays to protect high-use areas.
    • Plan seams, outlets, sink openings, and vein direction before fabrication.
    • Keep the most dramatic marble in one main focal area.
    • Choose pH-neutral cleaners made for natural stone.

    Common Mistakes and How to Avoid Them

    Choosing marble from a small sample
    Small pieces may not show the full movement of the veins. Review the actual slab or a large photo before approving the stone.

    Ignoring undertones
    A blue-white marble can clash with creamy cabinets. Compare the stone with paint, flooring, and cabinet samples in the same light.

    Using too many competing patterns
    Bold marble, patterned tile, busy flooring, and colorful fabrics can overwhelm the room. Keep two surfaces quiet when one surface is dramatic.

    Skipping maintenance planning
    Natural marble needs care. Ask how often it should be sealed and which cleaners are safe before installation.

    Making the island too large
    An oversized island can block cabinet doors and traffic. Tape the footprint on the floor and test every walkway.

    Treating lighting as an afterthought
    Poor lighting can make beautiful marble look dull or overly cold. Layer ceiling, pendant, and under-cabinet lighting.

    Similar Variations

    • White Marble Kitchen: A bright, classic look using pale stone, white cabinets, and soft metallic accents.
    • Green Marble Kitchen: A richer style that pairs deep green stone with cream, wood, or aged brass.
    • Dark Marble Kitchen: A dramatic design built around charcoal or black stone with warm lighting.
    • Coastal Marble Kitchen: Light marble, pale blue, rattan, and natural wood create an airy seaside mood.
    • Organic Modern Marble Kitchen: Honed stone, oak cabinets, linen textures, and simple shapes keep the room relaxed.
    • Traditional Marble Kitchen: Detailed cabinetry, classic hardware, paneled hoods, and elegant stone create a timeless finish.

    A marble kitchen does not need to look formal or fragile. With the right slab, cabinet color, lighting, storage, and care plan, it can handle everyday cooking while still feeling special.

    The best 21 Marble Kitchen design is the one that fits your habits, your home style, and the way you want the room to feel.

  • 21 Galley Kitchen Design Ideas for a Smart, Stylish Space

    21 Galley Kitchen Design Ideas for a Smart, Stylish Space

    21 Galley Kitchen ideas can turn a narrow cooking area into a bright, efficient, and welcoming room. I’ll show you how to plan the layout, choose finishes, add storage, and make the space feel larger without wasting a single inch.

    What is a galley kitchen, and how can it work well? A galley kitchen is a narrow room with cabinets and appliances arranged along two facing walls, creating an efficient passage for cooking, storage, and cleanup.

    Keep reading for practical layouts, color ideas, lighting tricks, and small details that make a big difference. I’ll also point out common mistakes before you make them.

    Understanding the Galley Kitchen Style

    A galley kitchen is all about movement. The two long sides usually hold the sink, cooktop, refrigerator, cabinets, and counter space. Because everything sits close together, cooking can feel quick and organized. The challenge is avoiding a cramped, tunnel-like look.

    I like to treat the kitchen as both a work zone and a room people enjoy using. That means planning clear walking space first, then adding color, texture, lighting, and personality. In most homes, a galley kitchen works best when the busiest tasks are arranged in a simple order: store food, wash ingredients, prepare meals, then cook.

    You do not need a huge budget or a complete remodel. A smarter cabinet layout, lighter paint, better lighting, or a slim rolling cart can change the entire feel of the room.

    1. Create a Clean Work Triangle

    The Work Triangle: Does It Apply to Today's Kitchens? | Apartment Therapy
    Credit: apartmenttherapy

    A well-planned work triangle places the refrigerator, sink, and cooking surface within easy reach. In a galley kitchen, this often means putting the sink and cooktop on one side while placing the refrigerator across from them or near one end. The goal is to reduce unnecessary steps without making the passage feel crowded.

    I usually begin by marking these three zones on paper. Then I check where groceries enter, where dishes are stored, and where food is served. Keep the refrigerator near the entrance if possible. This lets people grab drinks without walking into the main cooking area.

    As a practical tip, avoid placing a tall pantry directly between the sink and cooktop. It can interrupt your work rhythm. This setup suits modern, farmhouse, and traditional homes because good kitchen flow never goes out of style.

    With the main work zones in place, the next step is making the narrow room feel open.

    2. Use Light Cabinet Colors to Expand the Room

    Galley Kitchen Layout Ideas That Maximize Space and Style in 2026 - Kitchen Search
    Credit: kitchenSearch

    Light cabinets can make a narrow kitchen look wider and brighter. White, soft gray, pale blue, cream, and light oak all reflect more light than deep brown or charcoal finishes. They also give you a calm background for counters, hardware, and artwork.

    I prefer adding some contrast instead of making every surface the same color. For example, use warm white cabinets on one wall and natural wood shelves on the other. A pale green island cart or muted blue lower cabinets can add interest without making the space feel heavy.

    Choose satin or semi-gloss cabinet paint if you want surfaces that are easier to wipe clean. Before buying, test samples beside your flooring and countertop because lighting can change how colors appear.

    This idea works beautifully in Scandinavian, coastal, cottage, and contemporary kitchens. Once the cabinets are bright, thoughtful contrast can keep the room from looking flat.

    3. Add Contrast With a Dark Lower Cabinet Run

    Galley Kitchen Layout: 21+ Design Ideas and Tips
    Credit: KitchenCabinetKings

    If an all-white kitchen feels too plain, use darker cabinets below and lighter cabinets above. Navy, forest green, graphite, walnut, and deep taupe can ground the room while keeping the upper half airy. This two-tone approach also adds visual structure to a long galley layout.

    I would keep the darker color on the side with fewer upper cabinets. That prevents the space from feeling boxed in. Pair dark lowers with a pale countertop, warm brass knobs, or simple black pulls. If the floor is dark too, choose a lighter wall color to balance the weight.

    A useful tip is to request large cabinet samples before committing. Small paint cards do not show how a color behaves across a full wall.

    The look adapts easily to modern, transitional, industrial, and farmhouse homes. After choosing cabinet contrast, you can use the backsplash to connect both sides.

    4. Choose a Backsplash That Adds Depth

    Kitchen Backsplash Ideas: 5 Best Designs for a 2026 Remodel
    Credit: Sweeten

    A backsplash protects the wall, but it can also shape the entire personality of a galley kitchen. Subway tile keeps the look classic. Zellige-style tile adds soft variation. Slab stone creates a smooth, modern surface with fewer grout lines.

    For a narrow room, vertical tile can make the ceiling seem taller. Horizontal tile can make the walls feel wider. If your cabinets already have strong color or wood grain, choose a quiet backsplash. If the cabinets are simple, a patterned tile can become the main feature.

    I recommend ordering samples and viewing them in morning, afternoon, and evening light. Use a grout color close to the tile for a calm look, or a contrasting grout for a bolder pattern.

    This works with coastal, vintage, modern, and Mediterranean decor. With the wall finishes selected, a useful table can help you compare materials quickly.

    Backsplash Material Comparison

    MaterialBest featureCleaning levelTypical visual effectGood style matches
    Ceramic tileAffordable and widely availableEasyClassic or colorfulCottage, traditional
    Porcelain tileDense and highly durableEasyStone, concrete, or tile lookModern, industrial
    Glass tileReflects lightEasy, but shows marksBright and polishedContemporary, coastal
    Natural stoneRich texture and variationModerate; may need sealingOrganic and upscaleRustic, Mediterranean
    Slab quartzVery few grout linesVery easyClean and seamlessModern, transitional
    Metal tileStrong visual statementModerateSleek and reflectiveIndustrial, modern

    Now that the walls have character, the floor can help guide the eye through the room.

    5. Run Flooring Boards Lengthwise

    A Guide to Galley Kitchens
    Credit: Houzz

    Flooring direction matters in a narrow kitchen. Running wood planks, luxury vinyl boards, or long-format tile along the length of the room can make the space feel more connected. The lines lead the eye forward instead of cutting across the passage.

    I like wide planks in a small galley kitchen because fewer seams create a calmer appearance. Light oak, natural maple, warm beige, and soft gray can all work well. If you use patterned tile, keep the pattern modest so it does not compete with the cabinets.

    Always check the material’s water resistance and slip rating, especially near the sink and dishwasher. A small sample installed on the floor will tell you more than a showroom display.

    This approach suits Scandinavian, modern farmhouse, coastal, and transitional interiors. Once the floor draws the room forward, lighting can make that visual path even stronger.

    6. Layer Several Types of Lighting

    Where to position lights in a galley kitchen - 3 top tips | Ideal Home
    Credit: IdealHome

    One ceiling fixture is rarely enough for a galley kitchen. Use three layers: general lighting, task lighting, and decorative lighting. Recessed fixtures or a slim track provide overall brightness. Under-cabinet lights help with chopping and cleaning. A small pendant or wall sconce adds charm.

    I prefer warm-white bulbs around 2700K to 3000K for a welcoming feel, though cooler light can work in a very modern kitchen. Place task lights toward the front of the cabinet underside so your body does not block the beam.

    A quick upgrade is installing plug-in LED strips under upper cabinets. They cost less than rewiring and can often be added in one afternoon.

    This lighting plan works in nearly every style, from industrial lofts to classic cottage kitchens. With the room properly lit, reflective surfaces can help spread that brightness.

    7. Install Reflective Surfaces in Small Doses

    15 Galley Kitchen Ideas You'll Want to Steal Immediately
    Credit: HouseBeautiful

    Reflective finishes can make a narrow kitchen feel less closed in. Try polished chrome hardware, glossy tile, a mirror-backed shelf, glass cabinet doors, or a lightly reflective countertop. You do not need shine everywhere. Too much can look harsh and show fingerprints.

    I often use one reflective element on each side of the room. For example, pair glossy backsplash tile on the sink wall with glass-front cabinets on the opposite wall. This bounces light without creating visual noise.

    If you choose a mirrored surface, place it where it reflects a window, artwork, or attractive light fixture. Do not aim it directly at a cluttered counter.

    This idea fits glamorous, contemporary, coastal, and Art Deco-inspired spaces. Next, we can use open storage to add air and personality.

    8. Mix Upper Cabinets With Open Shelving

    Open Kitchen Shelving Ideas from Real Renovations
    Credit: Sweeten

    Open shelves can make a galley kitchen feel lighter than a full wall of upper cabinets. They also give you a place to display daily dishes, small plants, wooden boards, or favorite pottery. I would not remove every upper cabinet, though. Closed storage hides clutter and protects items from cooking grease.

    Use one or two shelves on the wall with less counter activity. Keep the shelf depth around 10 to 12 inches so it does not crowd the walkway. Store attractive items at eye level and use baskets for smaller pieces.

    A practical rule is to leave some empty space. If every inch is filled, open shelving becomes another messy storage area.

    This works with farmhouse, boho, Scandinavian, and modern kitchens. Once storage is balanced, you can compare common galley dimensions before selecting furniture.

    Galley Kitchen Size Guide

    FeatureComfortable targetSmall-space minimum to considerPlanning note
    Main walkway42 to 48 inchesAbout 36 inchesWider is better for two cooks
    Counter depth24 to 25 inchesAbout 18 to 20 inches for shallow zonesKeep full depth near the cooktop
    Upper cabinet depth12 to 15 inches10 to 12 inches for shelvesShallow storage protects walkway space
    Clear space near appliances15 to 24 inchesAvoid less than 12 inchesHelps with doors and food prep
    Counter beside cooktop15 inches or moreUse the largest available areaCreates a safer landing zone
    Counter beside sink18 inches or moreAt least one usable prep areaSupports washing and chopping

    The measurements provide a foundation, but the right seating choice can decide whether the kitchen feels open or crowded.

    9. Add Slim Seating at the End

    8 Ways to Fit a Seating Area into a Galley Kitchen
    Credit: Houzz

    If your galley kitchen has a wider end wall, add a narrow breakfast ledge or compact counter. This creates a place for coffee, homework, or quick meals without blocking the main work aisle. Choose a counter depth that leaves a comfortable passage behind the stools.

    I like backless stools because they slide fully under the ledge. Look for seats around 18 to 24 inches wide, depending on the available counter length. A fold-down wall table can work in extremely small homes.

    Avoid adding seating beside the busiest part of the kitchen. It can cause traffic jams when someone is cooking.

    This solution adapts to apartment, modern, cottage, and coastal interiors. With seating placed carefully, a narrow cart can add even more flexibility.

    10. Use a Rolling Cart as Flexible Storage

    Small Kitchen Trolley Designs That Maximise Storage and Space
    Credit: Homelane

    A rolling cart gives you extra prep space without permanently changing the floor plan. You can use it for produce, cookware, coffee supplies, or serving dishes. When guests arrive, roll it out of the work zone or use it as a mobile bar.

    Choose a cart narrower than the open section where it will sit. Locking casters are important because a moving cart near a hot stove can be unsafe. A wood-top cart brings warmth, while stainless steel suits a clean industrial kitchen.

    I suggest assigning the cart one clear purpose. If it becomes a place for random mail and bags, it loses its value quickly.

    This idea works in rental kitchens, farmhouse homes, industrial lofts, and small condos. After adding flexible storage, a pantry plan can help keep counters clear.

    11. Build a Tall Pantry Wall

    Galley Kitchen Cabinet Layouts: Space-Saving Strategies
    Credit: chervinKitchen

    Tall pantry storage makes use of vertical space while keeping food organized. A narrow pull-out pantry can hold cans, spices, oils, and dry goods. Full-height cabinets can also hide a microwave, broom, recycling bins, or small appliances.

    Place tall units at the end of the kitchen when possible. Their height can feel heavy if they sit in the middle of the room. Use adjustable shelves, door racks, and labeled bins so deep storage does not become a black hole.

    Before ordering cabinets, measure baseboards, vents, outlets, and door swings. A pantry that looks perfect on paper may block a doorway in real life.

    This storage plan suits traditional, modern, Scandinavian, and transitional homes. Once tall storage is handled, small organizing details can make everyday cooking much easier.

    12. Organize Drawers Around Daily Tasks

    Expert Ideas for Adding a Pantry to a Galley Kitchen | Apartment Therapy
    Credit: Apartmenttherapy

    Deep drawers often work better than low cabinets because you can see everything from above. Use one drawer for pots, another for pans, and a shallow drawer for utensils. A pull-out trash bin near the sink can also save steps during food preparation.

    I recommend storing the items you use every day between waist and shoulder height. Keep special serving pieces higher up or farther away. Add peg systems, adjustable dividers, and drawer liners to prevent movement.

    Take inventory before buying organizers. There is no reason to build a custom spice drawer if you rarely use spices. Good storage should match your habits, not a showroom display.

    This approach fits minimal, family-friendly, traditional, and modern kitchens. The next table can help you match storage choices with cost and impact.

    Storage Upgrade Budget Guide

    UpgradeApproximate cost rangeInstallation difficultyBest use
    Drawer dividers$10 to $60 per drawerEasyUtensils and cooking tools
    Under-sink pull-out$40 to $150Easy to moderateCleaners and spare supplies
    LED cabinet lighting$30 to $250Easy to moderateTask lighting
    Rolling kitchen cart$80 to $500EasyExtra prep and storage
    Pull-out pantry unit$300 to $1,500ModerateCans, spices, and dry goods
    New drawer base cabinet$600 to $2,500 or moreModerate to advancedPots, pans, and cookware

    When storage is planned around real habits, decor can be added without sacrificing function.

    13. Choose Hardware That Fits the Scale

    This Hardware Detail Can Instantly Make a Kitchen Look Cheap | Livingetc
    Credit:livingetc

    Cabinet hardware is small, but it changes how the room feels. Long pulls emphasize the horizontal shape of a galley kitchen. Small knobs feel more traditional. Matte black creates contrast, brass adds warmth, and brushed nickel stays quiet and flexible.

    Use the same finish for most hardware, then repeat it in one or two other places, such as the faucet or light fixture. Mixing metals can work, but keep the combination intentional. Two finishes are usually easier to manage than three or four.

    Measure existing hole spacing before ordering replacement pulls. This simple step can prevent extra drilling and repair work.

    This idea fits modern, vintage, farmhouse, and transitional rooms. With the hardware selected, art and accessories can bring a personal touch.

    14. Display One Strong Decorative Moment

    45 Galley Kitchens That Are the Epitome of Shipshape
    Credit: ELLEDecor

    A galley kitchen does not need decoration on every wall. One strong feature often looks better. Try a framed print, a colorful runner, a collection of cutting boards, or a small gallery arrangement at the end of the room.

    I like using the far wall as a visual destination. A bold piece there can make the kitchen feel intentional instead of merely narrow. Keep art away from direct heat and areas likely to collect splashes.

    Choose decor that repeats a color already used in the cabinets, backsplash, or nearby dining room. This creates a connection without making the kitchen look overly matched.

    The approach works for eclectic, cottage, coastal, and contemporary styles. After choosing the focal point, soft textiles can add comfort underfoot.

    15. Add a Narrow Runner for Comfort

    Add Warmth and Personality to Your Kitchen With a Runner
    Credit: Houzz

    A runner brings color, pattern, and warmth to a long kitchen floor. Choose a washable indoor-outdoor rug or a low-pile design that will not catch cabinet doors. A runner around 2 to 3 feet wide often works well, but measure the walkway first.

    Leave a small border of visible flooring on both sides so the rug feels placed rather than crammed. Non-slip backing is essential, especially near the sink. Patterns with several tones hide crumbs and small spills better than solid pale rugs.

    I would avoid thick shag styles because they trap food and make cabinet access harder. Flatwoven cotton, polypropylene, and low-pile wool are more practical.

    This detail suits boho, farmhouse, Scandinavian, and coastal kitchens. With a runner grounding the room, plants can add life without taking over the counters.

    16. Bring in Greenery Without Losing Counter Space

    How to organise a galley kitchen - 5 top tips | Ideal Home
    Credit: Idealhome

    Plants soften hard kitchen surfaces and make a narrow room feel more welcoming. Use a small herb pot near a bright window, a hanging plant in an unused corner, or a narrow planter on an open shelf. Choose varieties that match your light and cooking habits.

    I find that one large plant at the end of a galley kitchen often looks better than several tiny pots spread everywhere. Herbs such as basil, thyme, mint, and rosemary can be useful, but they need suitable light and regular care.

    Keep plants away from the cooktop, toaster, and areas where grease collects. Use waterproof saucers to protect shelves and counters.

    This idea works with tropical, rustic, modern, and Mediterranean decor. The following table can help match materials and finishes to the mood you want.

    Material and Finish Pairings

    Design moodCabinet finishCountertop choiceHardwareAccent material
    ScandinavianWhite or pale oakWhite quartzBrushed nickelLinen and light wood
    CoastalSoft blue or warm whitePale quartz or butcher blockAged brassRattan and ceramic
    IndustrialCharcoal or natural woodConcrete-look quartzMatte blackSteel and leather
    FarmhouseCream or sage greenButcher block or honed stoneOil-rubbed bronzeWoven baskets
    ModernFlat white or graphiteVeined quartzBlack or chromeGlass and smooth metal
    TraditionalRaised-panel cream or navyMarble-look quartzPolished brassFramed art and wood

    Material combinations set the mood, but window treatments can affect how bright the entire space feels.

    17. Keep Window Treatments Simple

    Galley kitchen ideas and layouts to suit any space | Ideal Home
    Credit: idealhome

    If your galley kitchen has a window, avoid heavy curtains that make the room feel smaller. A woven shade, café curtain, or simple Roman shade can provide privacy while still allowing daylight inside. Choose a fabric that can handle moisture and occasional splashes.

    Natural woven shades add texture, while white fabric keeps the room fresh. If the kitchen faces strong afternoon sun, choose a light-filtering option rather than a completely sheer one.

    Measure the window carefully, including the frame and nearby cabinet doors. Make sure the treatment can open fully without hitting the faucet or counter.

    This works in cottage, coastal, traditional, and modern homes. Once daylight is managed, the ceiling offers another place to add design interest.

    18. Use the Ceiling as a Quiet Feature

    25 Galley Kitchen Design Ideas to Try Right Now
    Credit: HouseBeautiful

    A ceiling can add personality without taking up valuable wall space. Paint it a soft blue, pale green, warm cream, or muted color that connects with the backsplash. Beadboard, slim wood planks, or subtle wallpaper can also create texture.

    In a very narrow kitchen, keep the ceiling treatment light and simple. A strong pattern may make the room feel lower. If you use a bold ceiling, keep the walls and cabinets calmer.

    I recommend testing paint on a large poster board before applying it overhead. The same color can look darker on a ceiling than expected.

    This idea suits coastal, farmhouse, vintage, and eclectic interiors. A finished ceiling can make the room feel complete, while smart appliances keep it easy to use.

    19. Select Compact Appliances Carefully

    9 Galley Kitchen Design Tips - This Old House
    Credit: ThisOldHouse

    Small appliances can improve a galley kitchen, but smaller is not always better. Choose models that match your cooking needs and leave usable landing space beside them. A 24-inch dishwasher, counter-depth refrigerator, or slim range may create more room, but check capacity first.

    I always measure appliance doors when fully open. The refrigerator, oven, and dishwasher should not collide or block the main passage. If you rarely bake, a compact oven may be enough. If you cook for a family, prioritize refrigerator and prep space.

    Look for integrated panels if you want appliances to blend with the cabinets. Stainless steel is easier to coordinate when you want a more visible appliance look.

    This strategy works in apartments, modern homes, rental upgrades, and classic kitchens. With appliances sized correctly, the final step is connecting the kitchen to nearby rooms.

    20. Open the View Without Removing Every Wall

    Galley kitchen ideas: 10 designs to elevate your space | Homes and Gardens
    Credit: homesandgardens

    Some galley kitchens feel dark because they are closed off from the rest of the home. If a full wall removal is not practical, consider a pass-through, interior window, glass door, or half wall. These changes can improve sightlines while preserving useful storage.

    Before removing or cutting anything, confirm whether the wall is structural and check the location of plumbing, wiring, vents, and heating ducts. Even a simple opening may need professional review.

    I like a wide interior window with a slim ledge. It allows conversation and light to pass through while keeping the kitchen work area defined.

    This solution suits mid-century, modern, traditional, and open-plan homes. Once the sightline improves, the last idea can help the kitchen feel connected rather than isolated.

    21. Connect the Kitchen to Nearby Rooms

    Galley kitchen ideas and layouts to suit any space | Ideal Home
    Credit: idealhome

    A galley kitchen feels larger when its colors and materials relate to the dining room, hallway, or living area. Repeat one wall color, wood tone, metal finish, or textile pattern outside the kitchen. The connection does not need to be exact.

    For example, warm oak shelves can echo a nearby wood table. A blue backsplash can repeat in dining chairs or artwork. Similar flooring throughout the main level can also make the kitchen feel less enclosed.

    Keep the kitchen’s strongest details inside the cooking zone. The surrounding rooms should support the look, not compete with it.

    This idea adapts to open-plan, traditional, coastal, and apartment layouts. With the whole sightline considered, you can bring the design together using a few simple rules.

    Tips for Success

    • Measure the full walkway, including appliance doors, cabinet handles, and trim.
    • Keep at least one clear counter landing area beside the sink and cooktop.
    • Use closed storage for items that create visual clutter.
    • Choose washable rugs, durable counters, and easy-clean backsplash materials.
    • Test paint, tile, and cabinet samples in both natural and artificial light.
    • Place the refrigerator near the entrance when possible.
    • Repeat colors and finishes in nearby rooms for a more connected floor plan.

    Common Mistakes and How to Avoid Them

    Filling both walls with deep cabinets
    Choose shallow shelves, fewer upper cabinets, or one open wall section to protect the walking path.

    Placing the sink too close to a corner
    Leave usable counter space beside the sink so washing, drying, and preparing food do not feel awkward.

    Ignoring appliance door swings
    Mark every door’s open position on the floor before installation and check for collisions.

    Using too many bold finishes
    Choose one main feature, such as patterned tile or colorful cabinets, then keep the other surfaces calmer.

    Treating lighting as an afterthought
    Plan ceiling, task, and accent lighting before cabinets and backsplash work are finished.

    Adding decor that blocks work areas
    Keep plants, artwork, and accessories away from heat, splashes, and the main chopping zone.

    Similar Variations

    • Scandinavian Galley Kitchen: Pale wood, white cabinets, simple hardware, and soft natural textures create a bright, calm room.
    • Coastal Galley Kitchen: White or blue cabinetry, woven accents, light wood, and breezy fabrics bring a relaxed seaside feel.
    • Modern Farmhouse Galley Kitchen: Shaker cabinets, a farmhouse-inspired sink, warm lighting, and practical wood details add comfort.
    • Industrial Galley Kitchen: Black metal, concrete-look surfaces, exposed shelving, and strong task lighting create an urban edge.
    • Mediterranean Galley Kitchen: Terracotta tones, patterned tile, aged brass, and warm wood make the narrow layout feel rich.
    • Japandi Galley Kitchen: Minimal storage, muted colors, natural wood, and uncluttered surfaces create a peaceful cooking space.

    A successful galley kitchen starts with movement, storage, and safety. Once those basics work, color, lighting, texture, and decor can make the room feel personal rather than cramped.

    I would plan the layout on paper, measure twice, and make changes in stages when possible. The best 21 Galley Kitchen is the one that fits your daily life.

  • 19 Timeless Kitchen

    19 Timeless Kitchen

    19 Timeless Kitchen ideas can help you create a space that feels current, useful, and welcoming for years to come. I’ve gathered the most dependable choices for cabinets, colors, lighting, materials, storage, and decor so you can plan with confidence.

    What are 19 timeless kitchen ideas? They are classic design choices that balance function and beauty, including natural materials, simple cabinets, layered lighting, useful storage, durable finishes, and flexible colors that work across changing home styles.

    Keep reading for practical ways to use these ideas without making your kitchen feel plain, dated, or overly matched.

    What Makes a Kitchen Timeless?

    A timeless kitchen is not stuck in one decade. It has a calm base, strong materials, and details that can change as your taste changes. Think simple cabinet doors, useful work areas, warm lighting, and colors that look good beside both old and new pieces.

    I find that the best kitchens feel collected rather than decorated all at once. A vintage bowl can sit beside a modern faucet. Wood can soften crisp white cabinets. Open shelves can display everyday dishes instead of random clutter. The goal is not to follow every trend. It is to make smart choices that still feel right after the excitement of a remodel fades.

    1. Choose Shaker Cabinets With Clean, Simple Lines

    Shaker Kitchen Cabinets: Timeless Design - Craft Kitchen and Bath
    Credit; CraftKitchenandBath

    Shaker cabinets remain a reliable choice because their recessed panels add detail without making the room feel busy. They work in small kitchens, large family kitchens, and open-plan spaces. White is classic, but soft gray, sage green, navy, cream, and natural wood can also look timeless.

    I like Shaker doors because they give you room to change the rest of the design later. You can swap hardware, paint the island, or add new lighting without replacing the whole look. Choose solid hinges, smooth drawer glides, and a finish that can handle daily use.

    For a practical update, use Shaker doors on the main cabinets and a different wood finish on the island. This idea suits modern farmhouse, traditional, cottage, and transitional homes, which makes it a strong starting point for the next decision.

    2. Build Around a Warm Neutral Color Palette

    Neutral Color Schemes for Timeless Kitchen Designs: Creating a Calm Ambiance - STEVENSWOOD
    Credit;stevens-wood

    A warm neutral kitchen feels comfortable without looking dull. Try ivory, mushroom, putty, warm gray, tan, or soft greige instead of relying only on bright white. These shades work well with wood, stone, brass, black, and woven textures.

    Use one main neutral for the cabinets, one supporting color for walls or the island, and one darker tone for contrast. This simple formula keeps the room balanced. I also recommend testing paint samples in morning, afternoon, and evening light. A color can look creamy in one room and gray in another.

    If your kitchen already has cool floors or countertops, warmer walls can make the space feel less stark. This palette adapts easily to coastal, Scandinavian, traditional, and modern styles, and it leads naturally to a closer look at color combinations.

    3. Add Natural Wood for Warmth and Balance

    13 Wooden Kitchen Ideas That Exude Warmth and Character | Homes and Gardens
    Credit: Homesandgardens

    Wood keeps a kitchen from feeling too cold or perfect. You can use it on an island, ceiling beams, shelves, bar stools, cutting boards, or a small furniture-style cabinet. Oak, walnut, maple, ash, and reclaimed wood each bring a different mood.

    For a clean look, repeat one wood tone in at least two places. For example, match oak shelves with oak stools. You do not need every wood surface to match exactly, but the undertones should work together. Avoid placing several orange-toned woods beside gray cabinets unless you want a strong contrast.

    A real wood island top adds character, but it needs regular care and protection from standing water. Use coasters and wipe spills quickly. Natural wood fits farmhouse, mid-century, rustic, Japandi, and contemporary kitchens, so the next layer can be chosen with confidence.

    4. Install a Classic Subway Tile Backsplash

    10 fresh subway tile kitchen backsplash ideas that feel timeless
    Credit: Cletile

    Subway tile has lasted because it is simple, affordable, and easy to combine with other materials. A standard 3-by-6-inch tile gives a familiar look, while a longer tile feels more modern. You can change the mood with the layout, grout color, and finish.

    White tile with light grout looks soft and clean. Dark grout creates more definition but may show dust and grease. Handmade tile adds movement through uneven edges and gentle color shifts. For a quieter backsplash, choose a matte tile in a warm neutral.

    Before installation, place sample tiles beside your countertop and cabinet color. A backsplash should support the room, not compete with it. Subway tile works in traditional, industrial, cottage, and modern kitchens, and the comparison below can help you choose a practical material.

    Backsplash Material Comparison

    MaterialBest useMaintenanceTypical visual effect
    Ceramic tileFull backsplashLowClean and flexible
    Porcelain tileHeavy-use kitchenLowDense, polished, or stone-like
    Glass tileSmall backsplash areasLow to mediumBright and reflective
    Marble tileElegant focal wallMedium to highVeined and classic
    Stainless steelBehind a rangeLowIndustrial and sleek
    Beadboard panelDry areas away from heatMediumCottage and relaxed

    With the backsplash selected, the next timeless move is to choose a countertop that looks good and works hard.

    5. Select Durable Countertops With Gentle Pattern

    Top 10 Timeless Countertop Design Decisions to Consider - Grace In My Space
    Credit: Graceinmyspace

    The best timeless countertop has a useful surface and a pattern you will not tire of seeing. Quartz, granite, butcher block, quartzite, marble, and soapstone all bring different benefits. Your choice should match how you cook, clean, and use the kitchen.

    Quartz is low-maintenance and available in many colors. Granite offers natural variation and strong durability. Marble is beautiful but can etch and stain, so it suits homeowners who accept a little patina. Butcher block adds warmth but needs oiling and careful cleaning.

    I suggest ordering a large sample, not just a tiny square. Look at it beside your cabinets and backsplash. Avoid overly dramatic veining if you want maximum flexibility. This approach works in sleek city kitchens and relaxed country rooms alike, which brings us to edge details.

    6. Use Furniture-Style Details on the Island

    15 Kitchen Island Ideas You Need to Know About Before You Start Your Remodel | Homes and Gardens
    Credit: homesandgardens

    A kitchen island can feel more like a piece of furniture when you add legs, inset panels, turned feet, open shelving, or a contrasting finish. This softens a large block of cabinetry and gives the room a more personal look.

    Choose an island color that relates to another feature, such as the flooring, dining table, or cabinet hardware. If the kitchen is narrow, avoid an oversized island that blocks movement. Leave about 36 inches for a comfortable walkway, and allow more space where two people regularly work.

    Add drawers on the prep side and seating on the opposite side. A furniture-style island fits traditional, farmhouse, transitional, and modern kitchens when the lines stay simple. Once the island has character, lighting becomes the next key feature.

    7. Layer Ambient, Task, and Accent Lighting

    27 kitchen lighting ideas to make your space shine | Ideal Home
    Credit: IdealHome

    One ceiling fixture rarely gives a kitchen enough light. A timeless plan uses three layers. Ambient lighting fills the room. Task lighting helps with chopping and cooking. Accent lighting highlights shelves, artwork, or architectural details.

    Install under-cabinet lights near the front edge of upper cabinets so the counter does not sit in shadow. Use pendant lights over an island, but choose a size that leaves clear sight lines. Dimmers make every fixture more useful, especially when the kitchen opens into a dining or living area.

    Warm white bulbs around 2700K to 3000K usually create a comfortable home feeling. Use brighter task lighting where you work. This layered plan suits compact apartments, large traditional kitchens, and modern open spaces, and the guide below gives useful spacing references.

    Kitchen Lighting Guide

    Lighting locationUseful starting pointMain purpose
    Under-cabinet strip1 strip per cabinet runCountertop task light
    Island pendants30 to 36 inches above counterFocused work and style
    Pendant spacingAbout 24 to 30 inches apartEven island coverage
    Recessed ceiling lightsOften 24 to 36 inches from wallsGeneral room light
    Pantry or cabinet lightsMotion sensor optionEasy access
    DimmersOn ambient and pendant circuitsFlexible mood control

    Good lighting reveals the materials you choose, so now it is time to consider hardware and metal finishes.

    8. Mix Metal Finishes With a Clear Plan

    5 Compelling Reasons to Mix Metals in the Kitchen
    Credit: Houzz

    Mixed metals can make a kitchen feel layered instead of showroom-perfect. You might combine brushed brass cabinet pulls, a matte black faucet, and stainless steel appliances. The trick is to repeat each finish with purpose.

    Start with one main metal for cabinet hardware. Add a second finish through lighting or plumbing. A third finish can work, but use it lightly. Keep the sheen in mind. Brushed brass and satin nickel feel softer together than polished chrome and shiny gold.

    Place samples in the actual room before buying everything. Some brass finishes become darker over time, while polished surfaces show fingerprints. Mixed metals fit modern, vintage, industrial, and traditional interiors when the forms are related. The next idea adds texture without relying on more hardware.

    9. Add a Vintage or Reclaimed Accent

    18 Vintage Kitchen Ideas That Radiate Timeless Style
    Credit: Betterhomes&Gardens

    One old or reclaimed piece can give a new kitchen a sense of history. Consider a vintage mirror, antique stool, old cutting board, framed recipe card, salvaged sign, or small wooden cabinet. The item does not need to be expensive. It only needs to feel useful or meaningful.

    Keep vintage accents away from areas where water and heat could damage them. A framed print is safer beside a pantry than behind a sink. If you use reclaimed wood, check that it is clean, stable, and free from old paint that may contain lead.

    I like pairing one aged piece with mostly simple finishes. This keeps the kitchen fresh rather than themed. The idea works in cottage, industrial, farmhouse, eclectic, and contemporary homes, and it pairs especially well with a well-chosen floor.

    10. Install Flooring That Can Handle Real Life

    10 timeless monochrome kitchen floor ideas for your kitchen | Real Homes
    Credit: Realhomes

    Kitchen flooring must survive spills, dropped utensils, chair movement, and heavy foot traffic. Porcelain tile is hard-wearing and available in wood, stone, and concrete looks. Hardwood adds warmth and can flow into nearby rooms. Luxury vinyl is softer underfoot and comes in many patterns.

    Choose a floor color that hides crumbs and small marks between cleanings. Very pale solid floors can show dirt quickly, while very dark glossy floors often reveal dust. Matte or lightly textured finishes usually offer a practical middle ground.

    Before buying, order samples and view them beside the cabinets. Check that the pattern does not fight with the countertop. Durable flooring works in coastal, rustic, modern, and classic kitchens, and the material table below can help narrow the field.

    Kitchen Flooring Comparison

    FlooringComfortWater resistanceCare levelStrong design match
    Porcelain tileFirmExcellentLowModern, traditional
    HardwoodWarmMediumMediumClassic, farmhouse
    Luxury vinylSofterVery goodLowCasual, contemporary
    Natural stoneFirmVaries by stoneMedium to highRustic, elegant
    CorkSoftMediumMediumEco-friendly, relaxed
    BrickFirmGood when sealedMediumIndustrial, country

    Once the floor is doing its job, a simple rug can make the room more comfortable and inviting.

    11. Layer a Washable Runner for Warmth

    15 Best Kitchen Rugs 2021 - Stylish Mat Ideas for the Kitchen
    Credit: veranda

    A runner adds color, pattern, and comfort to a long kitchen walkway. It also gives your feet a break while you cook. Choose a washable cotton rug, low-pile performance runner, or indoor-outdoor style that can handle regular cleaning.

    For safety, use a non-slip pad or a rug with a secure backing. A runner should leave enough room for cabinet and appliance doors to open. In many kitchens, a 2.5-by-7-foot or 3-by-8-foot runner works well, but measure first.

    Look for muted reds, faded blues, olive, tan, or charcoal if you want a pattern that will age well. A rug fits bohemian, farmhouse, coastal, and modern kitchens when its colors repeat elsewhere. Next, we can make the walls useful as well as attractive.

    12. Turn One Wall Into Practical Open Storage

    Six Ways to Design a Timeless Kitchen | Visual Comfort
    Credit: VisualComfort

    Open shelving works best when it has a clear job. Use it for everyday plates, mugs, cookbooks, or a few plants. Do not treat every shelf as a display case. Useful objects create a more natural look and are easier to maintain.

    Install shelves where they will not interfere with cooking steam or grease. A depth of about 10 to 12 inches is usually enough for plates without making the room feel crowded. Leave breathing room between objects, and group items by color or material.

    If dust worries you, use one open shelf instead of a full wall. You can also choose glass-front cabinets for a similar display effect with less cleaning. Open storage fits Scandinavian, farmhouse, modern, and cottage kitchens, and the sizing guide can help prevent a cramped result.

    Open Shelf Planning Guide

    Shelf itemRecommended depthUseful spacing
    Mugs and small bowls8 to 10 inches10 to 12 inches high
    Dinner plates10 to 12 inches12 to 14 inches high
    Cookbooks10 to 12 inches12 to 14 inches high
    Small plants8 to 10 inchesLeave 4 inches around pot
    Large serving bowls12 to 14 inches14 to 16 inches high
    Floating shelf above counter10 to 12 inchesUsually 18 to 24 inches above counter

    Storage should look good, but it also needs to reduce daily effort. The next idea focuses on the inside of the cabinets.

    13. Add Deep Drawers and Smart Cabinet Storage

    23 Timeless Kitchen Design Ideas That Are Here to Stay
    Credit: BetterHomes&gardens

    A kitchen can look beautiful and still be frustrating if everything is hard to reach. Deep drawers often work better than low cabinet shelves for pots, pans, plates, and food containers. Pull-out trays can make corner cabinets easier to use.

    Use a drawer divider for utensils, a vertical rack for baking sheets, and a narrow pullout for oils or spices. Keep the items you use every day between waist and shoulder height. Save high shelves for occasional serving pieces.

    Before ordering cabinets, make a list of your largest items. Measure the stockpot, mixer, blender, and trash bin. This prevents unpleasant surprises later. Smart storage fits every kitchen style because it is mostly hidden, and the next idea makes the sink area both useful and attractive.

    14. Choose an Apron-Front or Deep Single-Bowl Sink

    Apron Sink vs Farmhouse Sink: Which One is Best for Your Kitchen?
    Credit: Ruvati

    A deep sink is practical for washing large pots and baking sheets. An apron-front sink adds a strong visual detail, while an undermount sink creates a quieter countertop line. Fireclay, stainless steel, granite composite, and porcelain each have different care needs.

    A stainless steel sink is forgiving and easy to coordinate with appliances. Fireclay feels traditional but can chip if heavy objects are dropped. A single-bowl design gives you more room, while a divided sink may help if you wash and rinse separately.

    Place the faucet where it is easy to reach without splashing nearby walls. Add a pull-down sprayer and a small soap dispenser if you want fewer items on the counter. This choice works in farmhouse, transitional, contemporary, and traditional kitchens, leading to another hardworking feature: the pantry.

    15. Create a Pantry Zone Instead of Scattered Storage

    28+ Kitchen Pantry Storage Ideas for Every Space
    Credit: backsplash

    A pantry does not have to be a separate room. A tall cabinet, built-in shelves, or a set of labeled drawers can create a useful pantry zone. Keep dry goods together so meal prep feels faster and the counters stay clear.

    Use clear containers only for foods you buy often. Labels help, but do not transfer every item if it creates extra work. Adjustable shelves are valuable because cereal boxes, jars, and appliances are not the same height.

    Leave a little empty space for groceries and seasonal items. A pantry that is packed to the edges will stop working well. This feature suits tiny galley kitchens and spacious traditional homes alike, and it prepares the room for one final organizational detail.

    16. Design a Dedicated Coffee or Beverage Station

    42 Coffee Station Ideas for a Stylish Morning Routine
    Credit: Thespruce

    A beverage station gives frequent-use items a home. It might include a coffee maker, mugs, tea, glasses, a water filter, and a small tray for sweeteners. In a large kitchen, place it outside the main cooking zone so people can serve themselves without blocking meal prep.

    Use a short shelf, a small cabinet, or a section of counter. Add an outlet where cords can stay hidden. If the station is near a sink, cleanup becomes easier. Keep only daily items visible and store backup supplies below.

    A beverage area can look sleek with flat-front cabinets or charming with open shelves and vintage mugs. It works in modern, cottage, Scandinavian, and farmhouse kitchens. With the practical zones covered, thoughtful decor can now add personality.

    17. Display Useful Decor Instead of Random Clutter

    11 things that always make your kitchen look cluttered | Homes and Gardens
    Credit: Homesandgardens

    The most convincing kitchen decor often has a job. A wooden board can lean against the backsplash. A ceramic pitcher can hold wooden spoons. A large bowl can collect fruit. Linen towels can add color without taking up much space.

    Use odd numbers and vary height when styling a counter or shelf. Leave clear work space around the sink and cooktop. I suggest creating one or two decorated zones instead of spreading small objects everywhere.

    Choose pieces that relate to the room’s colors, but do not make every item match. A little contrast keeps the kitchen alive. Useful decor adapts to minimalist, rustic, vintage, and maximalist homes, and plants can add another layer of life.

    18. Bring in Greenery That Suits the Kitchen

    A green kitchen done right feels timeless, rich, and effortlessly elevated. The secret? It's never just about picking “a green” — it's about choosing the right green for your lighting, cabinetry style,
    Credit; Instagram

    Plants soften hard cabinets, stone, and metal. Herbs such as basil, rosemary, mint, and thyme can sit near a bright window, though they need regular care. For lower maintenance, try pothos, snake plants, or small succulents in suitable light.

    Use pots that will not stain the countertop. A tray under plant containers catches water and protects wood. Keep greenery away from hot burners, strong drafts, and areas where leaves may touch food preparation surfaces.

    One large plant can have more impact than several tiny pots. Choose a simple ceramic, terracotta, or woven planter that supports the room’s style. Greenery works in nearly every kitchen, and the final idea adds a personal finish through art.

    19. Hang Art and Personal Pieces With Restraint

    A Restrained Neutral Kitchen Defined By Layered Textures | Homes and Gardens
    Credit: homesandgardens

    Art makes a kitchen feel connected to the rest of the home. Try a framed botanical print, food illustration, landscape, textile, family photograph, or small collection of ceramic plates. Choose pieces that can handle the room’s conditions.

    Avoid hanging valuable artwork directly above a range or sink, where heat, grease, and moisture can cause damage. A wall beside the breakfast table or pantry is usually safer. Use frames that relate to the hardware or wood tones without matching everything exactly.

    One large piece often looks calmer than many tiny pieces. If you prefer a gallery wall, keep a consistent frame color or repeat one visual theme. Personal art works in modern, coastal, traditional, eclectic, and farmhouse kitchens, bringing the entire design together.

    Tips for Success

    • Measure walkways, appliance doors, and drawer clearances before ordering materials.
    • Order large samples of flooring, countertops, cabinet colors, and tile.
    • Use the kitchen’s natural light to guide paint and finish choices.
    • Spend more on items that are difficult to replace, such as cabinets, plumbing fixtures, and flooring.
    • Keep at least one clear section of counter for daily prep.
    • Repeat colors and materials in small ways instead of making every feature identical.
    • Choose finishes based on your cleaning habits, not only on appearance.
    • Mix old and new pieces so the kitchen feels personal rather than staged.

    Common Mistakes and How to Avoid Them

    Choosing style before function

    Define this as selecting colors and finishes before considering how the kitchen is used. Fix it by mapping cooking, cleaning, storage, and walking zones first.

    Using too many competing materials

    Define this as combining several bold stones, woods, metals, and tile patterns in one room. Fix it by choosing one main focal material and keeping supporting finishes quiet.

    Ignoring lighting during the remodel

    Define this as relying on one ceiling fixture or adding lights after cabinets are installed. Fix it by planning ambient, task, and accent lighting before the walls are closed.

    Making open shelves too deep

    Define this as installing shelves that collect clutter or block the room visually. Fix it by keeping most shelves around 10 to 12 inches deep and displaying only useful items.

    Picking a rug without a safety plan

    Define this as placing a loose runner where people turn or where water spills. Fix it with a non-slip pad, washable material, and enough clearance for doors.

    Filling every surface

    Define this as decorating counters and shelves until there is no easy place to work. Fix it by leaving open space around the sink and cooktop, then rotating decorative items seasonally.

    Similar Variations

    • Modern Classic Kitchen: Simple cabinets, restrained colors, clean hardware, and one refined focal material.
    • Warm Minimalist Kitchen: Pale wood, uncluttered counters, soft lighting, and a small number of carefully chosen objects.
    • Classic Farmhouse Kitchen: Shaker cabinets, apron-front sink, natural wood, vintage accents, and practical open shelving.
    • Coastal Classic Kitchen: Creamy whites, pale blue or sea glass tones, woven textures, and light oak.
    • Organic Contemporary Kitchen: Smooth cabinets, earthy colors, stone surfaces, plants, and sculptural lighting.
    • Transitional Kitchen: Traditional cabinet details paired with modern appliances, simple tile, and updated metal finishes.

    A timeless kitchen does not need to be plain, expensive, or designed around one strict look. It needs a strong base, durable materials, useful storage, and enough personality to feel like yours. Start with the choices that are hardest to change, then add color, lighting, textiles, art, and small accents over time.

    When you balance beauty with real daily needs, these 19 Timeless Kitchen ideas can keep your home welcoming for many years.

  • 22 Contemporary Kitchen Ideas for a Fresh, Livable Home

    22 Contemporary Kitchen Ideas for a Fresh, Livable Home

    22 Contemporary Kitchen ideas can help you create a space that feels sleek, warm, and practical without looking cold or overly styled. I’ll walk you through the most useful choices, from cabinet colors and lighting to storage, seating, and finishing details.

    What makes a contemporary kitchen? It combines clean lines, practical storage, simple colors, modern materials, and a few warm decorative touches. The result is a streamlined room that feels comfortable, useful, and current without following a short-lived trend.

    You’ll also learn how to fit these ideas into small kitchens, open layouts, traditional homes, and tighter budgets. Let’s start with the foundation.

    What Defines a Contemporary Kitchen?

    When I picture a contemporary kitchen, I see a calm room with clear lines and very little visual clutter. It is not always stark white or ultra-modern. In fact, the best contemporary kitchens often mix smooth cabinets with wood, stone, woven pieces, or soft lighting.

    The style focuses on how the room works. Cabinets should open easily. Counters should handle daily messes. Lighting should support cooking, dining, and relaxing. Colors usually stay fairly simple, but texture keeps the design from feeling flat.

    Contemporary style also leaves room for personality. You can add colorful art, vintage stools, plants, or handmade pottery. The key is restraint. Choose a few strong details instead of filling every surface.

    1. Choose Flat-Panel Cabinets for a Clean Base

    A Complete Guide To Flat Panel Kitchen Cabinets For Modern Kitchen | George Cabinetry
    Credit: Georgecabinetry

    Flat-panel cabinets are one of the easiest ways to create a contemporary kitchen. Their smooth fronts have little ornament, so the room feels organized and uncluttered. Handleless doors create an even cleaner look, while slim bar pulls add a practical touch without taking over.

    For color, consider warm white, soft gray, mushroom, olive, navy, or natural wood. I like pairing one cabinet color with a different island finish. For example, pale oak lowers can soften charcoal cabinetry.

    Before ordering, ask for full-size samples. Cabinet color can change dramatically under daylight and warm bulbs. Also check how fingerprints show on darker finishes.

    This idea works in modern, farmhouse, transitional, and even traditional homes when paired with classic counters or hardware. Next, let’s look at the surface that pulls the whole room together.

    2. Use a Quiet Countertop With Subtle Movement

    Naturally formed. Effortlessly refined. Quartzite brings a quiet strength to the space, with subtle movement, soft veining, and a light, airy feel that never overwhelms. It's the kind of surface that doesn't
    Credit; Instagram

    A contemporary countertop should support the design rather than compete with it. Quartz, porcelain, granite, and solid-surface materials all work well. Look for a calm background with soft veining instead of a pattern that dominates the room.

    If your cabinets are dark, a pale countertop can brighten the kitchen. If the cabinets are white, a warm stone with beige or gray movement can add depth. Waterfall edges on an island create a polished look, but a simple eased edge often gives better value.

    Order samples before making a final choice. Place them beside cabinet doors, flooring, and backsplash samples. Check them in morning, afternoon, and evening light.

    The same approach fits coastal, industrial, Scandinavian, and traditional kitchens. Once the counter feels right, the backsplash can add texture without making the room busy.

    3. Install a Full-Height Backsplash

    46+ Full Height Backsplash ( EYE-CATCHING BACKDROP ) - Tile Designs
    Credit: Backsplash

    A backsplash that runs from the countertop to the upper cabinets, shelves, or ceiling gives a contemporary kitchen a finished appearance. It also reduces visual breaks, which makes a small room seem more spacious.

    Large-format porcelain slabs offer a smooth, low-maintenance surface with fewer grout lines. If you prefer tile, try stacked rectangular tile, slim vertical tile, or handmade-look ceramic in a soft neutral shade. Keep grout close in color to the tile for a quiet effect.

    Use a sample board before installation. Include the grout color, because grout can change the entire look. If the backsplash is bold, keep the cabinets and counters simple.

    This idea can adapt to rustic, Mediterranean, coastal, or classic homes by changing the tile shape and surface. Now let’s bring in lighting, which can change the mood more than paint.

    4. Layer Three Types of Kitchen Lighting

    27 kitchen lighting ideas to make your space shine | Ideal Home
    Credit: IdealHome

    Good lighting makes a contemporary kitchen easier to use and more pleasant at night. I recommend three layers: ambient lighting for general brightness, task lighting for work areas, and accent lighting for style.

    Recessed ceiling lights can provide even ambient light. Under-cabinet LED strips help with chopping and cleaning. Pendants over an island add visual interest and focused light. Choose bulbs around 2700K to 3000K for a warm, comfortable glow, and use dimmers whenever possible.

    Keep pendant bottoms about 30 to 36 inches above the counter, depending on sightlines and ceiling height. Test the placement with paper templates before drilling.

    Layered lighting fits every home style. Sleek black fixtures suit modern rooms, while aged brass or woven shades work in traditional and coastal spaces.

    Lighting Guide for a Contemporary Kitchen

    Lighting layerBest locationUseful color temperaturePractical purpose
    AmbientCeiling or flush fixtures3000K to 3500KGeneral room brightness
    TaskUnder upper cabinets3000KFood preparation and cleanup
    PendantAbove island or peninsula2700K to 3000KFocused light and decoration
    AccentInside glass cabinets or shelves2700KDisplay and nighttime glow
    Toe-kickUnder base cabinets2700KSoft evening pathway light

    With the lighting plan in place, we can make the kitchen feel warmer through natural materials.

    5. Add Warm Wood to Balance Sleek Finishes

    25 Wooden Kitchen Designs Blending Rustic Charm with Modern Elegance
    Credit: Greenply

    Too many glossy, hard surfaces can make a kitchen feel more like a showroom than a home. Wood adds warmth right away. You can use it on an island, open shelves, ceiling beams, stools, cutting boards, or cabinet sections.

    Light oak creates a Scandinavian feel. Walnut feels richer and more dramatic. Reclaimed wood brings texture and a relaxed farmhouse note, but it should be sealed carefully near sinks and cooking areas.

    Try one or two wood tones rather than mixing several. A wood island with matching stools usually feels more intentional than a room filled with unrelated timber finishes.

    This idea works with contemporary, industrial, coastal, and traditional designs. Once you have warmth, the next step is choosing hardware that supports the look.

    6. Pick Simple Hardware With a Strong Finish

    12 Best Kitchen Cabinet Materials And Finishes To Design A Trendy Modular Kitchen
    Credit: Frikly

    Cabinet hardware is small, but it has a big effect. Contemporary kitchens usually look best with slim pulls, rounded knobs, edge pulls, or integrated finger rails. Choose a finish that relates to the lighting, faucet, or nearby furniture.

    Matte black creates contrast and works well with white, wood, and pale gray. Brushed brass adds warmth. Brushed nickel feels quiet and versatile. Stainless steel suits an industrial or professional-style kitchen.

    Use consistent hardware on most cabinets, but you do not have to match every metal in the room. Two finishes can work if one is clearly dominant. Install pulls at a comfortable height and use templates to keep spacing even.

    This choice adapts easily to modern, vintage, coastal, and transitional kitchens. Next, let’s use the island as more than a block of storage.

    7. Design an Island for Work, Storage, and Conversation

    20 kitchen island ideas to add stylish seating to your space | Ideal Home
    Credit; IdealHome

    A contemporary island should earn its space. It may hold drawers, seating, a sink, a cooktop, or hidden appliances. Before choosing the shape, decide how you use the kitchen. If you cook with others, open work zones matter more than a huge seating ledge.

    Leave about 42 inches between the island and surrounding cabinets for a comfortable work aisle. A smaller kitchen may need closer to 36 inches, but measure carefully around appliances and doors. Choose stools with backs if people sit there for long periods.

    Add deep drawers for pots, pull-out trash storage, and a dedicated outlet if local codes allow it. Keep the countertop overhang practical rather than oversized.

    This idea fits open-plan, compact, farmhouse, and luxury kitchens. With the island planned, we can improve storage along the walls.

    8. Replace Some Upper Cabinets With Open Shelves

    Why I Combined Open Shelves and Cabinets in My Kitchen Remodel
    Credit: houzz

    Open shelving can make a contemporary kitchen feel lighter and more personal. It breaks up a long wall of cabinetry and gives you a place for everyday dishes, glassware, or a few decorative pieces.

    Use shelves where they will not be exposed to heavy grease. The wall beside a refrigerator or coffee station may work better than the area beside a cooktop. Choose thick wood, painted metal, or stone shelves that relate to the rest of the room.

    Keep the display simple. Group items by color and leave some empty space. Store less attractive tools in drawers or closed cabinets. Shelves also need strong brackets and proper wall anchors, especially for dishes.

    This feature suits Scandinavian, coastal, industrial, and cottage kitchens. Now let’s compare some practical finish choices before moving deeper into storage.

    Contemporary Kitchen Finish Comparison

    MaterialStrengthsWatch-outsBest use
    QuartzLow maintenance, many colors, no sealingCan be costly; avoid extreme heatBusy family counters
    Porcelain slabHeat and stain resistance, bold patternsInstallation requires skilled handlingFull-height backsplash or island
    Solid woodWarm, repairable, tactileNeeds sealing and care near waterIsland tops and shelves
    Stainless steelHygienic, heat resistant, professionalShows fingerprints and scratchesWorktops and appliance zones
    Honed graniteNatural texture, durableUsually needs periodic sealingHigh-use counters
    Ceramic tileMany shapes and colors, budget-friendlyGrout needs cleaningBacksplashes and counters

    9. Create a Dedicated Coffee or Beverage Station

    This is why you need a kitchen coffee station in your home | Ideal Home
    Credit: IdealHome

    A small beverage station can make a contemporary kitchen more convenient. It may be a full cabinet section, a narrow counter beside the refrigerator, or a shelf with an outlet nearby.

    Store mugs, tea, coffee, and glasses together so the area stays easy to use. A pocket door or appliance garage can hide the coffee machine when you want a cleaner view. Add a washable tray to catch drips and protect the counter.

    Keep the colors connected to the main kitchen. A walnut shelf, brass rail, or small framed print can make the station feel designed rather than accidental.

    This feature works in urban apartments, large open kitchens, farmhouse homes, and traditional layouts. From here, we can tackle one of the biggest sources of kitchen clutter: small appliances.

    10. Hide Small Appliances Behind an Appliance Garage

    Appliance Garage Ideas: Transform Your Kitchen into a Clutter-Free Haven
    Credit: Decorilla

    Toasters, blenders, mixers, and coffee machines can quickly cover a counter. An appliance garage keeps them ready to use while protecting the clean lines of a contemporary kitchen.

    Choose a location near an outlet and away from direct splashes. Lift-up doors work well where counter space is limited. Pocket doors disappear neatly, while tambour doors add a softer, slightly vintage detail.

    Measure each appliance before planning the cabinet. Leave space for ventilation, cords, and easy hand access. Do not place a heat-producing appliance inside a closed cabinet unless the design is made for it.

    This idea adapts to sleek modern, shaker, cottage, and industrial kitchens. Once the counters are clearer, let’s add color in a controlled way.

    11. Use One Strong Accent Color

    The New Neutral Kitchen Color Designers Are Using Instead of White | Homes and Gardens
    Credit: homesandgardens

    Contemporary kitchens often rely on neutral backgrounds, but that does not mean they must be boring. One strong accent color can give the room energy without creating visual noise.

    Try a deep green island, cobalt stools, terracotta tile, or a blue range hood. If the accent is permanent, test several shades in the actual room first. Paint and tile can look different beside counters and under artificial light.

    Repeat the accent two or three times. For example, use green on the island, a small art print, and a ceramic bowl. Repetition makes the color feel intentional.

    This approach works with modern, Mediterranean, eclectic, and traditional styles. Next, we’ll use texture for depth without adding another loud color.

    12. Mix Matte, Glossy, and Textured Surfaces

    Modern Kitchen Style: Colours, Textures & Finishes | Sydney
    Credit: wonderfulKitchens

    A room with only one finish can feel flat. A room with too many finishes can feel chaotic. Contemporary design benefits from a careful mix of surfaces.

    Pair matte cabinet doors with a lightly reflective backsplash. Add a honed counter, brushed metal faucet, or ribbed glass pendant. Fluted wood panels can bring shadow and rhythm to an island or pantry wall.

    Try to keep the color palette simple while allowing the textures to vary. This creates interest without making the kitchen look crowded. Touch the samples together before choosing them. Some finishes look good alone but clash when placed side by side.

    The same method suits minimalist, coastal, industrial, and art deco-inspired rooms. With texture established, we can make the floor support the entire scheme.

    Accent Color Pairings

    Main kitchen colorAccent colorSupporting materialOverall effect
    Warm whiteOlive greenOak or rattanSoft and grounded
    CharcoalAged brassWalnutRich and dramatic
    Pale grayTerracottaCream ceramic tileEarthy and welcoming
    Natural oakDeep navyBrushed nickelCalm and tailored
    Mushroom beigeDusty blueLight stoneGentle and coastal
    BlackWarm whiteStainless steelCrisp and graphic

    13. Choose Flooring That Can Handle Daily Life

    15 Kitchen flooring ideas for style on every surface | Ideal Home
    Credit: Idealhome

    Kitchen floors need to look good, but they also need to survive spills, dropped utensils, and constant foot traffic. Porcelain tile, sealed hardwood, luxury vinyl, and natural stone can all work in a contemporary setting.

    Large-format tile creates fewer grout lines and makes a small kitchen feel calmer. Light oak flooring warms a white kitchen. Dark flooring can look dramatic, but it may show crumbs and dust more clearly.

    Choose a slip-resistant surface, especially near the sink and entry door. Use a washable runner in busy areas, but secure it with a non-slip pad. Order a floor sample and place it beside the cabinets before installation.

    This idea fits modern, rustic, coastal, and classic homes. Once the floor is practical, we can add softness underfoot.

    14. Place a Washable Runner in the Work Zone

    15 Best Washable Kitchen Runner Rugs - Making Manzanita
    Credit: makingmanzanita

    A runner adds color, comfort, and pattern to a contemporary kitchen. It also helps reduce fatigue when you stand at the sink or prep counter.

    Choose a low-pile washable rug with a non-slip backing. A 2-by-6-foot runner often works in a narrow galley kitchen, while a 3-by-8-foot option may suit a longer work zone. Make sure cabinet doors can open without catching the edge.

    For a quiet room, use a faded geometric pattern or solid woven texture. If the cabinets are plain, a small pattern can provide personality. Avoid thick shag rugs, which trap crumbs and make chair movement difficult.

    Runners work in Scandinavian, farmhouse, boho, and transitional kitchens. Next, we’ll bring in greenery for a more natural finish.

    15. Add Plants That Tolerate Kitchen Conditions

    Kitchen plant ideas – the best houseplants and how to style them in a kitchen | Ideal Home
    Credit: IdealHome

    Plants make a contemporary kitchen feel alive. They also soften straight lines and hard surfaces. Choose varieties that match the available light rather than buying based only on appearance.

    Herbs such as basil, thyme, and mint work well near a bright window, though they need regular care. Snake plants and pothos handle indoor conditions more easily. A small trailing plant can sit on a shelf, while a larger plant can fill an empty corner.

    Use pots that repeat a kitchen finish, such as matte black, terracotta, or pale ceramic. Place plants away from hot burners and keep leaves clear of food preparation areas.

    This idea fits tropical, minimalist, cottage, and industrial styles. After adding life, let’s make the walls feel more personal.

    16. Display Art Instead of Filling Every Wall With Cabinets

    15 kitchen wall ideas to decorate the heart of your home | Ideal Home
    Credit: Idealhome

    Art can make a contemporary kitchen feel like part of the home instead of a purely functional workspace. Choose one large print, a pair of small paintings, or a framed textile.

    Keep artwork away from direct steam, splashes, and high heat. A dining wall, breakfast nook, or end panel beside the refrigerator is often safer. Use a frame finish that connects to the room, but do not feel forced to match every metal.

    Food photography, abstract shapes, botanical prints, and vintage signs can all work. I prefer one clear focal point over many tiny pieces scattered around the room.

    This approach adapts to eclectic, traditional, coastal, and minimalist homes. With the walls handled, we can create a comfortable place to sit.

    Kitchen Seating Size Guide

    Seating typeRecommended width per personTypical seat heightBest placement
    Counter stool24 to 26 inches24 to 26 inches36-inch counter
    Bar stool28 to 30 inches28 to 30 inches42-inch bar
    Compact backless stool20 to 22 inchesCounter heightSmall islands
    Dining chair20 to 24 inches17 to 19 inchesKitchen table
    Bench seating18 to 22 inches per person17 to 19 inchesNooks and banquettes

    17. Select Comfortable Seating With Simple Shapes

    20 kitchen island ideas to add stylish seating to your space | Ideal Home
    Credit: IdealHome

    Kitchen seating should look good, but comfort matters more. Choose stools with a supportive seat, a stable base, and enough room for knees. Backless stools slide away neatly, while stools with backs are better for long breakfasts or homework sessions.

    Wood adds warmth. Upholstered seats bring softness. Metal frames suit an industrial kitchen and can be balanced with cushions or a wood seat.

    Measure the counter height before shopping. Counter stools and bar stools are not interchangeable. Leave enough space between seats so people do not bump elbows.

    This idea works in contemporary, farmhouse, retro, and coastal kitchens. Now let’s improve the everyday experience with smarter storage.

    18. Use Deep Drawers Instead of Lower-Cabinet Shelves

    Kitchen drawers vs cabinets - which is best for your space? | Ideal Home
    Credit: IdealHome

    Deep drawers make lower storage easier to reach. You can see pots, pans, plates, and food containers without kneeling and pulling everything out. They also give a contemporary kitchen a tidy, horizontal appearance.

    Use shallow drawers for utensils and wraps. Medium drawers suit dishes and baking tools. Deep drawers can hold cookware, small appliances, or pantry containers. Add drawer dividers so items stay upright and easy to find.

    Check the drawer hardware rating before storing heavy cast iron. Soft-close runners reduce noise and protect the cabinet over time. If you are remodeling, place the most-used items between waist and shoulder height.

    This storage strategy fits small apartments, modern homes, traditional kitchens, and family spaces. Next, we’ll use vertical storage where it makes the biggest difference.

    19. Build a Tall Pantry Wall

    Tall Kitchen Cabinets: Smarter Storage For Organized Cooking
    Credit: Sweeten

    A tall pantry wall uses vertical space efficiently. It can include food storage, a broom cabinet, an appliance garage, or a hidden microwave. This keeps smaller cabinets free for daily-use items.

    Adjustable shelves are important because jars, cereal boxes, and appliances come in different sizes. Pull-out pantry shelves make narrow spaces easier to reach, but fixed shelves can offer more storage for less money.

    Group items by purpose. Keep breakfast foods together, baking supplies in one section, and snacks at a child-friendly height. Add labels if several people share the kitchen.

    This idea suits contemporary, farmhouse, transitional, and compact kitchen designs. With storage organized, we can decide how to make the sink area look polished.

    20. Treat the Sink Wall as a Design Feature

    15 kitchen wall ideas to decorate the heart of your home | Ideal Home
    Credit: idealHome

    The sink wall often becomes the busiest part of a kitchen, so it deserves thoughtful design. A deep single-bowl sink gives space for large pans. An apron-front sink adds character, while an undermount sink creates a smooth countertop transition.

    Choose a faucet with a pull-down sprayer and a finish that relates to the cabinet hardware. Add a window, simple shelf, or attractive soap dispenser if space allows. Keep daily cleaners in a hidden caddy rather than lined up beside the faucet.

    Make sure the faucet height works beneath nearby windows or shelves. Also check that the sink cabinet can hold plumbing, bins, and cleaning supplies.

    This idea adapts to modern, cottage, coastal, and traditional kitchens. Let’s compare a few layout and storage choices before finishing the final ideas.

    Storage Feature Comparison

    FeatureSpace neededBest forMain benefit
    Pull-out pantry9 to 15 inches wideNarrow gapsEasy access to dry goods
    Deep drawer bank24 to 36 inches wideBase cabinetsStores pots and dishes visibly
    Corner drawerLarger corner cabinetL-shaped kitchensUses difficult corner space
    Appliance garage18 to 36 inches wideBusy countersHides small appliances
    Tall pantry cabinet24 to 36 inches wideFull-height wallsAdds major vertical storage
    Open shelf8 to 12 inches deepDisplay zonesLightens upper cabinetry

    21. Connect the Kitchen to the Rest of the Home

    7 New Warm and Inviting Contemporary Kitchens
    Credit: Houzz

    In an open-plan home, the kitchen should feel related to the living and dining areas. This does not mean every room must match. Repeat one or two elements, such as wood tone, wall color, metal finish, or textile pattern.

    A contemporary kitchen can connect through a shared flooring material, a nearby wood table, or lighting with similar shapes. Keep countertop clutter low because open kitchens are always visible.

    Use a rug or pendant light to define the dining zone without building a wall. If the kitchen feels too exposed, consider a slatted divider, glass partition, or tall plant instead of closing the layout.

    This strategy works in apartments, traditional houses, lofts, and coastal homes. One final idea can make the entire room feel more responsible and future-ready.

    22. Choose Durable, Repairable, and Lower-Waste Materials

    How to Dispose of Kitchen Renovation Waste Sustainably | Livingetc
    Credit: LivingEtc

    A contemporary kitchen should not be designed only for photographs. Choose materials that can handle years of use and be repaired when possible. Durable cabinets, quality hinges, replaceable hardware, and timeless colors reduce the need for frequent updates.

    Consider recycled glass counters, responsibly sourced wood, water-saving faucets, and energy-efficient appliances. The greenest choice is often the item you will keep for a long time. Avoid selecting a finish simply because it is popular this year.

    Ask cabinet companies about repair options, finish touch-ups, and replacement doors. Buy fewer decorative pieces, but choose ones you truly enjoy using or seeing.

    This idea fits minimalist, rustic, modern, and traditional homes. With these choices, your kitchen can feel current without becoming disposable.

    Tips for Success

    • Measure every wall, doorway, window, and appliance opening before ordering materials.
    • Create a finish board with cabinet, counter, backsplash, flooring, metal, and paint samples.
    • Plan lighting before cabinets and ceilings are installed.
    • Keep the main walkway clear, especially in open-plan kitchens.
    • Use closed storage for visual clutter and open shelves for items you use often.
    • Choose cabinet and countertop colors after checking the room’s natural light.
    • Spend more on hinges, drawer runners, faucets, and lighting because these parts receive daily use.

    Common Mistakes and How to Avoid Them

    Choosing finishes from a small online image
    Order physical samples and view them in your own kitchen at different times of day.

    Making the island too large
    Mark the proposed island with painter’s tape and test the walking space, cabinet doors, and appliance clearance.

    Using only ceiling lights
    Add under-cabinet task lighting and dimmable pendants so the room works at night.

    Adding too many materials
    Limit the main palette to a few cabinet, counter, wood, tile, and metal finishes that support one another.

    Ignoring storage for small appliances
    Plan outlets and cabinet space for coffee machines, mixers, toasters, and charging devices before construction begins.

    Picking style over comfort
    Test stools, faucets, drawer handles, and work heights in person whenever possible.

    Similar Variations

    • Warm Minimalist Kitchen: Uses simple cabinets, soft neutrals, wood, and very little decoration.
    • Contemporary Coastal Kitchen: Combines pale blue, white, light oak, natural fibers, and relaxed lighting.
    • Modern Farmhouse Kitchen: Mixes flat or shaker cabinetry with wood accents, practical storage, and vintage-inspired details.
    • Contemporary Industrial Kitchen: Uses black metal, concrete-look surfaces, exposed lighting, and strong graphic lines.
    • Japandi Kitchen: Blends Japanese simplicity with Scandinavian warmth through pale wood, calm colors, and tidy storage.
    • Contemporary Mediterranean Kitchen: Adds handmade tile, earthy colors, natural stone, and warm metal accents to a clean layout.

    A successful contemporary kitchen is not just a collection of trendy finishes. It is a room planned around real habits, useful storage, comfortable lighting, and materials that can handle everyday life.

    Start with the layout, then build the palette and details around it. The best 22 Contemporary Kitchen design is the one that looks calm, works hard, and still feels like home.