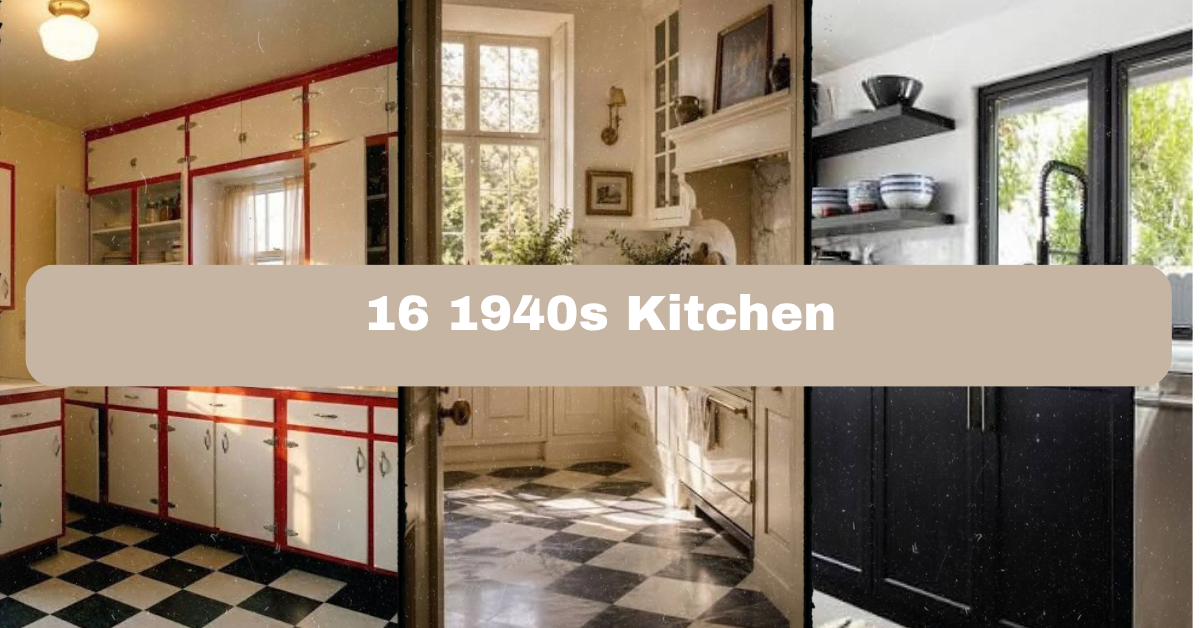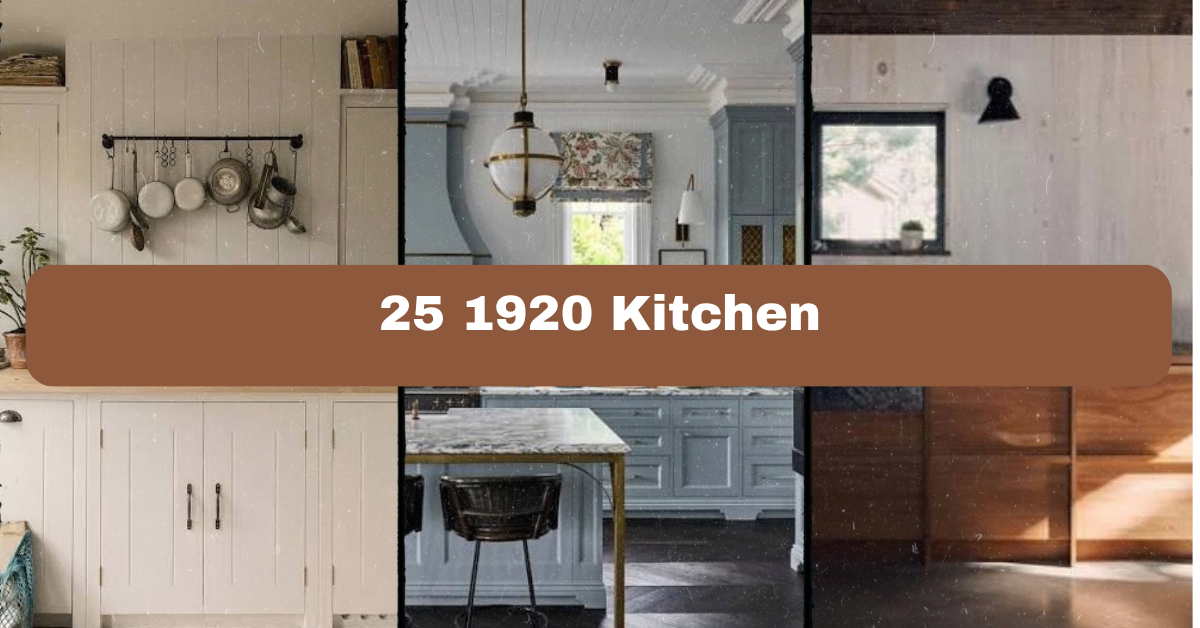
25 1920 Kitchen ideas can help you create a room that feels charming, practical, and true to the period without turning your home into a museum. I’ll walk you through colors, cabinets, lighting, flooring, hardware, and small details that make the look work today.
A 1920s kitchen usually combines simple painted cabinets, practical work areas, vintage fixtures, patterned flooring, wood accents, and soft period colors. The best designs balance historic character with modern appliances, storage, lighting, and safety.
Keep reading for thoughtful ways to plan the room, whether you own a true 1920s house or simply love the look. I’ll also share easy updates that work in newer homes.
What Defines a 1920s Kitchen?
When I picture a 1920s kitchen, I see a hardworking room with a clean layout and plenty of personality. It is less ornate than a Victorian kitchen but warmer than a strict modern space. White or cream cabinets were common, along with painted wood, enamel surfaces, simple tile, and sturdy hardware.
The style also reflects a time when kitchens became more organized. Work areas were often arranged around cooking, washing, and food storage. Built-in cabinets, open shelves, pantry cupboards, and breakfast nooks all fit naturally. Today, I like to mix those old-fashioned details with reliable appliances, better lighting, and hidden storage. The goal is not perfect historical accuracy. It is a kitchen that feels lived-in, useful, and connected to the home’s age.
1. Choose Cream Cabinets Instead of Bright White
Cream cabinets create an instant 1920s feeling. They soften the room and look more natural beside aged wood, brass, and patterned tile. Choose a warm shade with yellow, beige, or soft gray undertones. Avoid very stark blue-white paint, which can make a historic kitchen feel too sharp.
I would use cream on the main cabinets and add slightly darker trim around doors or windows. Simple Shaker doors, flat-panel fronts, and narrow rails all work well. For a quick update, repaint existing cabinets and replace modern pulls with cup handles.
This idea suits traditional, cottage, farmhouse, and transitional homes. Next, add a second cabinet color to give the room more depth.
2. Add a Soft Sage or Dusty Blue Island
A painted island is a great way to bring color into a 1920s kitchen without overwhelming it. Sage green, dusty blue, muted teal, and smoky gray all fit the period-inspired look. These colors feel calm and slightly faded, as if they belong in an older home.
I like using the deeper shade on a small island or freestanding worktable. Pair it with cream cabinets, a butcher-block top, and aged brass knobs. If the room is narrow, keep the island light in color and use open legs to preserve visual space.
This approach works in coastal, farmhouse, English cottage, and modern homes. Once the color plan is set, choose a countertop that supports the vintage mood.
3. Install a Warm Butcher-Block Countertop
Wood countertops add warmth and connect a new kitchen to the handmade feel of the 1920s. Butcher block is especially useful on an island, baking station, or small prep area. Maple, oak, and walnut are strong choices, though each creates a different mood.
Use light maple for a cheerful cottage look. Choose medium oak for a traditional kitchen. Walnut brings a richer, more refined finish. Seal the surface with a food-safe product, and follow the care instructions closely. Keep hot pans and standing water away from unprotected wood.
A wood counter can fit rustic, Scandinavian, traditional, and contemporary rooms. After adding warmth below, turn your attention to the backsplash.
4. Use Small White Subway Tile With Dark Grout
Small subway tile gives a 1920s kitchen a clean, practical backdrop. A three-by-six-inch tile is classic, but two-by-four-inch tiles can look even more period-friendly. Choose handmade-looking edges if you want a softer, less perfect finish.
Dark gray grout makes the pattern visible and hides cooking marks better than bright white grout. Cream grout creates a quieter result. Keep the tile simple rather than adding too many decorative borders. A narrow pencil trim can finish the top edge neatly.
This backsplash works with traditional, industrial, cottage, and modern cabinets. Before selecting more materials, compare a few reliable period-inspired combinations.
H3: Useful 1920s Kitchen Color Combinations
| Main cabinet color | Accent color | Countertop | Best overall mood |
|---|---|---|---|
| Warm cream | Sage green | Oak or butcher block | Cottage and relaxed |
| Soft gray | Dusty blue | White quartz | Calm and coastal |
| Pale ivory | Black | Honed granite | Classic and graphic |
| Muted teal | Cream | Light wood | Cheerful and vintage |
| Medium oak | Antique white | Soapstone | Traditional and grounded |
The right palette makes every later choice easier, so use these combinations as a starting point rather than mixing colors randomly.
5. Select Hexagonal or Checkerboard Flooring
Flooring can make the whole kitchen feel more connected to its era. Small hexagonal tile, black-and-white checkerboard tile, and simple square ceramic tile are all strong options. These patterns add interest without requiring busy wall decor.
For a softer look, use cream and charcoal instead of pure white and black. A muted terracotta and beige pattern can also suit a warmer home. Choose matte or low-sheen surfaces because they look more authentic and are less slippery than high-gloss tile.
Always order samples before committing. Check them in morning and evening light. These floors suit vintage, farmhouse, Art Deco, and modern interiors. Next, bring in hardware that looks intentionally aged.
6. Replace Cabinet Pulls With Vintage-Style Hardware
Hardware is small, but it has a big effect. Bin pulls, latches, simple round knobs, and bridge faucets all reinforce a 1920s kitchen design. Aged brass, brushed nickel, oil-rubbed bronze, and antique pewter are useful finishes.
Try cup pulls on drawers and small knobs on doors. Keep the shapes simple. Oversized modern handles can make the cabinets feel newer than the rest of the room. If the cabinets are original, measure each hole carefully before ordering replacements.
I would install one sample first and live with it for a day. This style works with farmhouse, traditional, industrial, and updated vintage rooms. Once the hardware is in place, choose lighting that makes those details shine.
7. Hang Schoolhouse Pendant Lights
Schoolhouse lights are one of the easiest ways to suggest a 1920s kitchen. Their rounded glass shades spread light across counters without looking too formal. Choose opal glass, milk glass, or frosted glass with a simple metal fitting.
Hang one over a sink or two above an island. The bottom of a pendant should usually sit about 30 to 36 inches above the countertop, though your sightline matters too. Use warm LED bulbs around 2700K to keep the light comfortable and inviting.
These fixtures work in craftsman, farmhouse, vintage, and transitional homes. With the main lighting planned, add a smaller fixture for a cozy eating area.
8. Build a Small Breakfast Nook
A breakfast nook makes a 1920s kitchen feel friendly and purposeful. If you have a corner near a window, add a small round table, a built-in bench, or two simple wooden chairs. A cushion in ticking stripe, gingham, or muted floral fabric adds character.
Keep the furniture compact. A round table about 36 to 42 inches wide can seat two to four people without blocking traffic. Add a wall sconce or small pendant above the table. Use washable fabric if the nook will serve as a daily family spot.
This idea fits cottage, craftsman, apartment, and traditional homes. The next step is choosing furniture that looks useful rather than overly decorative.
H3: Breakfast Nook Size Guide
| Nook type | Recommended table size | Comfortable seating | Minimum clear area |
|---|---|---|---|
| Two-person corner | 30 to 36 inches round | 2 chairs | About 6 by 6 feet |
| Four-person round table | 36 to 42 inches round | 4 chairs | About 7 by 7 feet |
| Narrow bench nook | 36 by 48 inches | 2 to 3 people | About 5 by 7 feet |
| Built-in L-shaped nook | 42 by 60 inches | 4 to 6 people | About 7 by 8 feet |
| Compact apartment nook | 24 by 36 inches | 2 people | About 5 by 5 feet |
Leave enough room to pull out chairs and walk past the table. A beautiful nook that blocks the refrigerator will become frustrating fast.
9. Use a Freestanding Hoosier-Style Cabinet
A Hoosier-style cabinet adds storage and strong period character. These tall units often include drawers, shelves, a work surface, and small compartments for baking supplies. Even a modern reproduction can bring the same practical charm.
Place one against an empty wall or near the baking area. Use it for coffee gear, cookbooks, flour jars, or serving pieces. If you find an antique cabinet, check for odors, pests, damaged hinges, and unsafe finishes before bringing it indoors.
This piece works in farmhouse, cottage, traditional, and eclectic kitchens. After adding tall storage, balance the room with lighter open shelving.
10. Install Open Shelves With Simple Brackets
Open shelves make a small kitchen feel less crowded and provide space for attractive daily items. Use painted wood, reclaimed boards, or smooth oak. Simple wood or metal brackets are better than highly ornate supports.
Display only what you use often, such as white dishes, mixing bowls, glass jars, and a few mugs. Leave some empty space so the shelves do not look messy. Install them where they will not interfere with cabinet doors or cooking steam.
A practical shelf depth is often 10 to 12 inches. This works in modern, rustic, coastal, and traditional kitchens. Now that storage is becoming visible, organize it with period-friendly containers.
11. Display Glass Jars and Ceramic Canisters
Glass jars and ceramic canisters make everyday supplies part of the decor. Store flour, sugar, oats, pasta, tea, or wooden utensils in containers that are easy to reach. Clear glass works well for a pantry wall, while cream or colored ceramic creates a more collected look.
Choose labels with simple lettering. Avoid filling every container with matching accessories, since too much uniformity can look staged. Mix heights and textures instead. A small tray can group oils, salt, and pepper near the stove.
This idea suits minimalist, farmhouse, vintage, and English cottage kitchens. With the counters organized, add one carefully chosen decorative wall feature.
12. Add a Framed Botanical or Food Print
Artwork can soften a kitchen filled with hard surfaces. Botanical prints, fruit studies, herb illustrations, and old-style food advertisements all suit a 1920s-inspired room. Look for muted greens, faded reds, warm beige, and charcoal.
Frame the print in wood, brass, or simple black. Hang it away from direct steam and splatter. A small pair of prints often looks better than one oversized piece in a narrow kitchen. You can also frame a reproduction recipe or vintage-style market label.
This works in traditional, eclectic, cottage, and contemporary homes. Use the artwork as a bridge between the cabinet color and the room’s accent shades.
H3: Material Comparison for a Period-Inspired Kitchen
| Material | Strengths | Care level | Best use |
|---|---|---|---|
| Butcher block | Warm, repairable, affordable | Moderate | Island or baking area |
| Soapstone | Heat-resistant, matte, historic feel | Low to moderate | Full countertop |
| Honed granite | Durable and less shiny | Low | Busy family kitchen |
| Ceramic tile | Many colors and patterns | Moderate grout care | Counter or backsplash |
| Quartz | Easy care and consistent color | Low | Modern period blend |
| Stainless steel | Sanitary and durable | Low, but shows marks | Work zone or utility area |
Choose materials based on how you cook. A charming surface is not worth it if it cannot handle your daily routine.
13. Try a Farmhouse Sink With an Apron Front
An apron-front sink creates a strong focal point. White fireclay is the most recognizable choice, but porcelain enamel and stainless steel can also work. Look for a simple front without excessive curves or decorative ridges.
Before buying, measure the cabinet opening, plumbing position, counter depth, and sink base. Farmhouse sinks are heavy, so the cabinet needs proper support. A bridge faucet or separate hot and cold handles can add vintage appeal.
This sink fits farmhouse, traditional, cottage, and transitional kitchens. Once the main sink is selected, make the surrounding wall practical as well as pretty.
14. Create a Narrow Rail for Towels and Utensils
A wall rail offers useful storage without taking up counter space. Install one near the sink for towels, or near the range for wooden spoons and small tools. Brass, black metal, and brushed nickel all work, depending on the rest of the hardware.
Use sturdy hooks and avoid hanging too many items. A linen towel, one small basket, and three or four utensils are usually enough. Mount the rail into a wall stud whenever possible, especially if you will hang heavy cookware.
This detail works in industrial, vintage, Scandinavian, and farmhouse rooms. It also helps smaller kitchens feel more organized before you consider larger storage changes.
15. Add a Built-In Plate Rack
A plate rack gives upper cabinetry a custom, old-house feel. It can sit above a counter, inside a cabinet, or between two shelves. Use it to display everyday plates in cream, white, or soft blue.
Keep the rack close to the dishwasher or sink so the plates are easy to put away. Make sure each slot is wide enough for your dishes. A shallow rack saves space, while a deeper version can hold bowls and cutting boards.
Paint the rack to match the cabinets or use natural wood as a contrast. This feature suits English cottage, farmhouse, traditional, and eclectic styles. Next, make the lower cabinets work harder with deep drawers.
H3: Storage Planning Guide
| Storage feature | Useful depth | Best items | Planning note |
|---|---|---|---|
| Upper cabinet | 12 to 15 inches | Plates, glasses, mugs | Keep heavy items low |
| Base cabinet shelf | 21 to 24 inches | Pots, appliances | Add pull-out trays |
| Wide drawer | 24 to 36 inches | Pans, dishes, tools | Use dividers |
| Narrow drawer | 6 to 12 inches | Spices, utensils | Place near prep area |
| Pantry shelf | 12 to 16 inches | Cans, jars, dry goods | Avoid deep hidden rows |
| Open shelf | 10 to 12 inches | Daily dishes, decor | Leave space between groups |
Good storage should save steps. Put each item near the place where you use it most.
16. Choose Deep Drawers Instead of Too Many Shelves
Deep drawers make pots, pans, plates, and small appliances easier to reach. In a period-inspired kitchen, use them behind furniture-style fronts so the room still feels traditional. Add wood or bamboo dividers to prevent sliding.
Place the largest drawers near the cooktop. Use medium drawers for prep tools and shallow drawers for flat items. Soft-close hardware is a modern convenience that can stay hidden behind classic cabinet faces.
This idea works in modern, traditional, craftsman, and farmhouse kitchens. Once storage is practical, use the walls and ceiling to add architectural interest.
17. Add Beadboard or Tongue-and-Groove Paneling
Beadboard brings texture and a relaxed historical feeling to the kitchen. Use it on the backsplash, island sides, breakfast nook walls, or a ceiling. Paint it cream, pale blue, sage, or warm white.
Keep the lines vertical to make a low ceiling feel taller. Seal the paneling well near sinks and cooking areas. For a busy kitchen, tile may be easier to clean behind the range than wood paneling.
This feature suits coastal, cottage, farmhouse, and craftsman interiors. It also provides a gentle backdrop for the next idea, which focuses on ceiling design.
18. Use a Simple Coffered or Paneled Ceiling
A modest paneled ceiling can make a kitchen feel finished without adding clutter. Narrow strips of painted wood create a subtle grid, while beadboard gives a more relaxed cottage mood. Keep the design simple if the room already has patterned floors or detailed cabinets.
Paint the ceiling a warm white or very pale blue. Use low-profile trim so it does not reduce headroom. In a small kitchen, run panels in the room’s longest direction to support a sense of width.
This works in craftsman, traditional, coastal, and farmhouse homes. With the ceiling complete, bring some softness into the room through textiles.
H3: Lighting Temperature Guide
| Lighting location | Suggested color temperature | Reason |
|---|---|---|
| Main ceiling fixture | 2700K to 3000K | Warm, comfortable room light |
| Under-cabinet lighting | 2700K to 3000K | Keeps counters from looking harsh |
| Pantry or utility area | 3000K to 3500K | Clearer task visibility |
| Breakfast nook | About 2700K | Relaxed dining atmosphere |
| Decorative wall light | About 2700K | Soft accent glow |
Use dimmers where possible. Layered light is more useful than one bright ceiling fixture.
19. Layer Linen Curtains and Cafe Panels
Small fabric panels can make a kitchen feel more welcoming. Linen, cotton, ticking stripe, gingham, and small floral prints all suit a 1920s mood. Cafe curtains cover the lower half of a window while keeping the upper glass open for light.
Choose washable fabric and install the rod close to the window frame. Keep curtains away from open flames and hot burners. If privacy is not a concern, use a simple valance or one side panel instead.
This idea fits cottage, traditional, coastal, and country kitchens. After softening the windows, ground the room with a useful woven accent.
20. Place a Flat-Weave Runner Near the Sink
A runner adds comfort underfoot and breaks up hard flooring. Choose a flat-weave wool, cotton, or washable synthetic design in muted colors. Stripes, small diamonds, and faded geometric patterns can echo the 1920s without looking costume-like.
Measure the walkway before shopping. Leave a few inches of visible floor on each side, and make sure doors can open fully. Use a non-slip pad, especially on tile or wood.
A runner works in modern, farmhouse, bohemian, and traditional spaces. It is a small change, but it can make long periods of cooking feel easier.
H3: Kitchen Runner Size Guide
| Kitchen area | Common runner size | Recommended clearance |
|---|---|---|
| Narrow galley walkway | 2 by 6 feet | Keep doors fully clear |
| Standard sink zone | 2.5 by 7 feet | Leave 3 to 6 inches per side |
| Long galley kitchen | 2.5 by 8 to 10 feet | Avoid stopping at door swings |
| Small prep area | 2 by 3 feet | Use a secure non-slip pad |
| Wide open kitchen | 3 by 8 feet | Center with the main work path |
A rug should support movement, not create a tripping point. Test the placement with cardboard before ordering.
21. Mix in a Wood Step Stool
A small wood step stool is both useful and decorative. It can help reach upper shelves, provide a seat during prep, or fill an awkward corner. Choose a sturdy folding model in oak, maple, or painted wood.
Look for wide steps, non-slip feet, and a weight rating that suits your household. Do not use a decorative stool that feels unstable. Store it beside the pantry or under an open shelf where it is easy to grab.
This piece fits rustic, cottage, Scandinavian, and traditional styles. Practical objects like this help the kitchen feel real instead of overly styled.
22. Add a Compact Appliance Garage
Modern appliances can disrupt a vintage kitchen’s appearance. An appliance garage hides a toaster, blender, mixer, or coffee machine while keeping it accessible. Build one into the cabinet run or use a freestanding wood cabinet.
Match the door style to the rest of the kitchen. Add outlets inside the garage, but have electrical work completed safely and according to local code. Provide ventilation for appliances that create heat, and never store a hot appliance inside.
This solution works in modern, traditional, farmhouse, and transitional kitchens. Once larger appliances are controlled, use a few small vintage accents with restraint.
23. Display One or Two Vintage Kitchen Pieces
A few vintage objects can add soul without making the kitchen feel crowded. Consider a copper mold, old wooden board, enamel pitcher, stoneware crock, or metal flour sifter. Choose items that relate to cooking rather than random clutter.
Place one piece on a shelf and another near the range or breakfast nook. Check antique finishes for flaking paint, lead concerns, rust, or food-safety issues. Decorative items do not need to be used for food.
This idea suits eclectic, farmhouse, traditional, and industrial rooms. A restrained collection keeps the 1920s reference clear and tasteful.
24. Design a Hidden Pantry Wall
A pantry wall can combine historic charm with modern organization. Use tall cabinet doors painted like the rest of the kitchen, then place adjustable shelves, pull-out baskets, and labeled bins behind them. The outside stays calm while the inside handles daily mess.
Group foods by type and keep frequently used items between waist and eye level. Use shallow shelves so cans and jars do not disappear behind one another. Add a small counter inside for appliances if the space allows.
This approach fits small apartments, large family kitchens, traditional homes, and sleek modern spaces. Good storage makes the final decorative layer much easier to manage.
H3: Budget Tiers for a 1920s Kitchen Refresh
| Project level | Approximate scope | Best value improvements |
|---|---|---|
| Under $500 | Cosmetic refresh | Paint, hardware, curtains, jars, prints |
| $500 to $2,000 | Small feature updates | Lighting, runner, open shelves, faucet |
| $2,000 to $8,000 | Partial renovation | Backsplash, counters, sink, cabinet changes |
| $8,000 to $20,000 | Major update | New cabinets, flooring, lighting, appliances |
| Above $20,000 | Full renovation | Layout, plumbing, electrical, custom millwork |
Costs vary by location, materials, and labor. Set aside extra money for repairs in older homes, especially around plumbing and electrical systems.
25. Blend Vintage Details With Modern Safety
The best 1920s kitchen is comfortable to use. Keep the historic look, but update the parts that affect safety and function. Grounded outlets, strong task lighting, reliable ventilation, slip-resistant flooring, and properly installed appliances matter more than perfect styling.
Use concealed modern features when possible. A quiet dishwasher can sit behind a furniture-style panel. A current refrigerator can blend in with warm cabinet colors. Install smoke and carbon monoxide detectors nearby, but follow local placement rules.
This balanced approach works in every home style. It lets you enjoy the character of the past without giving up the convenience of the present.
Tips for Success
- Create a mood board before buying paint, tile, hardware, or lighting.
- Test cabinet colors beside your flooring and countertop samples.
- Measure door swings, walkways, and appliance clearances before ordering furniture.
- Use warm white bulbs so cream cabinets do not look gray or harsh.
- Mix old-looking finishes with modern materials for easier care.
- Keep at least one clear prep area beside the sink or cooktop.
- Buy fewer decorative pieces, but choose items with useful shapes and strong character.
Common Mistakes and How to Avoid Them
Making the room look like a museum
Use a few period details, then add modern appliances, practical drawers, and current lighting for comfort.
Choosing too many competing patterns
Limit bold patterns to one main feature, such as the floor, backsplash, or curtains. Keep the other surfaces quiet.
Ignoring appliance clearances
Measure refrigerator doors, dishwasher openings, island spacing, and walkway width before installing anything.
Using fragile materials everywhere
Place delicate wood or handmade tile in lower-risk areas, and choose durable surfaces near sinks and cooktops.
Overloading open shelves
Display daily dishes and a few accents. Leave empty space so shelves remain useful and easy to clean.
Picking finishes that do not work together
Repeat each main finish at least twice. For example, use aged brass on the faucet and cabinet pulls.
Similar Variations
- 1920s Cottage Kitchen: Uses cream cabinets, floral fabric, beadboard, and small-scale vintage accessories.
- Art Deco Kitchen: Adds geometric tile, black accents, polished metal, and stronger contrast.
- 1920s Craftsman Kitchen: Focuses on oak, sturdy built-ins, earthy colors, and simple stained wood.
- Coastal Vintage Kitchen: Combines soft blue, white tile, natural wood, linen, and light woven textures.
- Modern Heritage Kitchen: Keeps the period color palette while using sleek appliances, quartz counters, and hidden storage.
- Farmhouse Period Kitchen: Blends apron sinks, painted cabinets, open shelving, wood counters, and practical furniture.
A successful historic-inspired kitchen does not need every feature on this list. Start with the elements that matter most to you, such as cabinet color, flooring, lighting, or a farmhouse sink. Then build the room slowly so each choice supports the next one.
I would focus on warmth, usefulness, and a few honest vintage touches rather than chasing a perfect reproduction. With the right balance, your kitchen can feel fresh today while still carrying the charm of a 25 1920 Kitchen.