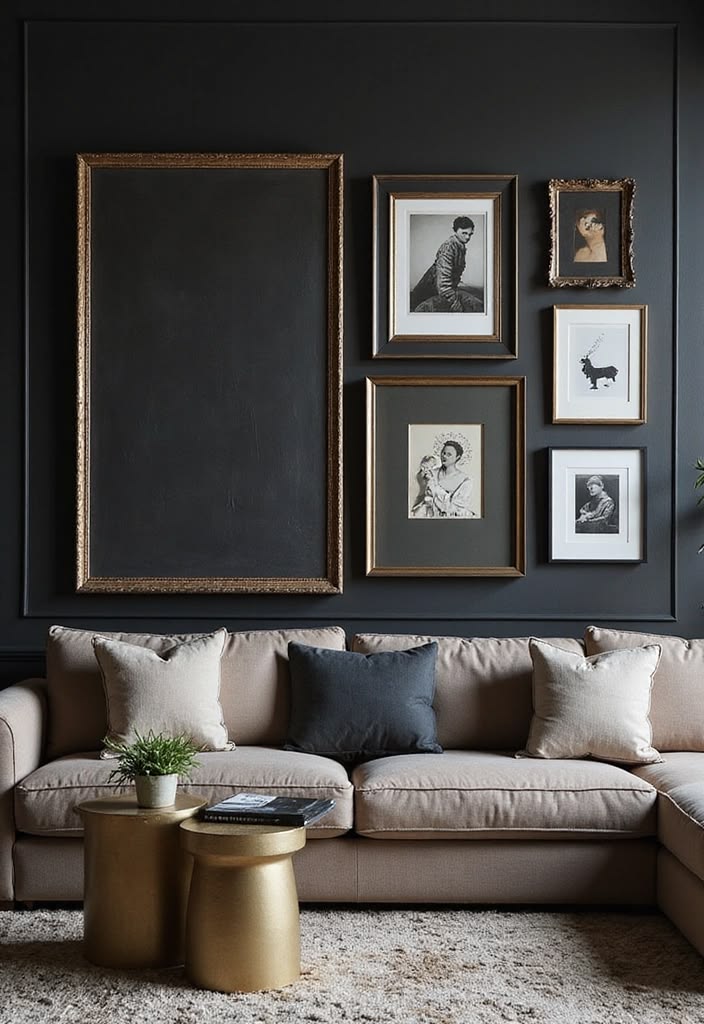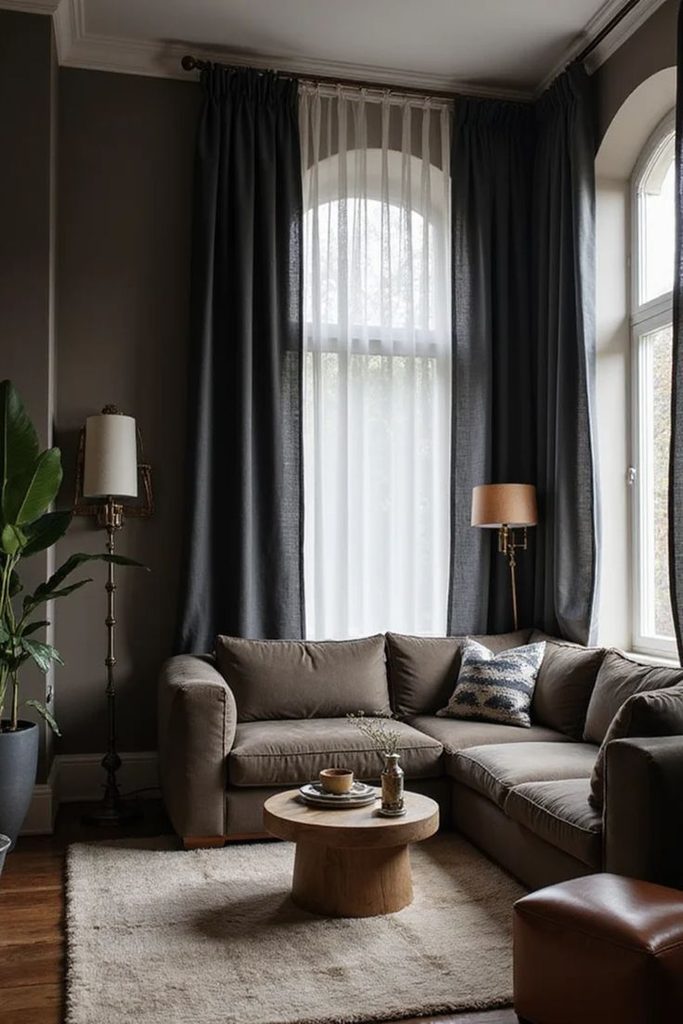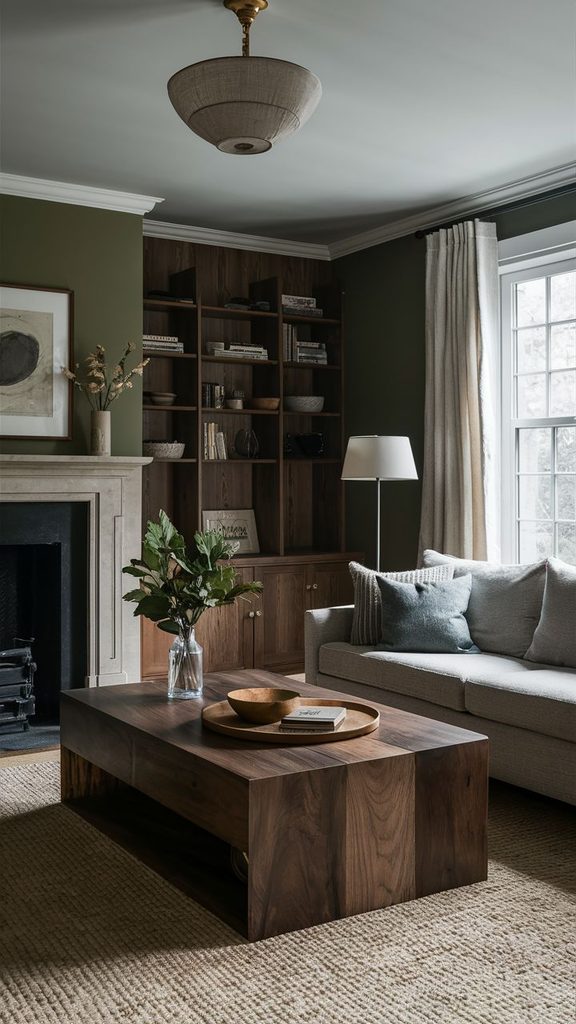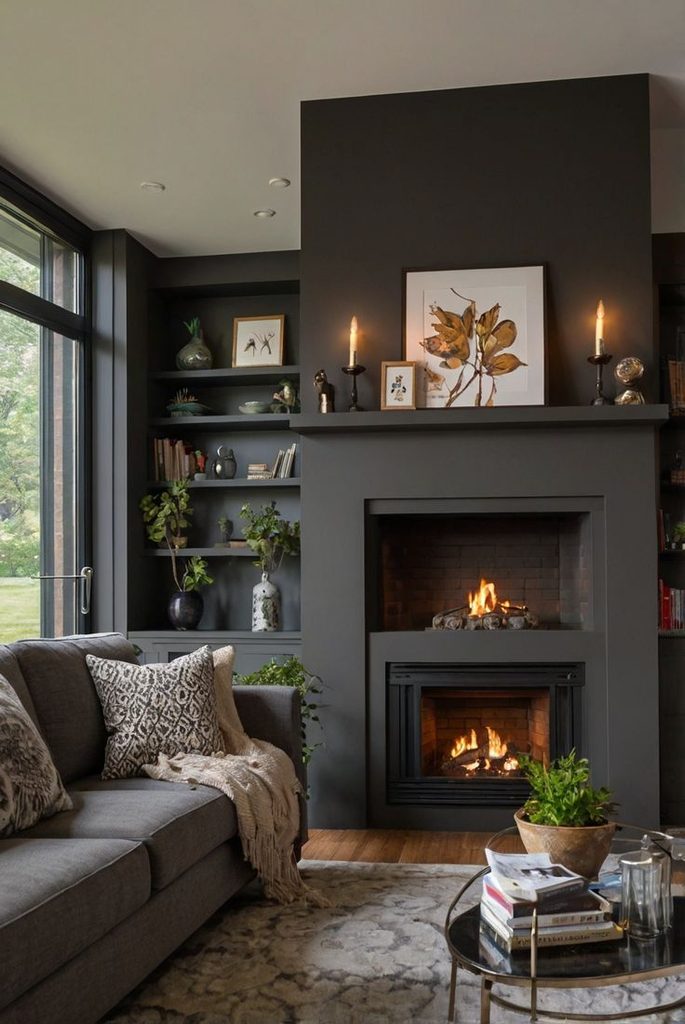
Blog

  • 19 Living Room Lighting Ideas

    19 Living Room Lighting Ideas

    I’ve put together 19 living room lighting ideas that actually work in real homes, not just fancy showrooms. If you’ve ever stood in your living room flipping the switch and thinking “why does this still look wrong,” you’re in the right place. I’ve tested a lot of these myself, and I’m going to walk you through what actually makes a room glow instead of just… lit.

    Living room lighting design combines ambient, task, and accent light sources to create layered illumination. The best setups use at least three light types at different heights, dimmed independently, to avoid flat or harsh overhead glare.

    Stick around, because I’m going to show you exactly how to layer your lights, what fixtures actually matter, and a few mistakes that make even beautiful furniture look off.

    What Good Living Room Lighting Actually Looks Like

    Here’s the thing nobody tells you: lighting isn’t about brightness. It’s about layers. A room with one overhead light is like a meal with only salt on it. Technically edible, but flat. Good lighting mixes ambient light (the overall glow), task light (for reading or working), and accent light (for drama and mood). When you get the mix right, your living room feels warm at night and functional during the day. When you get it wrong, everything looks either too harsh or too dim, no matter how nice your couch is. Let’s get into the ideas that fix this.

    1. Swap Your Overhead Light for a Statement Chandelier
    Credit: LM Marzuki

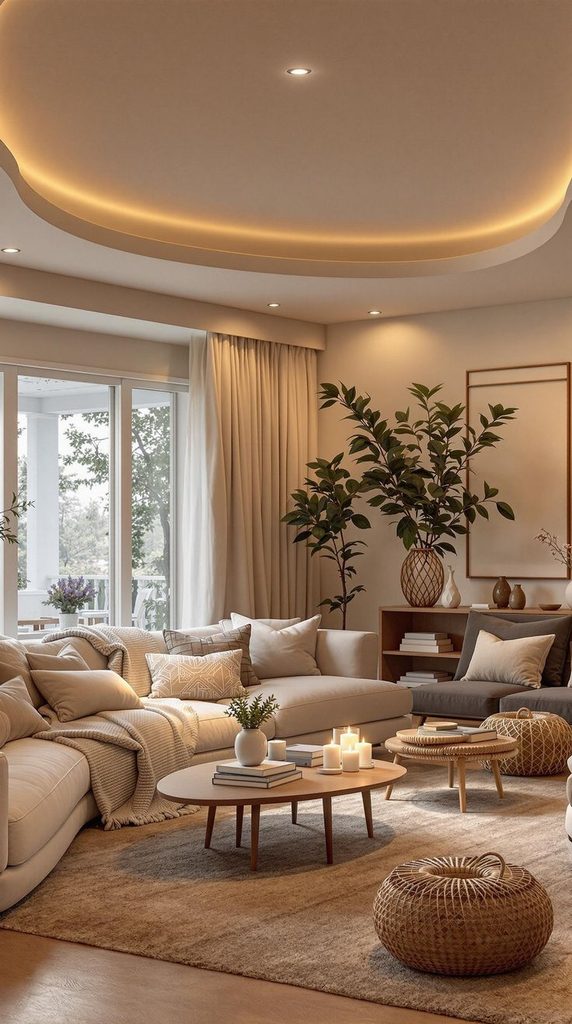
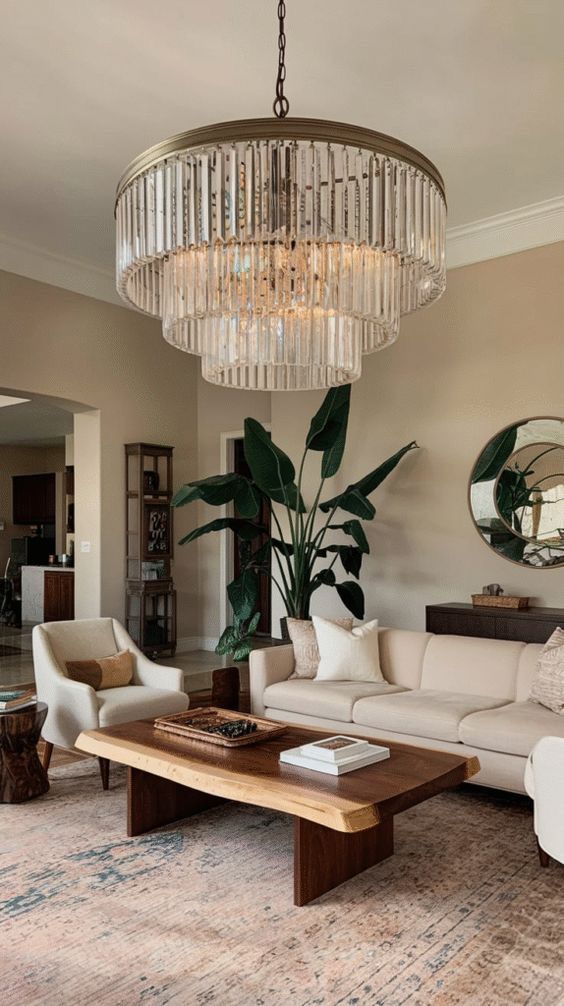
    A single flush-mount ceiling light is fine, but it’s boring. Swapping it for a chandelier instantly makes the room feel intentional. You don’t need anything huge. Even a modest fixture with some visual texture, like woven rattan or brass rings, gives the ceiling a focal point instead of dead space.

    Pick a size based on your room. A tiny chandelier in a big room looks lost. A giant one in a small room feels like it’s about to fall on your couch.

    Tip: Measure your room’s length and width in feet, add them together, and that number in inches is roughly the right fixture diameter.

    This works in traditional homes with crystal styles, and in modern spaces with matte black geometric shapes. Once your ceiling has a statement piece, you’ll want floor-level light to balance it out.

    2. Add Floor Lamps in the Corners Nobody Lights

    Story Pin image
    Credit: Trendy Home Decor Ideas

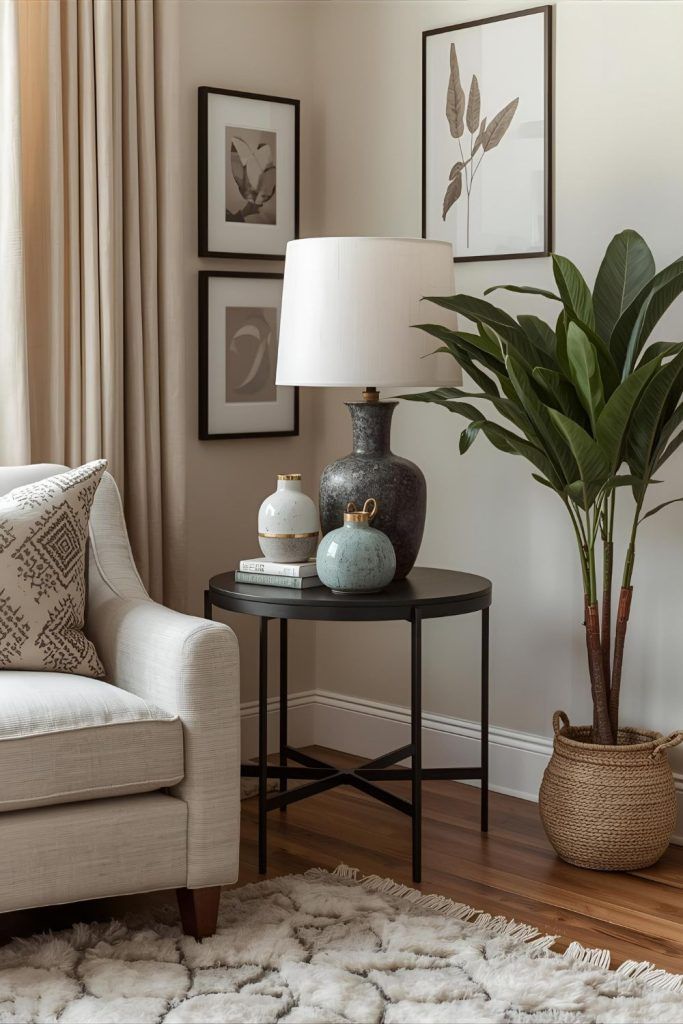
    Corners are lighting dead zones. Most people ignore them, which makes rooms feel smaller and shadowy at night. A tall floor lamp tucked into an empty corner fills that gap and makes the whole room feel bigger.

    Go for a lamp with a shade that diffuses light softly instead of a bare bulb look, unless you’re going for an industrial vibe. Warm white bulbs (2700K to 3000K) make corners feel cozy instead of clinical.

    Actionable tip: Place the lamp about a foot away from the wall so light spreads across it instead of getting swallowed by the corner.

    Coastal homes look great with rattan-based floor lamps. Farmhouse spaces do well with black metal stands. Once your corners are covered, it’s time to think about your reading nook.

    3. Create a Reading Nook With a Task Lamp

    Story Pin image
    credit: Tanu Apartment Aesthetic

    If you’ve got a favorite chair, it deserves its own light. A task lamp beside a reading chair means you’re not straining your eyes or relying on the main overhead light, which is usually too far away to help anyway.

    Adjustable arm lamps are great here because you can angle the light exactly where you need it. Look for one with a warm bulb and a shade that points down, not out, so it doesn’t glare into the rest of the room.

    Quick tip: Position the lamp’s shade at shoulder height when you’re seated. That’s the sweet spot for reading without shadows on the page.

    This idea works in literally every style. It’s about function first, then you pick a fixture that matches your room’s personality.

    4. Use Wall Sconces to Free Up Table Space

    Story Pin image
    Credit: Faisal Products

    Sconces are underrated. They mount right on the wall, which means you skip the need for a side table just to hold a lamp. This is huge in smaller living rooms where every inch of surface counts.

    Place them at eye level, roughly 60 to 66 inches from the floor, flanking a piece of art or your sofa. They cast a nice even glow without eating up floor or table space.

    Practical tip: Battery-operated or plug-in sconces let you skip hardwiring, which is great for renters.

    Modern homes like clean-lined metal sconces. Traditional spaces look great with fabric-shaded versions. Speaking of freeing up space, let’s talk about how lighting height changes a whole room’s feel.

    Lighting Height Guide by Fixture Type

    Fixture TypeRecommended Height from FloorBest Use
    Chandelier (over seating)30–34 inches above table/surfaceFocal ambient light
    Wall Sconce60–66 inchesAccent or supplemental light
    Floor Lamp Shade Center58–64 inchesCorner or reading light
    Table Lamp Shade BottomEye level when seated (~38–42 inches)Task lighting near seating
    Recessed Can LightCeiling mounted, spaced 4–6 feet apartGeneral ambient light

    5. Layer in String Lights for Soft Ambient Glow

    Story Pin image
    Credit: Nestora Home

    String lights aren’t just for patios anymore. Draped along a bookshelf, behind a mirror, or across a wall, they add a soft, twinkly ambient layer that regular lamps can’t match. They’re cheap, easy to install, and instantly make a room feel more relaxed.

    Warm white LED strings work best. Skip the cool white ones unless you’re going for a stark, modern look.

    Tip: Use battery-powered or plug-in strings with a built-in timer so you don’t have to remember to turn them on every evening.

    This idea fits boho and eclectic rooms especially well, but even minimalist spaces can use a single subtle strand behind a shelf. Once you’ve got that soft glow going, dimmer switches take things even further.

    6. Install Dimmer Switches on Every Fixture You Can

    Story Pin image
    Credit: My Gardening Guide

    This might be the single best upgrade you can make, and it’s cheap. A dimmer switch lets you control the mood of your room without buying new fixtures. Bright for cleaning, soft for movie night, somewhere in between for everyday life.

    Most dimmers cost less than $20 and take about 20 minutes to install if your fixture is already wired for it.

    Tip: Get dimmers rated specifically for LED bulbs, since not all dimmers play nice with LED technology and can cause flickering.

    This upgrade works no matter your decor style, because it’s invisible once installed. It’s function hiding behind your existing switch plate. Now let’s talk about how to use light to highlight the stuff you’re proud of.

    7. Highlight Art or Shelves With Accent Lighting

    Credit: Flexfire

    Accent lighting is about drawing the eye somewhere specific, like a piece of art, a bookshelf, or a plant you’re proud of. Small directional lights, called picture lights or puck lights, create a soft spotlight effect without lighting up the whole room.

    Battery-powered LED puck lights are a great low-commitment option since you can stick them anywhere without drilling holes.

    Tip: Angle accent lights slightly downward or upward at about 30 degrees to avoid a flat, washed-out look on the object you’re highlighting.

    This works beautifully in gallery walls for traditional homes and single statement pieces in modern minimalist rooms. Once you’ve got your art glowing, let’s zoom out to bigger ceiling options.

    8. Add Recessed Lighting for a Clean, Modern Base Layer

    Story Pin image
    Credit: Boost Lighting

    Recessed lights, also called can lights, sit flush in your ceiling and give your room even, glare-free ambient light. They’re a favorite in modern renovations because they disappear visually, letting your furniture and decor be the star.

    Space them about 4 to 6 feet apart for even coverage, and always pair them with a dimmer.

    Tip: Use warm white bulbs (2700K–3000K) even in recessed fixtures. Cool white can make a cozy living room feel like an office.

    This is a great base layer for any style since it’s basically invisible once installed. It pairs especially well with the next idea: layering lamps on top of that base.

    9. Mix Metal Finishes Across Your Fixtures on Purpose
    Credit: Inspire Spire

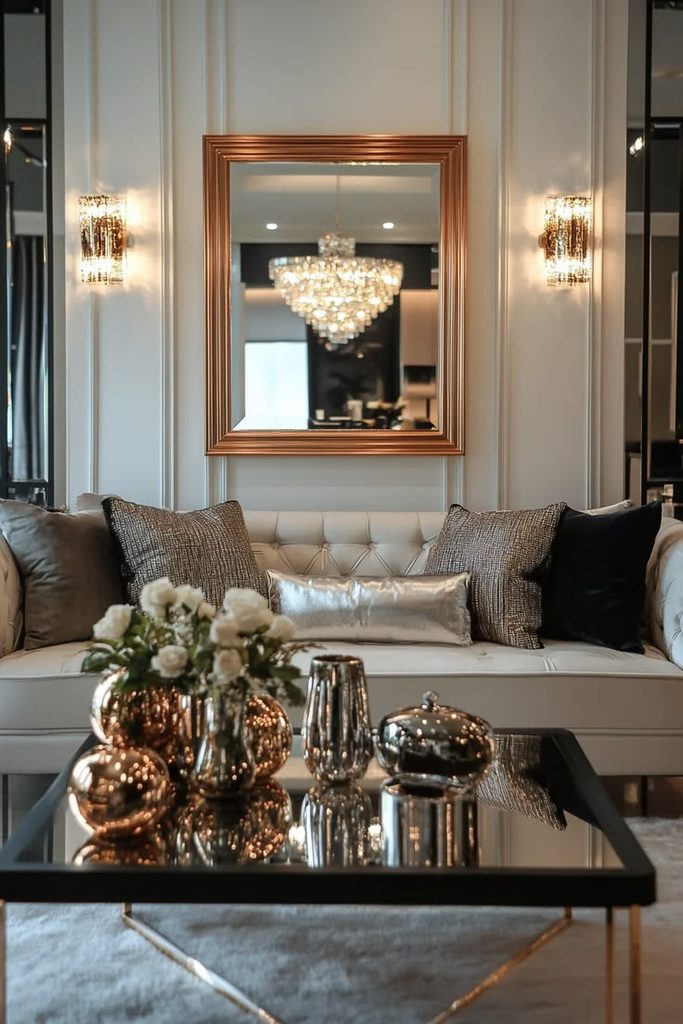
    A lot of people think every metal finish in a room has to match. It doesn’t. Mixing brass floor lamps with black sconces and nickel table lamps actually looks more collected and less like a showroom display, as long as you keep some consistency, like sticking to warm metals or cool metals as a general rule.

    Tip: Pick one dominant finish (used in 60% of your fixtures) and one or two accent finishes for the rest.

    Traditional homes tend to favor warm brass and bronze tones. Modern spaces often go moody with matte black and brushed nickel. Once your finishes feel intentional, it’s time to think about bulb color temperature, which matters more than people realize.

    Bulb Color Temperature Comparison

    Color TemperatureLook & FeelBest Living Room Use
    2200K–2700KWarm, amber, cozyTable lamps, floor lamps, evening ambiance
    3000KSoft white, still warmGeneral ambient lighting, recessed cans
    3500K–4000KNeutral whiteTask lighting, reading lamps
    5000K+Cool, bluish, brightNot recommended for living rooms

    10. Use a Torchiere Lamp to Bounce Light Off the Ceiling

    Story Pin image
    Credit: Faisal Products

    Torchiere lamps point their light upward, bouncing it off the ceiling for a soft, indirect glow. This is a great trick for rooms with low natural light or dark ceilings that need a lift. It fills a room with ambient light without a single harsh shadow.

    They work best in rooms with lighter colored ceilings, since darker ceilings absorb more light than they reflect.

    Tip: Pair a torchiere lamp with a dimmer for max flexibility between bright daytime use and soft evening glow.

    Modern and mid-century spaces love the sleek metal versions. Once your ceiling is glowing, let’s talk about a fixture that does double duty as decor.

    11. Choose a Statement Table Lamp as a Decor Piece

    Story Pin image
    Credit: Nexus Nook

    Your table lamp doesn’t have to be boring. A sculptural base, an interesting shade shape, or a bold color can double as decor while still giving you functional light. Think of it as a piece of art that also happens to glow.

    Ceramic bases in bold colors work great in eclectic rooms. Marble or glass bases fit cleaner, modern spaces.

    Tip: Match your lampshade’s undertone (warm or cool white lining) to your bulb’s color temperature so the light coming through looks intentional, not off.

    This idea flexes across every style because table lamps come in basically infinite shapes and finishes. Now, let’s talk about a lighting trick that’s often overlooked: natural light.

    12. Maximize Natural Light With Sheer Curtains

    Story Pin image
    Credit: Living Nova Hub

    Lighting isn’t just about bulbs. Daytime light matters too. Swapping heavy curtains for sheer ones lets more natural light flood in during the day, which makes your whole room feel brighter and bigger without spending a dime on electricity.

    Hang curtain rods a few inches above your window frame and wider than the window itself. This makes windows look larger and lets in more light around the edges.

    Tip: Keep sheers in light, neutral colors like white or cream to maximize how much light passes through the fabric.

    This works in nearly every style, though coastal and modern farmhouse homes tend to lean into it the most. Once daylight is maximized, nighttime accent options become even more important.

    13. Add Under-Shelf LED Strips for a Modern Glow

    Story Pin image
    Credit: Ilaria B

    If you’ve got open shelving or a media console, tucking thin LED strips underneath creates a soft glow that looks straight out of a design magazine. It’s subtle, but it adds serious depth to a room at night.

    Look for strips with adhesive backing and a dimmer remote, so you can adjust brightness without extra wiring.

    Tip: Choose warm white strips (2700K–3000K) unless you’re deliberately going for a techy, cool-toned look.

    This fits modern and contemporary spaces particularly well, though it can work in eclectic rooms too if you keep the glow subtle. Speaking of subtle glow, let’s talk about candles and how they still matter.

    14. Don’t Skip Candles for Flicker and Warmth

    Story Pin image
    Credit: Studio Pure Living

    Electric lighting is great, but candles add something bulbs can’t fake easily: movement. That little flicker adds warmth and softness that makes a room feel lived-in and calm, especially during movie nights or quiet evenings.

    Cluster a few candles of different heights on a tray for a more polished look instead of scattering single candles around.

    Tip: Flameless LED candles give you the flicker effect without the fire risk, great if you’ve got kids or pets.

    This works in every single design style since candles are basically universal. Now let’s cover a fixture type that’s making a big comeback: the pendant.

    15. Hang a Pendant Light Instead of a Traditional Lamp
    Credit: Devdatta

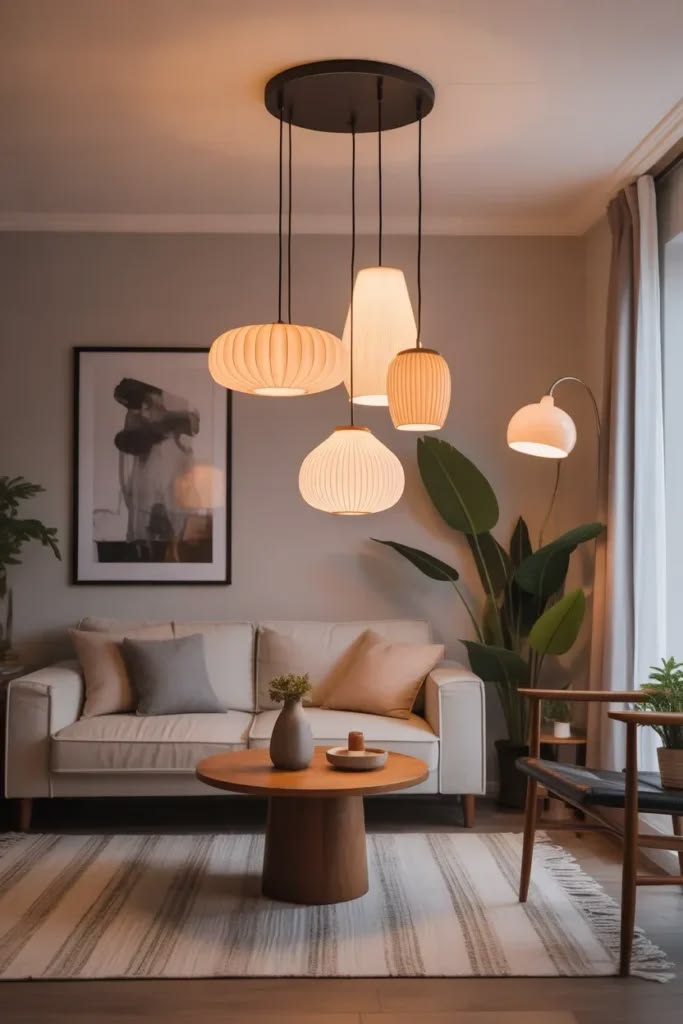
    Pendant lights aren’t just for kitchens. Hanging one or two in your living room, especially over a reading corner or side table, frees up floor space and adds visual interest at eye level instead of just on the ceiling or floor.

    Adjustable cord pendants let you customize the hanging height based on your ceiling and furniture placement.

    Tip: Hang pendants so the bottom of the shade sits about 30 inches above the surface below it, like a side table.

    Industrial and modern homes love exposed bulb pendants. Traditional spaces do well with fabric or glass shade versions. Once you’ve got pendants working, let’s talk about a layering trick using mirrors.

    16. Bounce Light Around the Room With Strategic Mirrors
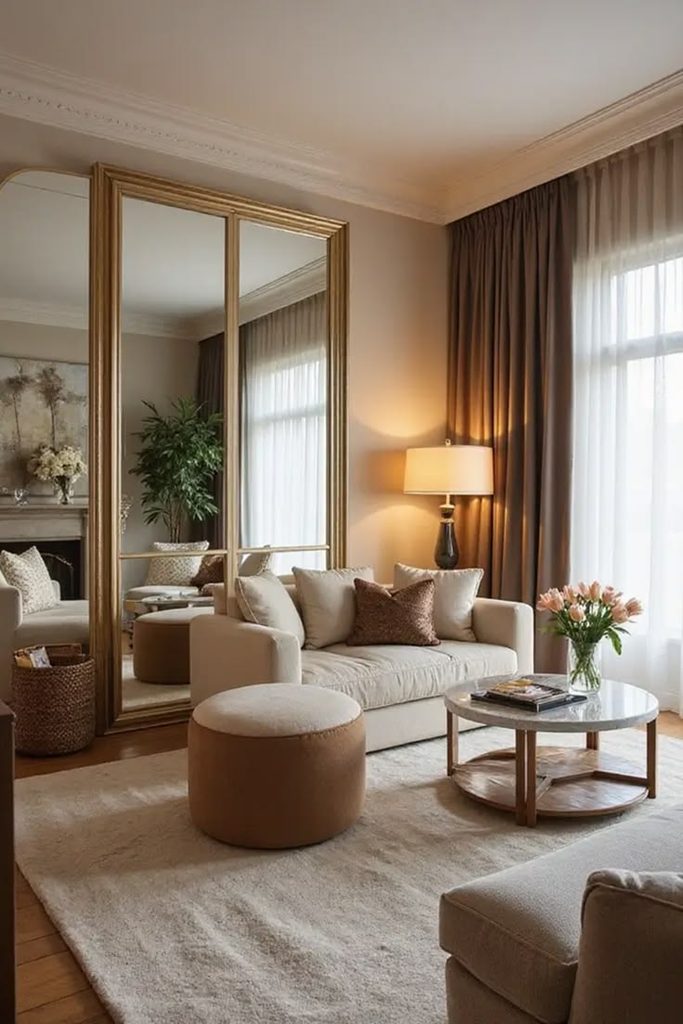
    Credit: Mirrorahome

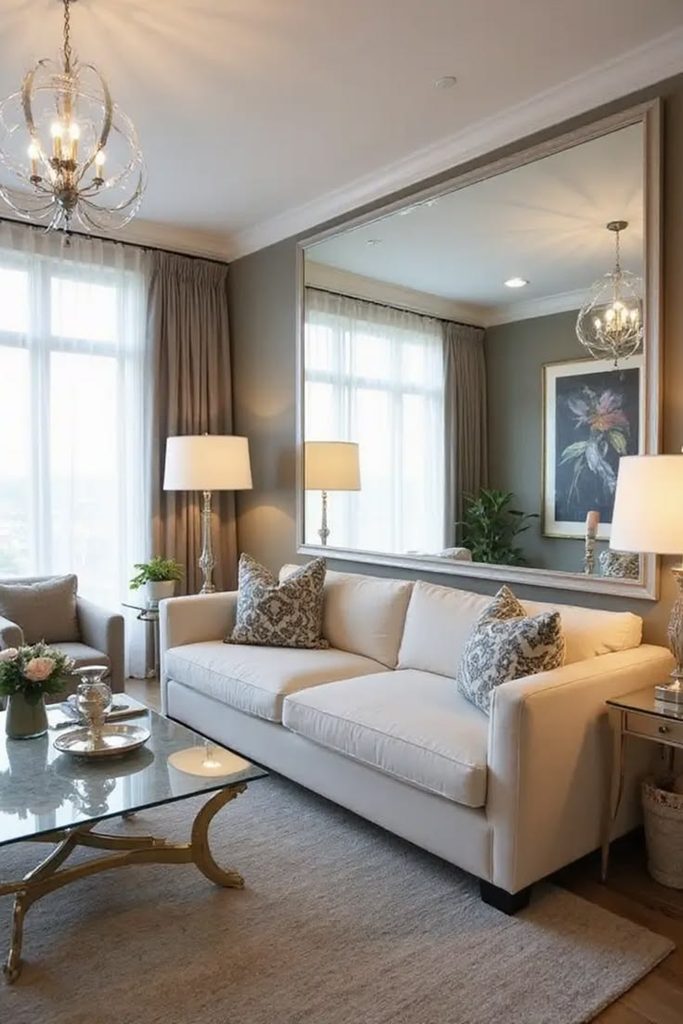
    Mirrors don’t produce light, but they multiply it. Placing a mirror across from a window or near a lamp bounces existing light around the room, making everything feel brighter without adding a single new fixture.

    A large mirror leaning against a wall opposite your main window works especially well for daytime brightness.

    Tip: Avoid placing mirrors directly facing a blank wall. Aim them toward a light source or window for the best effect.

    This trick works in literally any style since it’s about placement, not aesthetics. Once your light is bouncing well, let’s talk about smart bulbs and how they change the game.

    17. Switch to Smart Bulbs for Total Control

    Story Pin image
    Credit: tiffanymcbriden

    Smart bulbs let you control brightness and color temperature from your phone or a voice assistant, which means you can shift from bright and functional to warm and moody without touching a switch. Some even let you schedule lighting changes throughout the day automatically.

    Look for bulbs with adjustable color temperature, not just brightness, so you get the warm-to-cool flexibility.

    Tip: Set a warm, dim scene as your default evening setting so you’re not stuck squinting at a too-bright room every night.

    This fits tech-friendly modern homes best, though honestly, anyone with a smartphone can benefit. Speaking of control, let’s talk about how grouping lights on separate circuits changes everything.

    18. Put Lights on Separate Switches for Zone Control
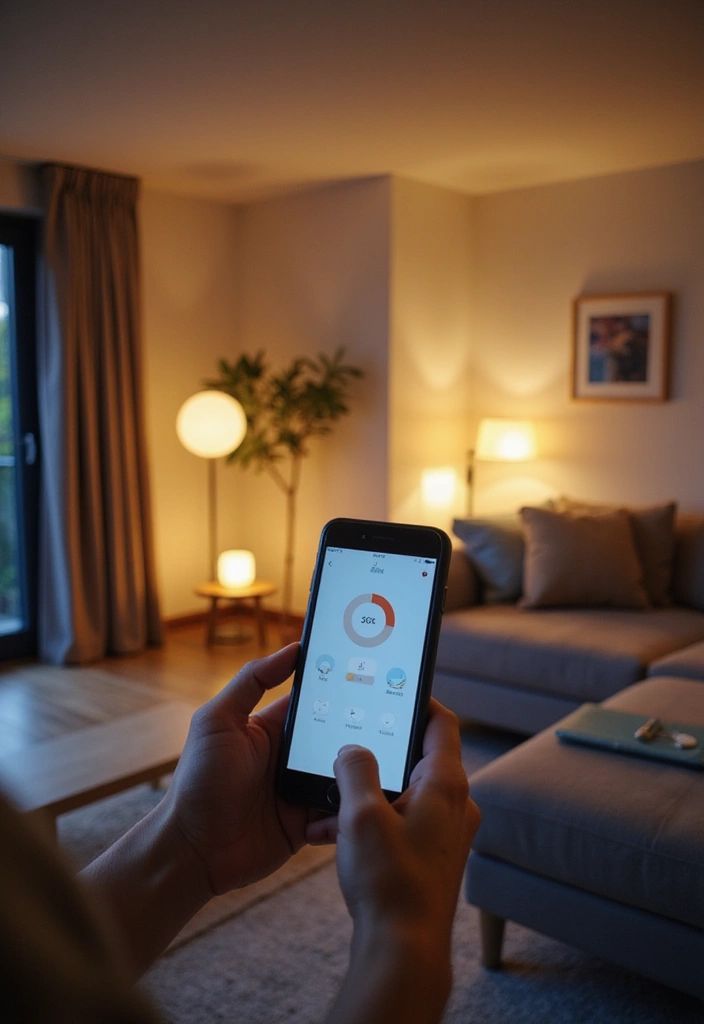
    Credit: Lampenza

    If every light in your living room is on one switch, you’re stuck with all-on or all-off. Splitting your lighting into zones, like overhead, lamps, and accent lights, on separate switches or smart plugs gives you way more control over mood and function.

    This is especially useful in open-concept spaces where your living room blends into a dining or kitchen area.

    Tip: Use smart plugs on lamps if rewiring switches isn’t an option. They’re a cheap way to create zones without an electrician.

    This works in every home style since it’s purely functional. Last but not least, let’s talk about a fixture people forget: the humble table lamp trio.

    19. Use a Trio of Matching Table Lamps for Visual Rhythm

    Story Pin image
    Credit: Peak Decor

    Instead of one big lamp, try three smaller matching lamps spread across your room, like one on a console table, one on a side table, and one on a bookshelf. This creates a rhythm of light around the room instead of one bright spot and a bunch of dark corners.

    Keep the shades and bases identical or very similar so the repetition feels intentional, not accidental.

    Tip: Use the same bulb wattage and color temperature in all three for a consistent glow throughout the room.

    This works especially well in traditional and transitional homes where symmetry and repetition feel right at home.

    Tips for Success

    • Always layer at least three light sources (ambient, task, accent) in your living room instead of relying on one overhead fixture.
    • Stick to warm white bulbs (2700K–3000K) for most living room fixtures to keep the space cozy.
    • Install dimmers wherever possible. It’s the cheapest upgrade with the biggest mood impact.
    • Measure your room before buying a chandelier or pendant so the scale actually fits the space.
    • Test bulb brightness (measured in lumens) before committing. A 60-watt equivalent bulb (around 800 lumens) works for most lamps.
    • Rotate your lighting plan seasonally. Brighter, cooler light in summer mornings, warmer and dimmer in winter evenings.
    • Don’t forget natural light. Curtains, mirrors, and window placement matter just as much as bulbs.

    Common Mistakes and How to Avoid Them

    Relying on one overhead light only
    : Add at least one floor lamp and one table lamp to break up flat, harsh lighting.

    Using the wrong bulb color temperature
    : Stick to warm white (2700K-3000K) in living spaces to avoid a clinical, cold feel.

    Placing lamps too far from seating areas
    : Position task lighting within arm’s reach of chairs or sofas for actual usability.

    Ignoring dimmers entirely
    : Install dimmer switches or smart bulbs so brightness can shift with time of day and activity.

    Choosing a chandelier that’s too small or too large
    : Use the room’s length plus width in feet as a rough guide for fixture diameter in inches.

    Forgetting accent lighting for art or shelves
    : Add small directional lights or puck lights to highlight favorite pieces and add depth.

    Similar Variations

    • Bedroom Layered Lighting – Similar zone approach, but focused on nightstands, reading nooks, and softer overall brightness.
    • Kitchen Task Lighting – Prioritizes bright, functional light over counters and islands rather than mood-based ambiance.
    • Home Office Lighting – Leans toward cooler, brighter light for focus, paired with task lamps for screen glare reduction.
    • Outdoor Patio Lighting – Uses string lights and lanterns similarly, but built for weather resistance and open-air spread.
    • Entryway Accent Lighting – Smaller scale version of accent lighting ideas, focused on a single statement fixture near the door.
    • Dining Room Pendant Lighting – Uses the pendant concept from this list, scaled up and centered directly over a table.

    Getting your living room lighting right doesn’t take a huge budget or a total renovation. It takes layers, the right bulb temperatures, and a little intention about where light falls and where it doesn’t. Start small, maybe a dimmer switch or a new floor lamp in that dark corner, and build from there. Once you see how much a few changes can transform the room, you’ll wish you’d tried these 19 Living Room Lighting Ideas sooner.
  • 21 Narrow Living Room Layout

    21 Narrow Living Room Layout

    If you’ve been searching for the best 21 narrow living room layout ideas, I’ve got you covered with everything you need to turn that awkward, skinny space into a room you actually love hanging out in. I’ve spent years messing around with furniture arrangements in tight spots, so I know the struggle is real. Let’s get into it.

    A narrow living room layout refers to arranging furniture in a room that’s noticeably longer than it is wide, typically under 12 feet across. The goal is to create walking paths, define zones, and avoid a bowling-alley feel by using furniture placement, rugs, and visual tricks to widen the perceived space.

    Stick around, because I’m about to show you 21 different ways to make a skinny living room feel open, cozy, and totally functional.

    What Makes a Narrow Living Room So Tricky

    Narrow rooms mess with our heads a little. You walk in and instantly feel like you’re in a hallway instead of a living room. That’s because our brains expect a certain width-to-length ratio to feel “normal.” When a room breaks that ratio, it can feel cramped even if the square footage is decent.

    The good news? Narrow doesn’t mean bad. Some of the coziest living rooms I’ve seen are long and skinny. You just have to work with the shape instead of against it. That means picking the right furniture sizes, thinking about traffic flow, and using color and light to trick the eye into seeing more space than there really is.

    1. Float Your Sofa Away From the Wall

    Credit: Inspiration For Home

    Most people shove the couch against the longest wall and call it done. Don’t do that here. In a narrow room, floating your sofa a few feet away from the wall can actually create better flow and break up the tunnel effect.

    This works because it stops your eye from traveling straight down the room in one long line. Instead, it creates a “stop point” that makes the space feel sectioned and intentional.

    Practical tip: Leave at least 30 inches behind the sofa for walking room if you’re using it to divide the space.

    This trick works in modern homes with slim-profile sofas, and in traditional homes with slightly bulkier seating too.

    Next up, let’s talk about a layout style that’s perfect for skinny rooms.

    2. Try a Linear “Train Car” Layout

    credit: QUIET MINIMAL

    A linear layout means arranging all your furniture in a straight line down the room, sofa, chair, console, like train cars on a track. It sounds boring, but it actually works really well in narrow spaces because it respects the natural shape instead of fighting it.

    Keep furniture pieces low profile so they don’t block sightlines. A slim console table behind the sofa can double as storage and a visual anchor.

    Tip: Use furniture with exposed legs to keep the floor visible, which makes the whole layout feel lighter.

    Coastal and Scandinavian homes love this style because both lean into simplicity and light, airy furniture.

    Now let’s flip the script and talk about angles instead of straight lines.

    3. Angle Furniture to Break Up the Tunnel Effect

    credit: Home Decor Ideas & Inspo

    Sometimes going against the grain works. Placing a chair or small loveseat at a slight angle can interrupt that long, hallway-like sightline. It adds visual interest and makes the room feel less like a corridor.

    This works especially well near the entry point of the room, where an angled chair can act like a soft divider between the entryway and the actual seating area.

    Tip: Angle pieces no more than 15 to 30 degrees, too much and it’ll look messy instead of intentional.

    This trick shines in eclectic and bohemian spaces where a little asymmetry feels right at home.

    Let’s move on to something everyone underestimates: rugs.

    4. Use a Runner Rug to Guide the Eye

    Story Pin image
    Credit: The Trendy Corner

    A long, narrow rug can actually help a narrow room instead of hurting it. Instead of fighting the shape, a runner rug leans into it and creates a clear path from one end of the room to the other.

    Choose a rug that’s about 70 to 80 percent of the room’s length, and keep the width proportional so it doesn’t touch the walls.

    Tip: Pick a rug with a border or pattern that draws the eye lengthwise, it emphasizes flow instead of width.

    Farmhouse and traditional homes look great with woven runner rugs, while modern spaces do well with flat-weave geometric designs.

    Now, let’s talk about something that changes the whole feel of the room: color.

    5. Paint the Walls a Light, Airy Color

    Credit: Chris Aulner

    Dark walls can make a narrow room feel like it’s closing in on you. Light colors like soft white, pale gray, or muted sage bounce light around and make the walls feel like they’re pushing back a little.

    I always tell people to test paint swatches at different times of day before committing. Light changes everything.

    Tip: Use the same color on the ceiling as the walls to remove visual “stop lines” that make the room feel shorter or boxier.

    This works in nearly every style, though coastal and minimalist homes benefit the most from this trick.

    Let’s pair that color talk with a smart data table before we go further.

    Best Paint Colors for Narrow Living Rooms

    ColorBest ForEffect on Space
    Soft White (OC-45 Swiss Coffee)Modern, MinimalistMaximizes light bounce
    Pale Sage GreenCoastal, CottageCalming, adds depth
    Warm GreigeTraditional, TransitionalCozy but not closing
    Light Blue-GrayScandinavianCool tone, feels airy
    Soft BlushBoho, EclecticWarms up cool rooms

    6. Choose Furniture With Exposed Legs

    Story Pin image
    Credit: We Love Home Blog

    Furniture that sits flush to the floor makes a room feel heavier. Pieces with visible legs let light pass underneath, which tricks the eye into thinking there’s more open floor space than there actually is.

    Look for sofas, chairs, and console tables with slim wood or metal legs. It’s a small detail that makes a big difference.

    Tip: Measure leg height, anything under 4 inches won’t give you the airy effect you’re going for.

    Mid-century modern and Scandinavian styles naturally use this kind of furniture, but you can find leggy versions in almost any style now.

    Speaking of furniture, let’s talk sizing next.

    7. Scale Down Furniture Size to Match the Room

    Credit: Sarah Joy Blog

    A giant sectional might look amazing in a showroom, but in a narrow room, it’ll swallow the whole space. Stick to furniture that’s proportional to the room’s actual width.

    A good rule: your sofa shouldn’t take up more than 60 percent of the wall it sits against, and pathways should stay at least 24 to 30 inches wide.

    Tip: Measure your room before shopping, and bring that number with you. It saves so much frustration later.

    This rule applies across every design style, since proportion matters more than aesthetic.

    Now let’s zoom into lighting, because it plays a bigger role than people think.

    8. Layer Lighting to Add Depth

    Credit: Learn California

    One overhead light in a long room creates flat, boring lighting. Layering light sources, floor lamps, table lamps, and wall sconces, adds depth and makes the room feel bigger because your eyes travel to different points instead of staring at one flat glow.

    Place lamps at varying heights to create visual rhythm down the length of the room.

    Tip: Use warm-toned bulbs (2700K to 3000K) for a cozy vibe that still feels bright enough to work in.

    Industrial and modern farmhouse spaces look amazing with mixed metal lamp finishes layered this way.

    Let’s shift gears and talk mirrors next.

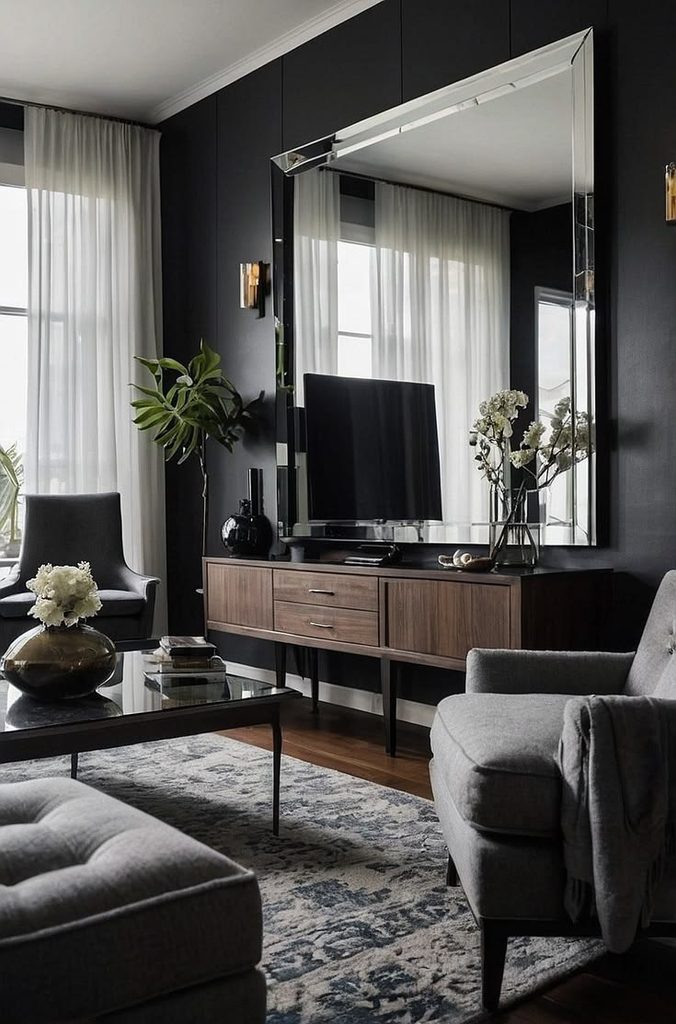
    9. Add a Large Mirror to Expand the Room Visually

    Credit: Mirrorahome

    Mirrors are basically cheat codes for small or narrow spaces. Placing a large mirror on a shorter wall reflects light and visually doubles the perceived width of the room.

    Go for a mirror that’s at least 30 inches wide for real impact. Anything smaller gets lost.

    Tip: Position mirrors to reflect a window or a piece of art, not a blank wall, for the best effect.

    Traditional homes love ornate framed mirrors, while modern spaces do better with clean, frameless designs.

    Next, let’s talk about zoning the space so it doesn’t feel like one long blob.

    10. Create Distinct Zones With Furniture Placement

    Credit: Recipes Symphony

    Narrow rooms often try to do too much in one space, seating, TV area, maybe even a reading nook. Instead of letting it all blend together, define separate zones using furniture placement.

    A bookshelf or console table can act as a soft divider between a lounge area and a workspace without blocking light or flow.

    Tip: Use rugs to mark each zone, different textures or colors help signal “this area is for this purpose.”

    This works beautifully in open-concept homes, no matter if you’re going modern, traditional, or transitional.

    Let’s check out a comparison table before moving to the next batch of ideas.

    Furniture Size Guide for Narrow Living Rooms

    Room WidthMax Sofa LengthCoffee Table SizeWalking Path
    9 feet72 inches36 x 18 inches24 inches
    10 feet78 inches40 x 20 inches26 inches
    11 feet84 inches42 x 22 inches28 inches
    12 feet90 inches48 x 24 inches30 inches

    11. Use Vertical Storage Instead of Wide Pieces

    Credit: Farm Food Family

    Wide dressers and low bookshelves eat up precious floor space. Tall, narrow storage pieces solve the same problem without stealing walking room. Think slim bookshelves or vertical media consoles.

    Going vertical also draws the eye upward, which makes the ceiling feel higher and the whole room feel less squeezed.

    Tip: Anchor tall pieces near the shorter walls so they don’t interrupt the long sightline down the room.

    Industrial and modern styles both use tall metal or wood shelving units really well for this exact purpose.

    Now let’s talk about a trick a lot of people skip: sightlines from the entry.

    12. Plan Around the Entry Sightline

    Credit: Traci Pelan

    What you see first when you walk in sets the tone for the whole room. In narrow spaces, that first sightline often runs straight down the length of the room, which can feel like staring down a hallway.

    Break it up by placing an accent chair, plant, or small table in that direct line of sight so your eye stops before it reaches the far wall.

    Tip: Walk through your own entryway and snap a photo, it’s the easiest way to see what guests actually notice first.

    Bohemian and eclectic homes do this well with layered plants and textiles near entry points.

    Let’s move into texture next, since it adds warmth without adding bulk.

    13. Mix Textures Instead of Adding More Furniture

    Credit: Home Decor Bliss Blog

    When floor space is tight, texture becomes your best friend. Throw pillows, woven blankets, and textured curtains add coziness without taking up room the way extra furniture would.

    Layer a chunky knit throw with a smooth linen pillow for contrast that feels intentional, not cluttered.

    Tip: Stick to 3 to 4 textures max so the room doesn’t feel busy.

    Coastal and farmhouse homes thrive on this kind of layered texture, while modern spaces should keep textures more minimal and clean.

    Next, let’s talk about curtains and how they can actually change the shape of the room.

    14. Hang Curtains High and Wide

    Story Pin image
    Credit: The Charmed Door

    This is one of my favorite tricks. Hanging curtain rods closer to the ceiling, instead of right above the window frame, makes the whole wall feel taller. Extending the rod wider than the window also makes the wall feel broader.

    It’s a simple fix that costs nothing extra but completely changes how the room feels.

    Tip: Hang rods 4 to 6 inches from the ceiling for the biggest visual impact.

    This works in literally every design style, from traditional drapery to simple linen modern panels.

    Let’s talk about something people forget: the TV placement.

    15. Mount the TV Instead of Using a Stand

    Credit: Lost At E Minor

    TV stands take up floor space and visually chop up the room. Mounting your TV on the wall frees up that space for storage, seating, or just an open walking path.

    This also keeps the eye level cleaner, which matters a lot in narrow rooms where every inch of visual clutter adds up.

    Tip: Mount at eye level while seated, roughly 42 inches from the floor to the center of the screen.

    Modern and minimalist spaces benefit most from this, though it works in nearly any style with the right console styling below it.

    Now, let’s dig into furniture shapes that help instead of hurt.

    16. Choose Round or Oval Tables Over Rectangular Ones

    Story Pin image
    Credit: Ideas for Interior

    Sharp corners on rectangular tables can make walking through a narrow room feel more cramped, especially near tight pathways. Round or oval coffee tables soften the flow and reduce bumped shins.

    They also help the eye move in a curved motion instead of a straight, boxy line, which softens the whole room’s feel.

    Tip: Choose a round table with a diameter no more than 36 inches for smaller rooms.

    Traditional and transitional homes look great with wood oval tables, while modern spaces do well with glass or acrylic round ones.

    Let’s move into a smart trick using furniture height variation.

    17. Vary Furniture Height for Visual Interest

    Credit: Materialsix

    If every piece in your room is the same height, the whole space feels flat and long. Mixing heights, a low coffee table, a taller floor lamp, a mid-height bookshelf, creates rhythm that breaks up that stretched-out feeling.

    This works because your eyes move up and down instead of just side to side down the length of the room.

    Tip: Aim for at least three different height levels among your main furniture pieces.

    Eclectic and bohemian spaces naturally embrace mixed heights, but even clean modern rooms benefit from subtle variation.

    Now let’s talk about something small but mighty: accent walls.

    18. Use an Accent Wall on a Short End

    Credit: Pinterest

    Painting or wallpapering the shortest wall in a narrow room, usually the far end, draws the eye toward it and makes the room feel like it has a defined endpoint instead of stretching forever.

    This works especially well with bold colors or textured wallpaper that adds depth.

    Tip: Keep the side walls neutral so the accent wall really pops without competing for attention.

    Traditional homes love rich wallpaper here, while modern spaces might use a bold paint color or textured wood paneling instead.

    Let’s talk furniture arrangement for conversation next.

    19. Arrange Seating to Face Each Other, Not in a Line

    Credit: Portablepowerguides

    Lining up all your seating in a row down the room reinforces that hallway feeling. Instead, angle two chairs to face the sofa, even slightly, so conversation feels natural and the layout feels more like a “room” than a walkway.

    This also breaks the straight sightline that makes narrow rooms feel longer than they are.

    Tip: Keep at least 8 feet between facing seats for comfortable conversation distance.

    This trick works across every style, since good conversation flow matters no matter your decor preference.

    Let’s wrap up the main list with two final smart moves.

    20. Use Multi-Functional Furniture Pieces

    Credit: Light & Layer

    Ottomans with storage, nesting tables, and fold-out desks all help narrow rooms do more with less. Instead of adding separate pieces for separate needs, one smart piece can pull double duty.

    This keeps the floor plan open while still giving you the function you need day to day.

    Tip: Look for ottomans with removable trays, they work as coffee tables and storage at the same time.

    Modern and Scandinavian homes are especially good at this multi-functional furniture approach.

    Finally, let’s finish with a layout trick that ties everything together.

    21. Keep a Clear Diagonal Sightline Open

    Credit: Farm Food Family

    Instead of blocking every inch with furniture, keep one diagonal sightline open from one corner of the room to another. This diagonal view tricks the brain into perceiving more width than actually exists.

    Place your tallest furniture pieces outside this diagonal path to preserve the open feeling.

    Tip: Stand in the doorway and check what the longest unobstructed view in the room looks like, then arrange around protecting that view.

    This works in every home style because it’s based on basic visual perception, not decor trends.

    Tips for Success

    • Measure everything twice before buying furniture, narrow rooms leave zero room for guessing wrong.
    • Stick to a simple color palette to avoid visual chaos in a tight space.
    • Use vertical space for storage whenever floor space feels limited.
    • Keep walking paths at least 24 inches wide at all times.
    • Choose furniture with exposed legs to keep the floor feeling open.
    • Test lighting at night and during the day before finalizing lamp placement.

    Common Mistakes and How to Avoid Them

    Pushing all furniture against the walls
    : This creates a bowling-alley effect. Float at least one piece to break up the space.

    Choosing furniture that’s too bulky
    : Oversized sofas and chairs overwhelm narrow rooms. Measure your space and scale furniture down accordingly.

    Ignoring vertical space
    : Skipping tall storage wastes valuable square footage. Use shelves and vertical consoles instead of wide dressers.

    Using small, scattered rugs
    : Tiny rugs make the room feel choppy. Use one larger runner rug to unify the space.

    Hanging curtains too low or too narrow
    : This shrinks the perceived height and width of the room. Hang rods high and wide for a taller, broader look.

    Skipping mirrors
    : Missing out on reflected light is a common oversight. Add at least one large mirror to visually expand the room.

    Similar Variations

    • Narrow Hallway Layout – Similar principles applied to entryways and connecting corridors.
    • Small Apartment Living Room Layout – Focuses on multi-functional furniture in tight overall square footage.
    • Galley-Style Living Room – A kitchen-inspired linear approach applied to seating areas.
    • Open-Concept Narrow Layout – Blends narrow living rooms with adjoining kitchens or dining spaces.
    • Studio Apartment Zoning Layout – Uses similar zoning tricks but across an entire single-room living space.

    Narrow rooms get a bad reputation, but honestly, they just need a little extra planning. Once you understand how light, color, and furniture placement work together, that skinny space can feel just as open and welcoming as any wide-open living room. I’ve seen it happen over and over again, it just takes the right approach.

    At the end of the day, the best 21 Narrow Living Room Layout ideas all come down to one thing: working with your space instead of against it.

  • 24 Moody Living Room Ideas

    24 Moody Living Room Ideas

    I’ve pulled together 24 moody living room ideas that actually work in real homes, not just in perfectly styled magazine shoots. If you’ve ever scrolled through pictures of dark, cozy living rooms and wondered “can I actually pull this off in my house,” I get it. That’s exactly why I put this list together.

    Moody living rooms use deep, saturated colors like charcoal, forest green, or deep navy paired with warm lighting and rich textures to create a cozy, dramatic space. This design style trades bright and airy for intimate and layered, often using dark wall paint, plush fabrics, and warm-toned lighting to pull the whole room together.

    Stick around and I’ll walk you through 24 specific ways to bring this look into your own space, plus the mistakes that trip people up and how to dodge them.

    What Exactly Is a Moody Living Room?

    So what makes a living room “moody” anyway? Basically, it’s a space that feels rich, warm, and a little dramatic instead of bright and minimal. Think deep wall colors, soft lamp light instead of harsh overheads, and textures like velvet, leather, and wood that all pack visual weight. It’s the opposite of the all-white, super airy look that’s been everywhere for years.

    I like to think of moody rooms as the ones that make you want to curl up with a book and never leave. They feel like a hug. And honestly, once you start layering in the right colors and textures, this style is pretty forgiving. Let’s get into the ideas.

    1. Paint Your Walls a Deep Charcoal Gray

    Story Pin image
    Credit: Velvet Home Style

    Charcoal gray is probably the easiest gateway color into moody design. It’s darker than your typical greige but not as intense as pure black. This shade works because it acts like a neutral, so your furniture and art still pop against it.

    Pick a matte or eggshell finish so the wall doesn’t look flat or too shiny under lamp light. One practical tip: paint a large sample swatch and look at it morning, afternoon, and night before committing, since charcoal shifts a lot depending on light.

    This works in modern spaces with clean furniture lines, but it also softens up nicely in traditional rooms with crown molding and vintage furniture. Once your walls are set, you’ll want lighting that actually flatters that dark backdrop, which brings me to my next idea.

    2. Layer in Warm, Low Lighting Instead of Overhead Lights

    Credit: living room

    Overhead lighting is the enemy of moody rooms. It’s harsh and flat and kills the whole vibe. Instead, go for table lamps, floor lamps, and maybe a dimmer switch on any ceiling fixture you do keep.

    Warm bulbs (look for 2700K on the packaging) give off that golden, cozy glow instead of a cold white light. Try placing at least three light sources around the room at different heights: one lamp on a side table, one floor lamp in a corner, and maybe a small accent light near a bookshelf.

    This trick works no matter what style you’re going for, whether it’s farmhouse, industrial, or coastal. Once the lighting is dialed in, the next step is picking furniture that can hold its own against darker walls.

    3. Choose a Statement Sofa in a Rich, Saturated Color

    Story Pin image
    Credit: Modern Home decor

    Your sofa is the biggest piece of furniture in the room, so it needs to carry some visual weight. Deep emerald, burgundy, or navy velvet sofas look incredible against dark walls. Even a charcoal or espresso leather sofa adds depth without feeling boring.

    Avoid anything too glossy or shiny since it can feel cold. Velvet, boucle, and soft leather all add texture that plays well with moody lighting. A quick tip: if you’re not ready to commit to a colored sofa, start with a neutral one and add colorful throw pillows and a blanket instead.

    Modern homes might lean toward a low-profile navy sofa, while traditional spaces do well with a rolled-arm burgundy piece. Now that your main seating is set, let’s talk about what goes on the walls around it.

    4. Hang Dark, Framed Art With Gold or Black Frames

    Credit: ComfyIdeas

    Art sets the tone fast. In a moody room, go for pieces with dark backgrounds, moody landscapes, or abstract pieces with deep color palettes. Skip anything too bright or pastel since it’ll clash with the vibe you’re building.

    Frame choice matters here. Black frames feel modern and sharp. Gold or brass frames add warmth and a little glam. Try grouping three to five pieces in a gallery wall instead of one giant piece, since the layered look feels more intentional.

    This idea flexes easily. Coastal homes can use dark botanical prints, while traditional spaces might lean into oil-style portraits or landscapes. Speaking of layering, let’s move on to textiles, which do a ton of heavy lifting in moody design.

    Color Palette Combinations for Moody Living Rooms

    Palette NameWall ColorAccent ColorsBest For
    Forest NightDeep forest greenBrass, cream, burgundyTraditional, cottagecore
    Midnight StudyNavy blueWarm wood tones, goldModern, transitional
    Smoky CharcoalCharcoal grayRust, mustard, blackIndustrial, minimalist
    Wine CellarDeep burgundyCamel, black, goldTraditional, eclectic
    Espresso WarmthWarm dark brownTerracotta, cream, oliveFarmhouse, rustic

    5. Add a Plush Area Rug in a Deep, Textured Weave

    Credit: Oliver’s Finest Home Furniture Finds

    A rug grounds the whole room, literally. In a moody space, skip the light, airy jute rugs and go for something with depth, like a dark wool rug or a Persian-style rug with rich reds and blues woven in.

    Texture matters just as much as color here. A thick pile rug feels more luxurious underfoot and adds warmth to the whole space. My tip: size your rug so all your main furniture pieces sit at least partially on it, since a too-small rug makes the room feel disconnected.

    Modern rooms do well with solid dark rugs, while eclectic or traditional spaces can handle busier patterns. Once your floor is sorted, curtains are the next big texture opportunity.

    6. Hang Floor-to-Ceiling Curtains in a Heavy Fabric

    Credit: Smallvia

    Curtains do double duty in a moody room. They block light when you want it dim, and they add serious texture and drapery. Velvet curtains in deep colors like emerald or wine are a classic choice, but even a heavy linen in charcoal works great.

    Hang your curtain rod close to the ceiling, not right above the window frame. This makes the ceiling feel taller and the window feel bigger, which balances out all that visual weight from dark walls and furniture.

    This works across styles. Coastal homes might choose a deep navy linen, while glam spaces go for full velvet with a subtle sheen. Now let’s talk about the smaller layers that pull a room together: pillows and throws.

    7. Mix Textures With Velvet, Boucle, and Chunky Knit Throws

    Story Pin image
    Credit: Ravnora Decor Studio

    Moody rooms live or die by texture. If everything is smooth and flat, the room feels cold even with dark colors. Mixing velvet pillows, a boucle ottoman, and a chunky knit throw blanket adds dimension you can actually feel.

    Stick to a tight color palette so the mixed textures don’t feel chaotic, maybe two or three colors max across all your soft furnishings. A good rule: if your sofa is a solid color, add pattern through pillows, and vice versa.

    This idea works in basically every design style since texture is universal. Scandinavian moody rooms lean into knits and wool, while glam rooms go heavier on velvet and silk. Speaking of pulling things together, let’s talk wood tones next.

    8. Bring in Dark Wood Furniture for Grounding Weight

    Credit: Majida Lahrach

    Dark wood furniture, think espresso, walnut, or ebony finishes, adds a grounding element that keeps a moody room from feeling too soft or floaty. A dark wood coffee table, media console, or bookshelf gives your eye something solid to land on.

    Mixing wood tones is fine, but keep them all on the warmer or cooler side so they don’t clash. My tip: if you already have lighter wood pieces, a coat of dark stain or paint can transform them without buying new furniture.

    Traditional homes love ornate dark wood pieces, while modern spaces prefer clean-lined, simple silhouettes in the same dark tones. Now that your furniture’s grounded, let’s add some greenery to soften things up.

    9. Add Deep Green Houseplants for Organic Contrast

    Credit: Casolia

    Plants bring life into a moody room without breaking the color scheme. Deep green leafy plants like a fiddle leaf fig, snake plant, or pothos look incredible against dark walls, almost like living art.

    Choose planters in matte black, brass, or terracotta to keep the tones consistent with the rest of the room. A quick tip: cluster two or three plants of different heights together instead of scattering single plants around, since grouping creates more visual impact.

    This works everywhere, honestly. Boho spaces can go wild with lots of plants, while minimalist moody rooms might stick to just one or two statement plants. Next, let’s talk about a design element people often forget: the ceiling.

    10. Paint the Ceiling to Match or Complement the Walls

    Story Pin image
    Credit: Vyleron

    This one surprises people, but painting your ceiling the same color as your walls (or a shade darker) makes a moody room feel enveloping instead of chopped up. It’s sometimes called “the fifth wall” technique.

    This trick works best in rooms with decent natural light, since an all-dark room with no windows can start to feel like a cave. If your room is smaller or darker already, try a slightly lighter shade on the ceiling instead of an exact match.

    Modern and transitional homes have really embraced this look lately. Traditional spaces can do it too, especially with added crown molding painted in a contrasting trim color. Once your ceiling’s handled, let’s look at how fireplaces fit into this whole aesthetic.

    11. Use a Fireplace as a Moody Focal Point

    Credit: West Pear Interiors

    If you’re lucky enough to have a fireplace, lean into it. A dark stone or painted brick surround instantly adds drama. Even a simple black metal fireplace surround can transform a plain living room into a moody focal point.

    Style the mantel with a mix of candles, a dark-framed mirror, and maybe one or two decorative objects in brass or matte black. My tip: keep the mantel styling asymmetrical rather than perfectly matched on both sides, since it looks more natural and collected-over-time.

    This idea shines in traditional and farmhouse homes especially, though modern spaces can pull it off with a sleek linear fireplace design. Now, let’s talk about something a lot of people overlook: the ceiling fixtures themselves.

    12. Swap Bright Overhead Fixtures for Statement Lighting

    Story Pin image
    Credit: Malisha

    Even though I said to avoid harsh overhead lighting earlier, that doesn’t mean you skip ceiling fixtures altogether. A statement chandelier or pendant light in black metal, aged brass, or smoked glass adds drama while still giving you flexible lighting options with a dimmer.

    Pick a fixture with a warm bulb and dim it low most nights. Save full brightness for cleaning or hosting a bigger group. A good tip: hang pendant lights lower than you think you should, since it creates a cozier, more intimate feeling in the room.

    Industrial spaces love black metal cage fixtures, while glam rooms might choose a smoked glass chandelier. Speaking of focal points, let’s talk about bookshelves next.

    Budget Tiers for Moody Living Room Makeovers

    Budget LevelApproximate CostWhat You Can Do
    Starter$200–$500New paint color, throw pillows, a rug, and lamps
    Mid-Range$800–$2,000Paint plus one statement furniture piece (sofa or chair), new curtains, art
    Full Refresh$3,000–$6,000New sofa, rug, curtains, lighting fixtures, and a few art pieces
    Complete Overhaul$8,000+Full furniture swap, custom paint work, new flooring, fireplace update

    13. Style Open Shelves With Dark Books and Curated Objects

    Story Pin image
    credit: Shotframez

    Open shelving in a moody living room becomes basically a mini gallery. Group books by color, favoring dark covers or removing dust jackets for a uniform look. Mix in small sculptures, candles, or a small framed print between book stacks.

    Leave some negative space on each shelf. Packed-tight shelves feel cluttered instead of curated. A simple tip: stack some books horizontally and others vertically to create visual rhythm across the shelf.

    This idea works in almost any home style since it’s really about styling technique, not furniture. Eclectic homes can go bold with more objects, while minimalist moody spaces keep it to just books and one or two decor pieces. Next, let’s talk about a detail that ties a room together: hardware and metal finishes.

    14. Stick to One or Two Metal Finishes Throughout the Room

    Story Pin image
    Credit: Zeerwa

    Mixing brass lamp bases, black curtain rods, and chrome picture frames can feel messy fast. In a moody room, picking one dominant metal finish (like aged brass or matte black) and one secondary finish keeps everything feeling pulled together.

    Brass and black is a classic, reliable combo for moody spaces. It adds warmth (brass) and depth (black) without competing. My tip: do a quick walk around your room and note every metal finish you currently have, then slowly swap out the odd ones over time.

    This detail matters across every style, though glam rooms lean brass-heavy while industrial spaces go almost all black. Now, let’s talk about something that can make or break the mood: window treatments beyond just curtains.

    15. Layer Sheer and Blackout Curtains for Flexible Light Control

    Story Pin image
    Credit: Home Comfort Ideas

    Sometimes you want soft, filtered light. Other times you want the room fully dark and cozy for movie night. Layering a sheer curtain underneath a heavier blackout curtain gives you both options without extra hardware.

    Choose a sheer in a warm, slightly smoky tone rather than bright white, so it doesn’t clash with your dark walls when light passes through it. A practical tip: use a double curtain rod so both layers hang and move independently.

    This setup works in every home style. It’s especially useful in coastal or farmhouse moody rooms where you still want some daytime brightness. Now let’s move to a detail that often gets skipped: mirrors.

    16. Add a Large Dark-Framed Mirror to Bounce Light Around

    Credit: Homevizo

    Dark rooms need help bouncing light around, and a big mirror does exactly that. A large mirror in a black, bronze, or aged brass frame adds both function and style. Lean it against a wall or hang it above the sofa or fireplace.

    Position it across from a window if possible, so it reflects natural light deeper into the room. My tip: go bigger than you think you need. An oversized mirror almost always looks better than a small one in a moody space.

    Traditional homes love ornate mirror frames, while modern rooms prefer simple, thin-framed round or rectangular mirrors. Next, let’s talk about a smaller detail that adds a lot: candles and ambient flame.

    17. Use Candles and Warm Ambient Flame for Instant Coziness

    Story Pin image
    Credit: Restfuldecor

    Nothing says “moody and cozy” quite like candlelight. Cluster a few pillar candles on a tray on your coffee table, or line a few on the mantel. The flickering warm light adds texture and softness that lamps alone can’t replicate.

    Choose candles in dark holders or simple glass to keep the look intentional rather than cluttered. A quick tip: unscented candles are better for living rooms since strong scents can clash with other stuff going on in your home, like cooking smells.

    This works in every style, from boho to traditional to modern. Just adjust the candle holders to match your existing metal finishes. Now, let’s talk about seating beyond the main sofa.

    18. Add an Accent Chair in a Bold Pattern or Deep Color

    Credit: ComfyIdeas

    A single accent chair gives you a chance to add personality without redoing the whole room. Think a deep green velvet armchair, a leather wingback, or even a patterned chair in a rich jewel tone.

    Place it at an angle to the sofa rather than directly across, which creates a more relaxed, conversational layout. My tip: if your sofa is a solid neutral, this is the spot to go bold with pattern or color.

    Traditional homes might choose a wingback chair, while modern spaces lean toward a sleek barrel chair. Once your seating is sorted, let’s talk about how to layer in pattern through pillows without overdoing it.

    19. Layer Pillows in Varying Sizes but Matching Color Families

    Story Pin image
    Credit: Home by Yeli

    Too many random pillow patterns can make a moody room feel busy instead of cozy. Stick to one color family (like deep reds, rust, and burgundy) but vary the textures and sizes. Two large pillows, two medium, and one small lumbar pillow is a good formula.

    Mix solid velvet with one patterned pillow for interest, but don’t go overboard. My tip: odd numbers of pillows (three or five) tend to look more natural than even numbers.

    This works across styles just by adjusting the color family. Coastal moody rooms might use deep blues and greens, while farmhouse spaces lean into rust and cream. Next, let’s talk about a detail that’s easy to forget: your coffee table styling.

    20. Style Your Coffee Table With Layered Trays and Textures

    Credit: Chrystal Hardin

    An empty coffee table feels unfinished in a moody room. Layer a tray, a stack of dark books, a small plant, and maybe a candle. Keep the tray as your base so everything feels contained rather than scattered.

    Vary the heights of what you place on it. A tall vase, a short candle, and a flat stack of books creates a nice visual rhythm. My tip: leave about a third of the table empty so it doesn’t feel overloaded.

    This styling trick works everywhere, though minimalist rooms should stick to two or three objects max, while eclectic spaces can layer in more. Now, let’s talk about an often-overlooked spot: the entryway into your living room.

    21. Use a Darker Trim or Baseboard Color Instead of Bright White

    Credit: Maria Faller

    Bright white trim can feel jarring against dark walls. Instead, try painting your trim and baseboards a soft off-white, warm gray, or even matching them closer to your wall color for a seamless look.

    This small swap makes a bigger difference than people expect. My tip: if you’re not ready to commit to dark trim everywhere, start with just the living room and see how you like living with it before doing the whole house.

    Modern homes often go for a monochromatic look with trim matching walls closely. Traditional spaces might keep white trim but choose a warmer white instead of a stark, cool one. Next, let’s talk about textiles on the floor beyond just the main rug.

    22. Add a Smaller Layered Rug Under the Coffee Table

    Credit: West Pear Interiors

    If your main rug is solid, adding a smaller patterned rug layered on top under just the coffee table area adds texture without overwhelming the room. This trick is especially useful in rectangular rooms where one rug alone can look plain.

    Choose a smaller rug with a pattern that includes at least one color already in your room’s palette, so it feels connected rather than random. My tip: layering rugs also helps define separate zones in an open-concept living space.

    This works well in boho, eclectic, and traditional moody rooms especially. Modern spaces might skip this one in favor of a single clean rug instead. Now, let’s talk about a final furniture piece that often gets ignored: the side table.

    23. Choose Side Tables With Dark Finishes and Interesting Shapes

    Story Pin image
    Credit: brandcura

    Side tables are small, but they add a lot of personality when chosen well. A dark wood side table with an interesting shape, like a curved pedestal or a carved detail, adds visual interest next to your sofa or chair.

    Avoid matching side tables perfectly if you can. Mixing two different but complementary dark side tables (one round, one square, for example) feels more collected and personal. My tip: make sure whatever side table you pick is tall enough to comfortably reach from your seat, usually right around the same height as your sofa arm.

    Modern homes like sculptural, simple side tables, while traditional spaces might choose something with carved wood details. Finally, let’s wrap up with one last idea that ties everything together.

    24. Keep One Element Light to Prevent the Room From Feeling Too Heavy

    Story Pin image
    Credit: Styled Nest

    This last idea is important. Even in the moodiest room, you need one lighter element to keep things from feeling like a cave. This could be a cream-colored throw blanket, a lighter wood coffee table, or even just one pale pillow on an otherwise dark sofa.

    This small contrast actually makes the dark colors look richer by comparison. My tip: think of it like seasoning in cooking. Just a pinch of light keeps the whole room balanced instead of flat.

    This rule applies no matter what style you’re working in. Whether you’re going modern, coastal, or traditional, that single light touch keeps the moody vibe feeling intentional instead of oppressive.

    Tips for Success

    • Test paint colors at different times of day before committing to a full wall
    • Layer at least three different light sources for a warm, flexible glow
    • Keep your metal finishes limited to two per room for a cohesive look
    • Add texture through fabric, not just color, since flat surfaces read as cold
    • Leave one light element in the room so the mood feels intentional, not heavy
    • Shop secondhand for dark wood furniture pieces to save money on this look
    • Use a dimmer switch on any overhead fixture you keep in the room

    Common Mistakes and How to Avoid Them

    Using only overhead lighting
    : Swap it out for lamps and dimmers so the light feels warm instead of harsh and flat.

    Painting the whole room dark with no light contrast
    : Add at least one lighter element, like a cream throw or pale rug, to keep the space from feeling like a cave.

    Mixing too many metal finishes
    : Stick to one or two finishes throughout the room, like black and brass, for a cohesive feel.

    Choosing a rug that’s too small
    : Size up so your main furniture pieces sit at least partially on the rug.

    Skipping texture in favor of color alone
    : Mix velvet, boucle, wood, and knit textures so the room feels layered instead of flat.

    Overcrowding shelves and surfaces
    : Leave breathing room between decor objects so the styling feels curated, not cluttered.

    Similar Variations

    • Dark Academia Living Room – Leans into vintage books, leather furniture, and warm wood tones for a scholarly, cozy feel.
    • Moody Coastal Living Room – Combines deep navy and green tones with lighter driftwood accents for a beachy but still dramatic look.
    • Industrial Moody Living Room – Uses black metal, exposed brick, and dark leather for an edgier, urban feel.
    • Traditional Moody Living Room – Mixes deep jewel tones with classic furniture silhouettes and ornate frames.
    • Scandinavian Moody Living Room – Balances dark walls with light wood floors and minimal, functional furniture for a softer take on the trend.
    • Boho Moody Living Room – Layers rich patterns, plants, and warm lighting for a more eclectic, collected-over-time feel.

    At the end of the day, going moody in your living room isn’t about making the space feel dark and gloomy. It’s about layering warmth, texture, and rich color so the room feels like somewhere you actually want to spend time. Start small if you need to, maybe just a paint color or a new rug, and build from there.

    I hope these 24 moody living room ideas gave you a clear starting point and enough real, practical steps to actually make it happen in your own home.

  • 16 Living Room Corner Ideas

    16 Living Room Corner Ideas

    I’ve pulled together 16 living room corner ideas that actually solve the problem most people have: that weird, wasted corner nobody knows what to do with. If you’ve ever stood in your living room staring at an empty corner wondering why it feels so awkward, you’re about to get real answers.

    A living room corner is any interior angle where two walls meet, and it’s often left empty because standard furniture doesn’t fit its shape well. The fix involves angled furniture, vertical storage, lighting, or decor scaled to fit that tight triangular space.

    Stick around, because I’m about to walk you through 16 different ways to turn that dead space into the best part of your room.

    What Makes Corner Decorating So Tricky

    Corners are strange. They’re not quite big enough for a couch, but too big to ignore. Most furniture is built for straight walls, not angles, so a lot of people just shove a random plant there and call it done. I get it. I’ve done it too.

    But here’s the thing. Corners have potential. They’re natural spots for reading nooks, storage, or a statement piece that pulls your whole room together. Once you start thinking about the corner as its own little zone instead of leftover space, everything gets easier. That’s really what this whole list is about, helping you see that corner differently.

    1. Add a Curved Accent Chair

    Story Pin image
    Credit: Cozy Home Decor

    A curved chair softens the sharp angle of a corner instead of fighting it. Straight-edged furniture in a corner can look stiff, but a rounded barrel or swivel chair tucks in naturally and gives the eye somewhere soft to land. Pick a chair in a color that pops slightly from your walls, like mustard against a gray room, so it reads as a feature, not filler.

    Practical tip: measure the corner depth before buying. You need at least 30 inches of clearance so the chair doesn’t feel jammed in.

    This works in almost any style. Add boucle fabric for modern, rattan for coastal, or a tufted velvet chair for traditional rooms.

    Next up, let’s talk about what to put above that chair.

    2. Build a Floating Shelf Display

    Story Pin image
    Credit: Home Scovet

    Floating shelves mounted in a corner, arranged in a staggered zigzag pattern, use vertical space that usually goes to waste. They’re great for books, small plants, or framed photos. Keep the shelves shallow, around 6 to 8 inches deep, so they don’t jut out awkwardly into your walking path.

    Style the shelves with the rule of three: group items in odd numbers for a more natural, less staged look. Mix heights too. A tall vase next to a short stack of books looks more interesting than everything lined up evenly.

    For a modern home, go with black metal brackets. For a farmhouse look, use raw wood shelves with visible grain.

    Once your shelves are up, you might want something below them to anchor the whole corner, which brings me to seating.

    3. Create a Reading Nook With a Corner Bench

    Credit: Lisa

    A built-in or freestanding bench angled into the corner instantly turns dead space into a cozy reading spot. Add a thick cushion, a couple of throw pillows, and a small side table for your coffee or lamp. This idea works especially well in corners near a window, where natural light does half the styling work for you.

    Tip: choose a bench with storage underneath. You get seating and a place to stash blankets or books, which matters a lot in smaller living rooms.

    Coastal homes look great with a white-painted bench and linen cushions. Traditional spaces do well with a tufted bench in a deep jewel tone.

    If reading nooks aren’t your thing, plants might be more your speed.

    4. Anchor the Space With a Tall Statement Plant

    Story Pin image
    Credit: TheCozyHomeEdit

    A large plant, like a fiddle leaf fig or a snake plant, fills vertical space in a corner without taking up much floor room. Plants add life and color without needing a big budget. They also soften hard architectural lines, which corners have plenty of.

    Go for a plant that reaches at least 5 feet tall so it doesn’t get visually lost in the corner. Place it in a woven or ceramic planter that matches your room’s color palette.

    Quick tip: rotate the plant a quarter turn every couple of weeks so it grows evenly toward the light instead of leaning one direction.

    Modern rooms pair well with sculptural plants like a snake plant. Bohemian spaces love a fuller, leafier look like a monstera.

    Speaking of filling space, let’s talk about lighting next, because corners are notoriously dark.

    5. Install a Corner Floor Lamp

    Story Pin image
    Credit: Fatima

    Corners often sit far from windows and overhead lighting, which makes them feel dim and forgotten. A tall floor lamp fixes that fast. Arc lamps or tripod lamps work especially well because their base fits neatly into the angle of the wall.

    Choose warm-toned bulbs, around 2700K, for a cozy glow instead of a harsh white light. If you want the corner to double as a reading spot, pick a lamp with an adjustable head so you can direct the light exactly where you need it.

    Brass and black finishes suit modern rooms. Woven rattan shades feel right at home in coastal or boho spaces.

    Once the lighting’s sorted, you can start layering in texture, and that’s where a rug comes in.

    6. Layer a Small Rug to Define the Zone

    Story Pin image
    Credit: Home decor and Aesthetics

    Placing a small rug in the corner, even if it’s not covering your whole floor, visually separates that area from the rest of the room. It signals “this is its own little zone” without needing walls or furniture to do it.

    Pick a rug with texture, like a chunky wool or jute weave, since flat rugs can look lost in a smaller space. Keep the rug at least 2 feet away from the room’s main walking path so it doesn’t become a tripping hazard.

    Practical tip: layer a smaller patterned rug over a larger neutral one for extra depth without overwhelming the space.

    Geometric patterns fit modern rooms, while braided jute rugs feel right for farmhouse or coastal styles.

    Now that the floor’s handled, let’s go back to the walls with some art.

    Corner Idea Budget Tiers

    Budget TierPrice RangeBest Ideas to TryExample Items
    Low$20–$75Floating shelves, small rug, wall artThrifted frames, budget floor rug
    Mid$75–$250Floor lamp, accent chair, tall plantIKEA lamp, faux fiddle leaf fig
    High$250–$800+Built-in bench, custom shelving, statement furnitureCustom carpentry, designer chair

    7. Hang Art in an Asymmetrical Corner Gallery

    Story Pin image
    Credit: Dreamy Home Spaces

    A cluster of framed art hung across two walls of a corner, not just one, makes the whole space feel intentional instead of accidental. This trick works because it wraps the eye around the angle instead of stopping at a flat wall.

    Mix frame sizes and orientations, but stick to a consistent color palette so it doesn’t feel chaotic. Leave about 2 to 3 inches between frames for breathing room.

    Tip: lay your frames out on the floor first in the shape you want before hammering any nails. It saves you from a wall full of extra holes.

    Modern homes look sharp with black and white photography. Traditional rooms do well with framed botanical prints or family portraits.

    If art isn’t your style, a mirror might be the better move.

    8. Use a Mirror to Trick the Eye

    Credit: Spire creativity

    A large mirror angled into a corner bounces light around the room and makes the whole space feel bigger. This is especially useful in smaller living rooms where corners can feel cramped and dark.

    Lean a floor mirror against the wall for a relaxed look, or hang one at eye level for a more formal feel. Either way, position it to reflect a window or a lamp so it actually adds light, not just decoration.

    Quick tip: avoid hanging a mirror directly across from a cluttered shelf. It’ll double the mess visually.

    Round mirrors suit modern and boho spaces. Ornate gold frames feel more traditional or vintage.

    Next, let’s talk about something a little more functional: storage.

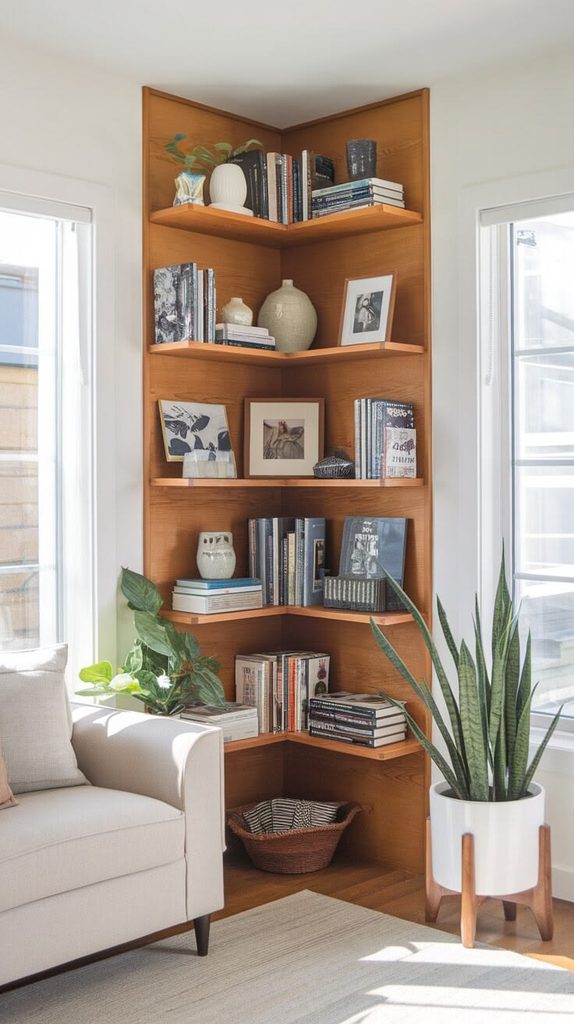
    9. Fit a Corner Bookshelf for Vertical Storage

    Credit: Appliance Realm

    A corner bookshelf, built specifically to hug the angle of the wall, makes use of space that a rectangular bookshelf simply can’t. These are often triangular or curved on one side, and they hold way more than people expect.

    Fill the shelves with a mix of books, baskets, and a few decorative objects so it doesn’t look like a library display. Leave a little negative space too. Packed shelves can feel overwhelming.

    Tip: put your most-used items at eye level and reserve the top and bottom shelves for display pieces or rarely-used storage.

    Painted white shelving fits coastal or farmhouse rooms. Dark wood feels more traditional or moody-modern.

    If shelving feels like too much commitment, a smaller side table might be the easier win.

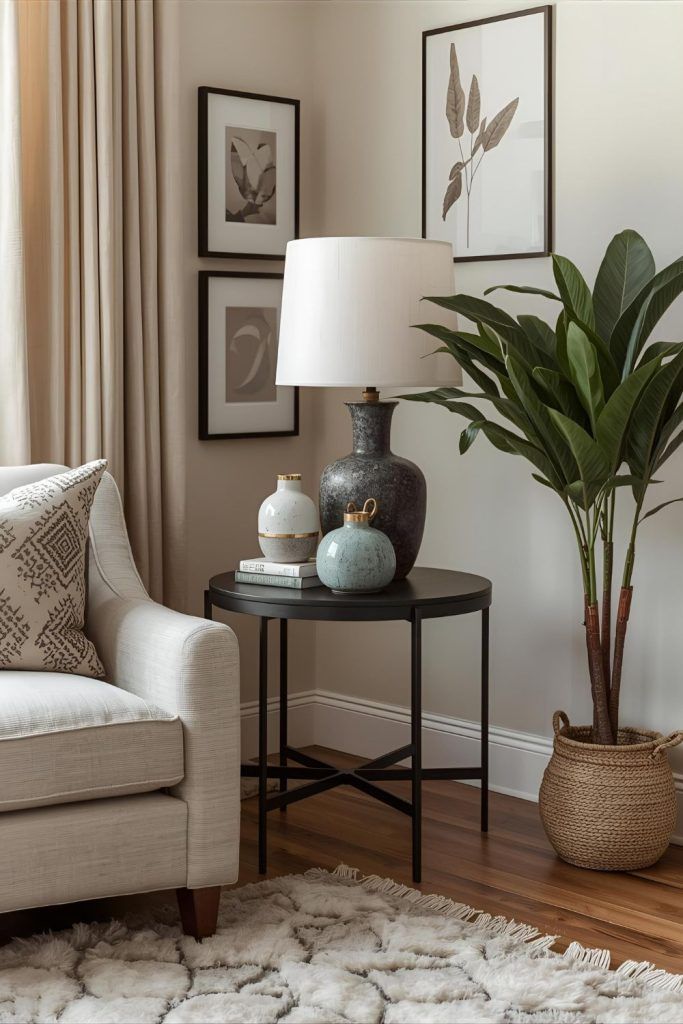
    10. Add a Round Side Table for Function and Flow

    Credit: RectifyHome

    A small round table tucked into a corner gives you a spot to set a drink, a candle, or a stack of magazines. Round shapes work better than square ones here because they don’t have hard corners bumping into the wall angle.

    Choose a table with some visual weight, like a stone-look base or a woven rattan design, so it doesn’t disappear next to bigger furniture.

    Practical tip: keep the table height close to your nearby seating’s arm height, usually around 22 to 26 inches, so it feels connected rather than random.

    Marble-top tables suit modern spaces. Wicker or rattan tables feel more relaxed and coastal.

    Speaking of relaxed, let’s talk about a corner idea built for pure comfort.

    11. Build a Cozy Blanket Ladder Corner

    Story Pin image
    Credit: The Aesthetic Abode

    A wooden blanket ladder leaned into a corner is a simple, low-effort way to add texture and warmth. Drape two or three blankets over the rungs in different textures, like a chunky knit and a woven throw, for layered interest.

    This idea works especially well next to a couch or reading chair, since it keeps blankets within reach instead of stuffed in a closet.

    Tip: alternate blanket colors so they contrast slightly with your wall color. It keeps the corner from blending into the background.
    Farmhouse rooms love a distressed wood ladder. Modern spaces look sharp with a matte black metal one.

    Now let’s get a little more dramatic with your next corner option.

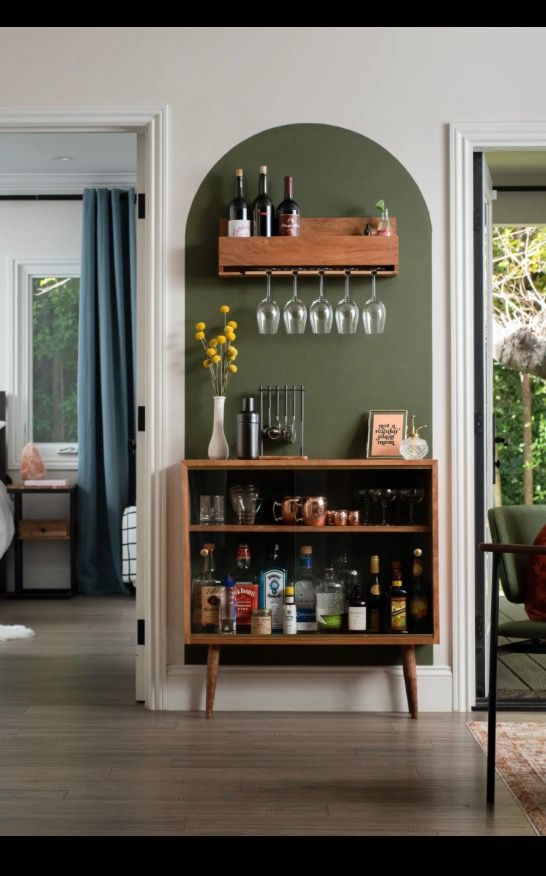
    12. Create a Mini Bar or Beverage Station

    Credit: Elizabeth Morgan

    A small corner bar cart or shelf setup turns unused space into a functional entertaining spot. Stock it with a few glasses, a couple of bottles, and a small tray to keep things tidy. This works great near a living room that opens into a dining area.

    Keep the setup compact. A cart around 30 inches wide is usually enough without crowding the corner.
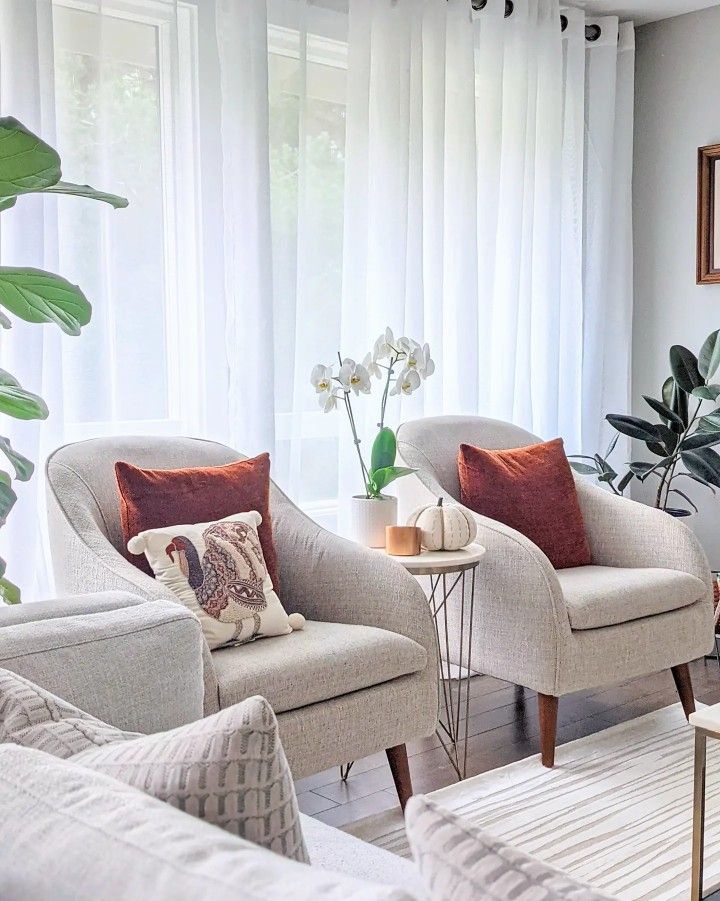
    Tip: add a small round mirror behind the bar area to reflect light off glass bottles and make the setup sparkle a bit more.

    Brass bar carts suit art deco or modern rooms. A repurposed wooden crate feels more rustic or farmhouse.

    If entertaining isn’t your priority, maybe your corner needs to work harder for storage instead.

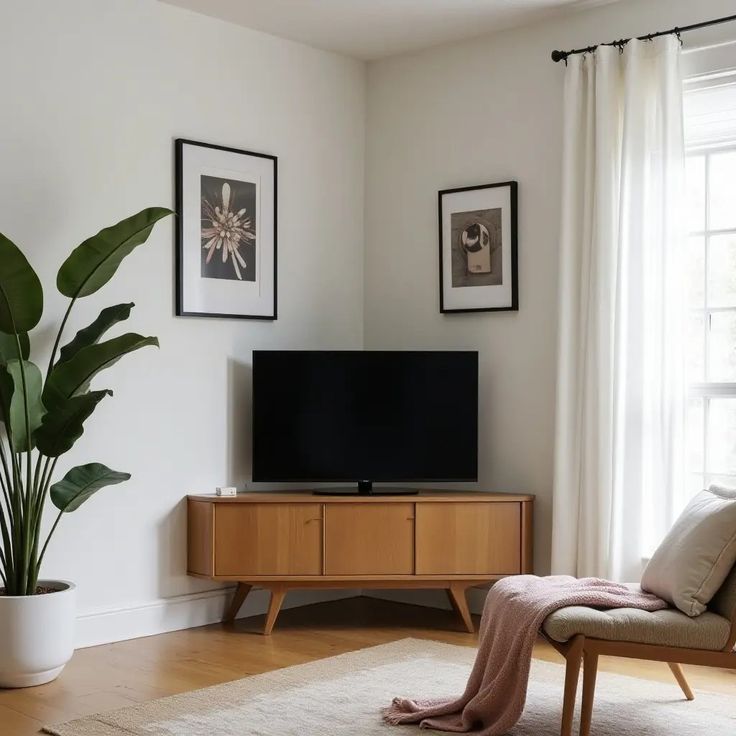
    13. Install a Corner TV Mount for Awkward Layouts

    Credit: Jeannie Greiner

    In smaller living rooms, corners can actually be the best spot for a TV, especially if there’s no good flat wall option elsewhere. A swiveling mount lets you angle the screen toward your main seating area without wasting space.

    Hide cords with a cord cover or a slim cable channel so the corner doesn’t look tangled and messy.

    Tip: mount the TV so the center sits at eye level when you’re seated, usually about 42 inches from the floor.

    Modern rooms pair well with a slim black mount. Traditional rooms can hide the TV behind cabinet doors when it’s not in use.

    Next, let’s soften things up again with texture and fabric.

    14. Drape a Textured Curtain Behind the Corner

    Story Pin image
    Credit: Unshelf Design

    Hanging a curtain panel diagonally across a corner adds softness and can even hide clutter or storage behind it. This works especially well in studio apartments where the living room corner doubles as extra storage.

    Choose a heavier fabric, like linen or velvet, so it hangs nicely instead of looking flimsy.

    Tip: mount the curtain rod at an angle that matches the corner’s natural line, rather than straight across, so it looks planned instead of accidental.

    Boho rooms love a patterned or fringed curtain. Modern spaces do better with a solid, neutral tone.

    Once your corner has some soft elements, you might want to bring in a bit of collected charm.

    15. Style an Open Corner Display Ledge

    Story Pin image
    Credit: The comfy corner

    A single wide ledge, lower than typical shelving, gives you room to lean framed art, stack books, and set small objects together in a relaxed, layered look. It feels more casual than traditional shelving and is easier to restyle whenever you want a change.

    Keep a mix of heights and textures. A tall vase, a stack of two or three books, and one small plant is usually enough.

    Tip: repaint or restyle this ledge every season. It’s one of the easiest corners to refresh without spending much.

    Eclectic and boho homes especially love this idea, though it works in modern spaces too with a more minimal styling approach.

    Last but not least, let’s finish with a corner idea that ties everything together.
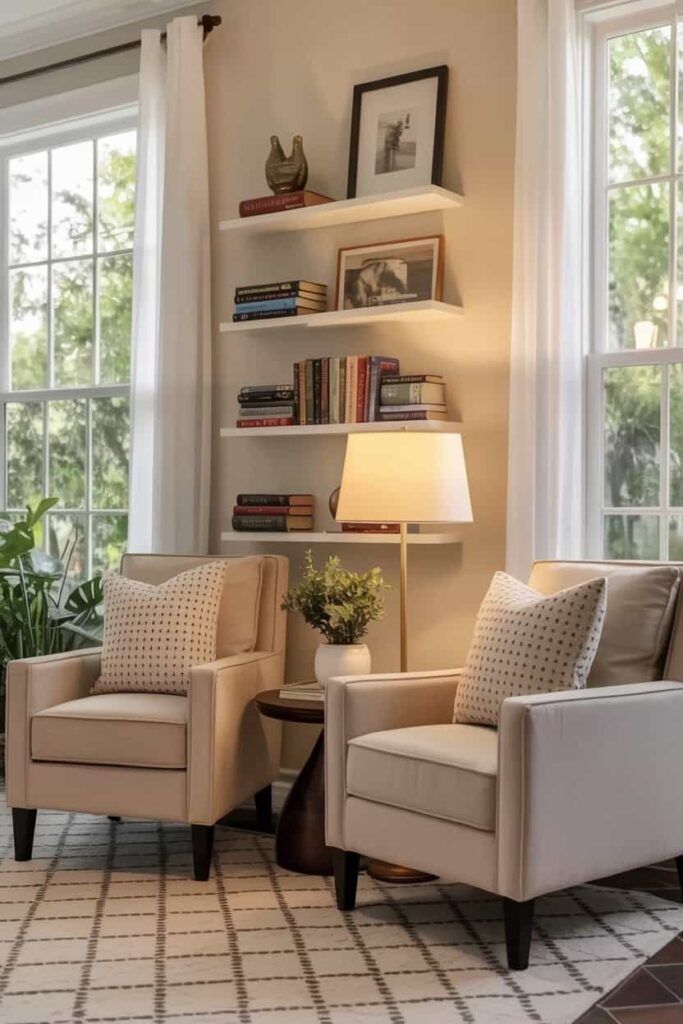
    16. Combine Multiple Elements Into a Layered Corner Vignette

    Credit: The Crafty Hacks

    Instead of picking just one idea, you can combine a few, like a plant, a lamp, and a small shelf, into one layered corner vignette. This creates a designed, intentional look rather than a single random object sitting alone.

    Balance is key here. Vary the heights, keep a consistent color scheme, and don’t overcrowd the space.

    Tip: stick to three main elements max. More than that, and the corner starts to feel cluttered instead of curated.

    This approach flexes across any style, since you’re really just combining smaller ideas from earlier into one cohesive corner.

    Tips for Success

    • Measure your corner’s depth and width before buying anything. Awkward furniture fit ruins even the best design idea.
    • Stick to a consistent color palette across your corner elements so it feels planned, not random.
    • Use lighting to fix dark corners before worrying about decor. A well-lit corner looks better instantly.
    • Leave a little negative space. Packed corners feel cluttered, not cozy.
    • Choose furniture with rounded edges when possible. It softens the sharp angle naturally.
    • Refresh your corner seasonally with small swaps, like pillows or plants, instead of a full redo.

    Common Mistakes and How to Avoid Them

    Overcrowding the corner
    : Stick to two or three main elements instead of piling on decor. Less is often more in tight spaces.

    Ignoring scale
    : Oversized furniture in a small corner looks cramped. Measure first and choose pieces sized for the actual space.

    Skipping lighting
    : A dark corner feels forgotten no matter how nice the decor is. Add a lamp or use a mirror to bounce light in.

    Choosing the wrong furniture shape
    : Square or sharp-edged furniture fights the angle of a corner. Curved or rounded pieces usually fit better.

    Forgetting the whole room’s flow
    : A corner should match your room’s overall color scheme and style, not feel like a separate design project.

    Similar Variations

    • Coastal Corner Nook: Light woods, linen textures, and airy colors for a relaxed beach-inspired feel.
    • Farmhouse Corner Shelf Display: Distressed wood shelving paired with neutral tones and vintage-style objects.
    • Modern Minimalist Corner: One statement piece, clean lines, and a limited color palette for a sleek look.
    • Boho Layered Corner: Mixed textures, patterned textiles, and plenty of plants for a collected, lived-in vibe.
    • Traditional Corner Library: Dark wood shelving, leather seating, and classic accessories like brass lamps.

    I know corners can feel like the hardest part of decorating a living room, but they don’t have to stay that way. Once you start treating that space as its own little design opportunity instead of leftover square footage, everything clicks into place a lot faster than you’d think. Whether you go with a cozy reading nook, a tall plant, or a full layered vignette, the goal is the same: make that corner feel like it belongs. That’s really the whole point behind these 16 Living Room Corner Ideas.

  • 19 Small Glam Living Room Ideas That Prove Size Doesn’t Matter

    19 Small Glam Living Room Ideas That Prove Size Doesn’t Matter

    If you’ve been searching for real answers on 19 small glam living room ideas, you’re in the right spot. I’ve dug through the design world to bring you the most complete, practical list out there, and I’m going to walk you through every single detail so you don’t have to guess anymore.

    A small glam living room is a compact living space designed with luxurious materials, metallic accents, and bold textures to create a high-end look without needing extra square footage. The style relies on smart furniture choices, reflective surfaces, and curated decor to make small rooms feel rich, elegant, and spacious.

    Stick around, because I’m about to show you 19 ways to turn even the tiniest living room into a glam masterpiece your friends will ask about.

    What Exactly Is Small Glam Style, Anyway?

    Okay, let’s talk about what glam actually means. It’s not about spending a fortune. Glam style is all about shine, drama, and a little bit of “wow.” Think velvet couches, gold mirror frames, and lighting that looks like jewelry.

    Now add “small” to that mix. Suddenly you’re not just decorating, you’re solving a puzzle. You need furniture that looks fancy but doesn’t eat up floor space. You need color and sparkle without making the room feel cluttered. That’s the fun challenge here.

    I’ve lived in small apartments most of my adult life, so trust me, I get the struggle. Let’s get into the ideas that actually work.

    1. Choose a Velvet Sofa in a Jewel Tone

    Story Pin image
    Credit: Simple Spaces

    A velvet sofa is basically the heart of any glam room. Pick a deep color like emerald, sapphire, or plum instead of plain gray. Velvet catches light in a way that instantly feels rich, even if the couch was on sale.

    For small spaces, go with a loveseat or a slim two-cushion sofa instead of a bulky sectional. This keeps the room open while still giving you that plush, expensive feel.

    Practical tip: Measure your walking path before buying. You want at least 30 inches of space to walk around the sofa comfortably.

    This idea works in modern homes with clean lines, or in traditional spaces where the velvet pairs with wood furniture. Next, let’s talk about what goes on the walls behind that gorgeous sofa.

    2. Hang an Oversized Mirror to Fake More Space

    Credit: RoomKer

    Mirrors are basically magic tricks for small rooms. A big mirror with a gold or silver frame bounces light around and makes the whole room feel twice as big. Plus, it’s an easy way to add glam without buying tons of furniture.

    Place it across from a window so it reflects natural light during the day. At night, it’ll bounce lamp light around too, keeping things bright and airy.

    Practical tip: Lean a floor mirror against the wall instead of hanging it if you’re renting and can’t drill holes.

    Coastal homes can use a mirror with a rope or driftwood frame, while modern spaces might prefer a sleek chrome edge. Speaking of light, let’s move into lighting fixtures that really shine.

    3. Add a Statement Chandelier, Even in a Small Room

    Story Pin image
    Credit: Maya Serr

    A lot of people think chandeliers only belong in giant dining rooms. Not true. A small crystal or metal chandelier hung in the living room instantly signals “this space is fancy.” It becomes the focal point the second someone walks in.

    Pick a size that’s about half the width of your seating area so it doesn’t overwhelm the room. Mini chandeliers or flush-mount versions work great for lower ceilings.

    Practical tip: Use a dimmer switch so you can control the mood, bright for daytime, soft and warm for evening lounging.

    This idea shines in traditional and glam-farmhouse mixes alike. Now let’s talk about the floor beneath that sparkly light.

    4. Layer a Metallic Thread Area Rug

    Credit: Apartment ABC

    A rug with subtle metallic thread running through it adds texture without shouting for attention. It grounds the room while still keeping that glam sparkle going. Look for rugs in cream, blush, or gray with gold or silver flecks woven in.

    Keep the rug size proportional. In small rooms, an 5×7 or 6×9 rug usually works best, just make sure the front legs of your furniture sit on it.

    Practical tip: Choose a low-pile rug for small rooms so it doesn’t make walking paths feel cramped.

    This works beautifully in modern glam or even a boho-glam blend. Next, we’re moving into how color choice makes a huge difference in small spaces.

    Color Palette Combinations for Small Glam Rooms

    Palette NameWall ColorFurniture ColorAccent ColorsBest For
    Blush & GoldSoft blush pinkCream or ivoryGold, rose goldFeminine, soft glam
    Midnight GlamCharcoal grayNavy velvetSilver, brassBold, dramatic rooms
    Neutral LuxeWarm whiteBeige linenChampagne, goldMinimalist glam
    Emerald DreamLight grayEmerald greenGold, blackRich jewel-tone look
    Coastal GlamPale blueWhite or creamSilver, seashellBeachy glam blend

    5. Use Mirrored Furniture to Add Shine Without Bulk

    Credit: Mia Folio

    Mirrored side tables or a mirrored console table are glam room staples. They reflect light, so they visually disappear a little into the room while still looking luxurious. This is huge for small spaces where every piece of furniture needs to earn its spot.

    Try a mirrored coffee table instead of a heavy wood one. It’ll feel lighter in the room and add instant sparkle.

    Practical tip: Wipe mirrored furniture down often. Fingerprints and dust show up fast on shiny surfaces.

    Mirrored pieces fit modern, Art Deco, and Hollywood Regency styles especially well. Now let’s talk about something softer, pillows and throws.

    6. Pile on Faux Fur and Silk Throw Pillows

    Story Pin image
    Credit: luxurious living

    Texture is what separates glam from boring. Mix faux fur pillows with silky satin ones on your sofa. The contrast between soft and smooth adds depth without adding clutter.

    Stick to three or four pillows max on a small sofa. Too many and you’ll lose sitting space, which defeats the purpose of having a cozy room.

    Practical tip: Choose pillow covers with zippers so you can switch them out seasonally without buying new pillows every time.

    Traditional homes can lean into brocade patterns, while modern spaces might prefer solid faux fur in cream or gray. Let’s talk about window treatments next, because they matter more than people think.

    7. Hang Floor-to-Ceiling Curtains Above the Window Frame

    Credit: Soft & Soulful

    This trick is sneaky but powerful. Hang your curtain rod higher than the actual window, close to the ceiling. It tricks the eye into thinking your ceilings are taller than they really are, which makes the whole room feel grander.

    Pick curtains in silk, velvet, or a subtle metallic sheen fabric. Light, flowy fabrics work if you want brightness, while heavier fabrics add drama.

    Practical tip: Curtains should just barely brush the floor, not pool or float above it, for the most polished glam look.

    This works in almost every home style, from modern to traditional to coastal glam. Now, let’s talk about a piece of furniture people often forget: the accent chair.

    8. Add One Bold Accent Chair Instead of a Second Sofa

    Credit: Dina Saunders

    In small rooms, you usually can’t fit two full sofas. Instead, add one striking accent chair in a bold pattern or a rich velvet color. It gives you extra seating without hogging space.

    A curved-back chair or a wingback style both scream glam while staying visually light on their feet.

    Practical tip: Choose a chair with slim, exposed legs (like brass or wood) instead of a skirted bottom. It’ll make the room feel less crowded.

    This idea flexes easily. Modern homes might choose a boucle chair, while traditional spaces lean toward tufted velvet. Speaking of small details, let’s talk about how to style your coffee table.

    9. Style Your Coffee Table With a Tray, Books, and One Statement Object

    credit: The Olive Branch Nest

    A coffee table can either look chaotic or curated. The trick is grouping items on a tray so they look intentional. Add two or three stacked coffee table books, a small vase, and one glam object like a gold sculpture or crystal candle holder.

    Keep the tray under 20% of your coffee table’s total surface so you still have room to set down a drink or your feet.

    Practical tip: Rotate the books and objects every season to keep the space feeling fresh without spending more money.

    This idea works in literally every design style since coffee table styling is universal. Now let’s move to something a little unexpected: ceiling details.

    10. Paint or Wallpaper the Ceiling for a Surprise “Wow” Moment

    Credit: Boho Dream Spaces

    Most people never look up when decorating, but that’s exactly why doing something up there is so effective. A metallic wallpaper or a deep, glossy paint color on the ceiling adds instant drama and makes the room feel custom-designed.

    Try a champagne gold wallpaper or a high-gloss navy paint if you want serious impact.

    Practical tip: Glossy finishes reflect more light, so they actually help small rooms feel bigger, not smaller, despite the dark color.

    This idea is bold, so it fits best in modern and eclectic glam homes. Next, let’s chat about a small but mighty detail: hardware.

    Budget Tiers for Small Glam Living Room Makeovers

    Budget TierTotal SpendWhat You Can Do
    Starter Glam$150–$300New pillows, a mirror, metallic candle holders, spray-painted frames
    Mid-Level Glam$500–$1,200Accent chair, area rug, small chandelier, curtains
    Full Glam Refresh$1,500–$3,500Velvet sofa, mirrored furniture set, statement lighting, wallpaper
    Luxury Glam$4,000+Custom furniture, designer lighting, full wall treatments

    11. Swap Boring Hardware for Brass or Gold Accents

    Story Pin image
    Credit: Home Harmony

    If your living room has a media console, cabinet, or bookshelf, check the hardware. Plain black or silver knobs can be swapped for brass or gold ones in about ten minutes. It’s one of the cheapest glam upgrades you can make.

    This tiny change adds up fast when you do it across multiple pieces in the room.

    Practical tip: Buy hardware in bulk from the same finish family so everything matches, even if the pieces are different styles.

    This trick works no matter what style you’re going for, honestly. Now let’s move to plants, because glam rooms need a little life too.

    12. Add Greenery in a Metallic or Ceramic Planter

    Story Pin image
    Credit: Pinkscroll

    Glam doesn’t mean cold and lifeless. Adding a plant or two softens the sparkle and brings warmth into the room. Choose planters in gold, brass, or a glossy ceramic finish to keep the theme going.

    A fiddle leaf fig or a snake plant works great in small spaces since they grow tall without needing much floor footprint.

    Practical tip: Pick low-maintenance plants if you’re not great with watering schedules. Snake plants can survive weeks of neglect.

    Boho and coastal glam styles especially love this natural-meets-luxury combo. Next, let’s talk about built-in storage that still looks stylish.

    13. Use a Glam Storage Ottoman Instead of a Coffee Table

    Story Pin image
    Credit: Ideas for Inspiration

    If your room is really tight on space, swap your coffee table for a storage ottoman covered in velvet or faux leather with metallic legs. It gives you a surface for drinks, hidden storage for blankets, and extra seating when guests come over.

    This one piece does the job of three, which is huge in small living rooms.

    Practical tip: Choose an ottoman with a tray top so you still get a hard surface when needed.

    This works in modern, transitional, and glam-farmhouse spaces alike. Now let’s chat about wall art, because bare walls kill the glam vibe fast.

    14. Hang Art With Metallic Frames or Metallic Details

    Credit: Hearth & Petals

    Skip plain black frames. Look for gold, silver, or rose gold frames instead, even if the art itself is simple. The frame does a lot of the glam work here.

    Abstract art with gold leaf details or black and white photography in ornate frames both work great.

    Practical tip: Hang art at eye level, about 57 inches from the floor to the center of the piece, for the most polished gallery look.

    This idea flexes across almost every design style since art frames are an easy swap. Next, let’s talk about something people overlook completely: door and trim colors.

    15. Paint Trim or Doors in a Glossy Contrast Color

    Credit: Grigsardaana

    Painting your trim, doors, or even a small accent wall in a glossy black or deep color creates instant drama. It’s a small update that changes the whole feel of the room.

    Pair glossy black trim with white walls for a crisp, high-contrast glam look.

    Practical tip: Use a semi-gloss or high-gloss paint finish specifically, since it reflects light better than flat paint.

    Modern and Art Deco homes especially benefit from this bold contrast trick. Now, let’s discuss a smaller detail that makes a big difference: candles and scent.

    16. Add Glam Candle Holders for Ambient Lighting

    Story Pin image
    Credit: home decore

    Candlelight instantly makes a room feel softer and more luxurious. Choose candle holders in crystal, brass, or mirrored glass, and cluster three different heights together on a shelf or table.

    This creates a layered lighting effect that’s way more flattering than one single overhead light.

    Practical tip: Use LED flameless candles if you have pets or kids, so you still get the glow without the fire risk.

    This idea fits every style since candlelight is universally cozy. Let’s move to bookshelves next, because they’re often the messiest spot in a living room.

    17. Style Open Shelves With Symmetry and Negative Space

    Story Pin image
    Credit: Home Styling Studio

    Open shelves can either look glam or look like clutter, depending on how you style them. Group items in odd numbers (like three), and leave some empty space between groupings so the eye has room to rest.

    Mix books, a small mirror, and a metallic object on each shelf for balance.

    Practical tip: Turn some books spine-in and cover-out to add visual variety instead of a straight row of spines.

    This idea works in basically any shelf setup, no matter your home style. Now let’s talk about multi-functional furniture, which is a small living room’s best friend.

    18. Choose a Nesting Table Set Instead of One Bulky Side Table

    Credit: DesignerAffair

    Nesting tables (usually two or three tables that stack together) are perfect for small glam rooms. Pull them apart when you need extra surface space, then tuck them back together when you don’t.

    Look for sets with mirrored tops or gold metal legs to keep the glam theme going.

    Practical tip: Use the smallest table as a plant stand when you’re not using it as a side table.

    This idea works especially well in modern and transitional glam spaces. Finally, let’s wrap up with one last idea that ties everything together.

    19. Create a Small Bar Cart Corner for Instant Glam Energy

    Story Pin image
    Credit: The Olive Branch Nest

    A bar cart in gold or brass with glass shelves adds major glam energy to even the tiniest corner. Style it with a few glasses, a decorative bottle, and a small tray. It doesn’t need to be big to make a statement.

    This also gives your room a “lifestyle” feel, like it’s ready for guests at any moment.

    Practical tip: Add a small round mirror behind the cart to double the visual effect of the glassware and metallics.

    This idea fits Hollywood Regency, modern, and eclectic glam styles perfectly, rounding out our full list of nineteen ideas.

    Tips for Success

    • Start with one statement piece, like the sofa or chandelier, then build the rest of the room around it.
    • Stick to two or three metallic finishes max (like gold and brass) so the room doesn’t feel mismatched.
    • Use vertical space, tall mirrors, floor-to-ceiling curtains, and tall plants, to make low ceilings feel higher.
    • Keep a consistent color story so small rooms don’t feel busy or chaotic.
    • Shop secondhand for glam furniture. Thrift stores often have great bones you can spray paint gold.
    • Layer lighting with lamps, candles, and overhead fixtures instead of relying on one light source.
    • Leave breathing room. Even glam rooms need some empty space to avoid feeling cluttered.

    Common Mistakes and How to Avoid Them

    Overcrowding the room with too much furniture
    : Stick to essential pieces only. A sofa, one chair, a coffee table, and a side table are usually enough for small spaces.

    Choosing a rug that’s too small
    : Measure your seating area first, then buy a rug big enough for at least the front furniture legs to sit on.

    Mixing too many metallic finishes
    : Pick one dominant metal (gold, silver, or brass) and use the others sparingly as small accents only.

    Ignoring lighting layers
    : Combine ceiling lights, lamps, and candles instead of relying on a single overhead fixture.

    Going too dark without enough reflective surfaces
    : Balance dark colors with mirrors, glass, and metallics so the room doesn’t feel cave-like.

    Forgetting the ceiling and walls
    : Add wallpaper, paint, or trim details instead of leaving them plain, since bare surfaces can make glam rooms feel unfinished.

    Similar Variations

    • Coastal Glam – Mixes glam metallics with beachy textures like rattan and driftwood.
    • Modern Glam – Focuses on clean lines, bold color blocks, and minimal but striking metallic accents.
    • Boho Glam – Blends warm earthy tones and natural textures with sparkly, luxe details.
    • Hollywood Regency – A bolder, more dramatic glam style with heavy use of mirrors, velvet, and black and white contrast.
    • Farmhouse Glam – Combines rustic wood tones with soft glam touches like crystal light fixtures and gold hardware.
    • Minimalist Glam – Strips glam down to just a few key sparkly pieces in an otherwise simple, neutral room.

    Small living rooms don’t have to feel like a limitation. With the right furniture choices, smart lighting, and a few sparkly details, you can build a space that feels expensive, cozy, and totally you. The key is picking a few strong statement pieces and letting them do the heavy lifting instead of cramming the room full of stuff.

    I hope this list gave you a clear roadmap for your own space. Whether you go bold with a velvet sofa or start small with candle holders and a mirror, you now have everything you need to bring these 19 small glam living room ideas to life in your own home.

  • 16 Two Chairs Sitting Area Ideas That Actually Work in Real Homes

    16 Two Chairs Sitting Area Ideas That Actually Work in Real Homes

    If you’ve been hunting for the best 16 Two Chairs Sitting Area ideas, I’ve got you covered here with everything I’ve learned from designing and testing these setups myself. I’ve spent way too many weekends rearranging furniture in my own living room, so I know what actually works and what just looks good in photos.

    A two chairs sitting area is a small furniture grouping built around two chairs facing each other or angled toward a shared focal point, often with a small table between them. It works in living rooms, bedrooms, offices, or sunrooms and needs only 6 to 8 square feet of floor space.

    Stick with me and I’ll walk you through 16 different ways to pull this off, plus the mistakes that trip most people up.

    What Makes a Two Chairs Sitting Area So Popular

    Here’s the thing about a two chairs sitting area. It’s small but it packs a punch. You don’t need a huge sofa or a ton of square footage. Just two chairs, maybe a little table, and boom, you’ve got a cozy spot for coffee, reading, or catching up with a friend.

    I love this setup because it feels personal. A sofa says “everyone’s welcome.” Two chairs say “let’s actually talk.” That’s a big reason designers keep using this trick in tiny apartments and big houses alike. It fits almost anywhere. A corner, a bay window, even a spot by your bed. Once you start noticing them, you’ll see two-chair setups everywhere.

    1. Face Two Accent Chairs Toward a Window

    Credit: Nature Creatures

    Nothing beats natural light when you’re trying to create a relaxing nook. Pick two chairs with similar shapes but maybe different fabrics for a little contrast. Place them facing the window, angled slightly toward each other so people can still chat.

    Add a small side table between them for coffee cups or a book. Keep the color palette light if the room already gets a lot of sun, since bright light can wash out bold prints.

    Quick tip: measure your window width first. You want the chairs to feel balanced, not crammed to one side.

    This idea works great in coastal or farmhouse homes with lots of windows. It also fits modern spaces if you pick sleek, low-profile chairs. Now let’s talk about what happens when you don’t have a window to work with.

    2. Anchor the Space With a Round Accent Table

    Credit: RectifyHome

    When there’s no window nearby, a round table becomes your focal point instead. Round shapes feel friendlier than square ones and they don’t have sharp corners to bump into, which matters in smaller rooms.

    Choose a table about knee height so it’s easy to reach from either chair. Wood tones warm up the space, while metal or glass tables feel more modern.

    Actionable tip: keep the table diameter under 24 inches if your chairs are close together, so there’s still room to walk past.

    Traditional homes look great with a carved wood table. Modern spaces do better with a simple pedestal base in black or brass. Once your table’s in place, you’ll want to think about how the chairs themselves are covered.

    3. Mix Two Different Fabric Patterns on Purpose

    credit: Home Decor Bliss Blog

    I know it sounds risky, but two chairs don’t have to match. Pairing a solid color chair with a patterned one adds personality without overwhelming the room. Just keep one color thread running through both fabrics so they still feel connected.

    For example, if one chair has a navy and cream stripe, the solid chair could be navy too. That little repeat ties everything together.

    Practical tip: hold fabric swatches side by side before you buy. If they clash instead of complement, swap one out.

    This trick works especially well in eclectic or bohemian homes, but even traditional rooms can handle a subtle pattern mix. Speaking of color, let’s dig into palettes a bit more.

    Color Palette Combinations for Two Chair Seating Areas

    Palette NameChair 1 ColorChair 2 ColorAccent Table FinishBest For
    Coastal CalmSoft BlueCreamWhitewashed WoodBeach houses, sunrooms
    Warm NeutralCamel TanIvoryBrassTraditional, transitional
    Bold ContrastCharcoal GrayMustard YellowBlack MetalModern, eclectic
    Earthy BohoTerracottaOlive GreenRattanBoho, farmhouse
    Monochrome ChicLight GrayDark GrayGlassMinimalist, contemporary

    Now that you’ve got some color direction, let’s talk about scale and proportion.

    4. Choose Chair Sizes That Match the Room Scale

    Story Pin image
    Credit: Goodschuman

    Big chairs in a tiny room feel like they’re swallowing the space. Tiny chairs in a huge room look lost and awkward. I always measure the area first before falling in love with a chair style.

    For small rooms, look for chairs under 30 inches wide. For larger rooms, you can go bigger, maybe armchairs with wide, deep seats that feel like a hug.

    Tip: leave at least 30 inches of walking space around the seating area so it doesn’t feel cramped.

    Modern farmhouse spaces often use slightly oversized chairs for a cozy vibe, while modern lofts lean toward slim profiles. Once size is sorted, it’s time to think vertical with lighting.

    5. Add a Floor Lamp Between the Chairs

    Credit: Nature Creatures

    A shared floor lamp does double duty. It lights up both chairs and acts as a stylish divider without taking up much floor space. I like arc lamps because they can stretch over a small table without needing their own footprint.

    Pick a warm bulb, around 2700K, for a cozy glow instead of harsh white light. Dimmable lamps give you flexibility for reading versus relaxing.

    Actionable tip: position the lamp so its light hits both chairs evenly, not just one side.

    Industrial-style homes look great with a matte black arc lamp. Traditional homes might prefer a brass floor lamp with a fabric shade. Lighting sets the mood, but rugs ground the whole area.

    6. Layer a Round or Oval Rug Underneath

    Credit: Rugs

    A rug pulls a two chairs sitting area together, especially on hardwood or tile floors. I always suggest sizing the rug so both chairs’ front legs sit on it. That little detail makes the whole grouping feel intentional instead of randomly placed.

    Round or oval rugs soften the geometry if your chairs and table are already boxy. Textured rugs like jute add warmth without adding visual clutter.

    Quick tip: go at least 5 feet in diameter for two chairs plus a small table, so there’s enough overlap.

    Bohemian rooms love a printed or patterned rug here, while minimalist spaces do better with something plain and textured. Next, let’s talk about what goes on the walls behind your chairs.

    7. Hang Art or a Mirror Behind the Chairs

    Credit: Nature Creatures

    An empty wall behind your sitting area feels unfinished. I like hanging one large piece of art or a mirror centered above the space between both chairs. It draws the eye up and makes the whole nook feel deliberate.

    Mirrors also bounce light around, which is great if your two chairs sitting area doesn’t get much natural sun.

    Tip: hang art so the center sits about 57 to 60 inches from the floor, which is standard eye level for most people.

    Coastal homes often use a single oversized mirror with a woven frame. Traditional spaces might hang a gallery wall instead. Once your walls are dressed, don’t forget the little extras.

    8. Add a Small Stack of Books or a Tray on the Table

    Credit: Coffee Aesthetic

    I always add something personal on the table between two chairs. A small stack of books, a tray with a candle, or a little plant. It makes the space feel lived in instead of staged.

    Keep it simple though. Two or three items max, so the table doesn’t feel cluttered.

    Practical tip: choose items with different heights, like a tall candle next to a short stack of books, for visual interest.

    This works in every home style honestly, since you can swap the specific items to match your vibe. Modern homes might use a single sculptural object, while cottage style homes might pile on more texture. Let’s move to something people often forget: the ceiling.

    9. Use a Pendant Light Instead of a Floor Lamp

    Story Pin image
    Credit: Tanu Apartment Aesthetic

    If floor space is tight, skip the lamp and hang a pendant light above the seating area instead. This frees up legroom and still gives you that cozy overhead glow.

    Pick a pendant that hangs about 30 inches above the table if there is one, or higher if there’s no table at all.

    Tip: choose a dimmer switch so you can adjust brightness depending on the time of day.

    Industrial and modern homes look sharp with a simple globe pendant. Farmhouse spaces might choose a lantern-style fixture instead. Now let’s think about what’s actually holding up those chairs.

    10. Pick Chair Legs That Match Your Flooring Tone

    Credit: Cochran’s Lumber & Millwork

    This is a small detail that makes a big difference. Wood chair legs that clash with your floor tone can make the whole area feel disconnected. I always try to match or complement, not contrast harshly.

    If you have warm oak floors, look for chairs with similar warm wood tones. If your floors are cool gray, black or dark walnut legs tend to blend better.

    Actionable tip: bring a small flooring sample with you when shopping for chairs, if you can.

    Scandinavian style leans toward light wood legs across the board. Traditional rooms often go darker with cherry or mahogany tones. Speaking of style, let’s compare a few budget options.

    Budget Tiers for a Two Chairs Sitting Area Setup

    Budget LevelChair Cost (Pair)Table CostRug CostTotal Estimate
    Budget-Friendly$150–$300$40–$80$50–$100$240–$480
    Mid-Range$400–$800$100–$200$150–$300$650–$1,300
    High-End$1,000–$2,500$250–$600$350–$800$1,600–$3,900

    No matter your budget, you can still build a great little nook. Let’s talk about arranging chairs at an angle instead of straight on.

    11. Angle the Chairs Instead of Facing Them Directly

    Credit: 士 勇

    Chairs facing each other head-on can feel a little intense, almost like an interview setup. Angling them slightly, maybe 15 to 20 degrees, feels more natural for conversation and lets people look elsewhere without feeling awkward.

    This also opens up sightlines to a window or the TV, so the area feels connected to the rest of the room instead of isolated.

    Tip: use a rug to help visually anchor the angled placement so it doesn’t look accidental.

    This works especially well in open-concept modern homes where the sitting area needs to relate to multiple parts of the room. Next, let’s talk about using chairs with arms versus without.

    12. Choose Armless Chairs for Tight Spaces

    Credit: Nature Creatures

    If your two chairs sitting area is squeezed into a small corner, armless chairs save real space. They also feel lighter visually, which helps a tiny room feel less crowded.

    Look for slipper chairs or slim accent chairs without bulky arms. You lose a little bit of comfort but gain a lot of flexibility.

    Practical tip: measure the width without arms, not just the overall chair width, when comparing options.

    Modern and minimalist homes benefit most from this trick, though even traditional homes can use armless chairs in a slipcovered style for a softer look. Let’s talk texture next.

    13. Mix Textures Like Velvet, Linen, and Wood

    Story Pin image
    Credit: The Aesthetic Abode

    A two chairs sitting area with only smooth textures can feel flat. I like combining a velvet chair with a linen chair, or adding a wood table next to a metal lamp. The contrast in texture keeps things visually interesting even in a small space.

    This doesn’t mean going overboard. Two or three textures max keeps it cohesive instead of chaotic.

    Tip: touch fabric samples in person before buying if you can. Photos don’t always show texture accurately.

    Bohemian and eclectic homes thrive on texture mixing. Modern homes should keep it more restrained, maybe just two textures total. Now let’s think about adding a third small piece to the mix.

    14. Add a Small Ottoman as a Shared Footrest

    Story Pin image
    Credit: Goodschuman

    An ottoman between two chairs, or off to the side, gives both seats a shared footrest without adding another full chair. It’s a small addition but it makes the space feel more relaxed and lived-in.

    Pick an ottoman low enough that it doesn’t block sightlines between the chairs. A tufted or upholstered ottoman also doubles as extra seating when guests come over.

    Actionable tip: choose an ottoman with a tray top if you want it to double as a table too.

    Traditional and transitional homes often use a tufted ottoman, while modern spaces might pick a simple leather cube. Let’s wrap up the main ideas with plants.

    15. Bring in a Tall Plant to Soften Hard Edges

    Story Pin image
    Credit: HOME DECOR

    Chairs and tables have a lot of straight lines and hard edges. A tall plant, like a fiddle leaf fig or a snake plant, softens all that geometry and adds a little life to the corner.

    Place it slightly behind or beside the seating area, not directly in the walking path.

    Tip: pick a low-maintenance plant if your two chairs sitting area doesn’t get much natural light, like a pothos or snake plant.

    Coastal and bohemian homes lean into lots of greenery, while modern homes might use just one sculptural plant for a cleaner look. Last but not least, let’s talk about symmetry versus asymmetry.

    16. Play With Asymmetry Instead of Perfect Symmetry

    Credit: Irfan

    Not every two chairs sitting area needs matching everything. Try one chair slightly larger than the other, or place the table off-center instead of dead in the middle. This creates a more relaxed, collected-over-time feeling instead of a showroom look.

    Tip: if you go asymmetrical, keep at least one element consistent, like fabric color, so it still feels planned.

    Eclectic and bohemian homes embrace this fully. Even traditional homes can use subtle asymmetry for a more personal touch. And that wraps up all 16 ideas, but let’s cover a few more things before you start shopping.

    Tips for Success

    • Always measure your space before buying chairs, not after you fall in love with a style.
    • Keep a walking path of at least 30 inches around the seating area so it doesn’t feel blocked.
    • Choose one statement piece, whether it’s a chair, rug, or lamp, and build the rest of the area around it.
    • Test fabric swatches in the actual room lighting before committing, since lighting changes how colors look.
    • Don’t skip the table. Even a small one gives the space function beyond just sitting.
    • Add at least one soft element, like a throw blanket, so the area doesn’t feel too rigid.
    • Step back and view the whole grouping from across the room before finalizing placement.

    Common Mistakes and How to Avoid Them

    Placing chairs too far apart
    : Keep them close enough that conversation feels natural, usually within 6 to 8 feet of each other.

    Ignoring scale
    : Match chair size to room size. Oversized chairs in a small room make the whole space feel cramped.

    Skipping the rug
    : A rug anchors the area and makes it feel like a real destination in the room, not just leftover furniture.

    Matching everything too perfectly
    : A little contrast in fabric or texture keeps the space from feeling stiff or showroom-like.

    Forgetting lighting
    : A dark corner with two chairs won’t get used. Add a lamp or make sure it’s near natural light.

    Overcrowding the table
    : Too many decorative items make the space feel cluttered instead of cozy. Stick to two or three pieces.

    Similar Variations

    • Coastal Reading Nook – Light woods, blue and white fabrics, and lots of natural light for a beachy feel.
    • Boho Corner Lounge – Layered rugs, patterned pillows, and mixed textures for a relaxed, collected look.
    • Modern Minimalist Duo – Sleek chairs, one accent color, and clean lines with almost no clutter.
    • Farmhouse Fireside Chairs – Two chairs angled toward a fireplace with cozy throws and wood accents.
    • Traditional Library Seating – Leather chairs, a small side table, and a nearby bookshelf for a classic study feel.
    • Scandinavian Window Nook – Light wood, neutral fabrics, and simple lines placed right by a window.

    Building a 16 Two Chairs Sitting Area really comes down to picking the right scale, adding a little personality through texture and color, and making sure the space actually invites people to sit down and stay a while. Once you nail those basics, the rest is just having fun with the details.

  • 18 Split Level Living Room Ideas That Actually Work

    18 Split Level Living Room Ideas That Actually Work

    I’ve spent way too many hours scrolling through home design boards trying to figure out what actually works for a split level living room, and I think I finally cracked it. This article pulls together the most useful, realistic ideas I could find, so you don’t have to dig through hundreds of pins yourself.

    A split level living room is a sunken or raised section of a living space, usually connected by a few steps, designed to define separate zones without walls. It works because it uses height instead of doors to create privacy and flow. This layout was huge in mid-century homes and it’s making a comeback in modern builds too.

    Stick with me and I’ll walk you through 18 ways to make this layout feel warm, functional, and actually livable instead of awkward.

    What Makes a Split Level Living Room So Tricky (And So Fun)

    Okay so here’s the thing about split level rooms. They’re weird in a good way. You’ve got two zones that are technically one room, but they feel separate because of the step or two between them. That can be a headache if you don’t plan it right. Furniture placement gets tricky. Lighting has to work for two different “floors.” But when you get it right, a split level living room feels layered and interesting instead of like one flat box.

    I like to think of it as two rooms having a conversation. They need to match in style but still have their own personality. That’s the fun part.

    1. Anchor the Lower Level With a Sectional Sofa

    Credit: Linda Strider

    The sunken part of your split level living room is begging for a big, comfy sectional. Lower ceilings and closer walls in that zone make a large piece of furniture feel cozy instead of cramped. Go with an L-shape or U-shape sectional so it hugs the corner and leaves room to walk around the step.

    Practical tip: measure the step-down area before you buy. You want at least 3 feet of walking space between the sofa and the stairs.

    This idea works in almost any style. A slouchy linen sectional feels coastal. A tufted leather one feels traditional. A clean-lined gray sectional feels modern. Once your sectional is set, you’ll want to think about what goes on the walls around it.

    2. Use a Gallery Wall to Tie the Two Levels Together

    Credit: Lovely Harbor

    One trick I love is running a gallery wall up the stairs or along the wall that connects both levels. It visually stitches the two zones together so the room doesn’t feel chopped in half. Mix frame sizes and finishes, but keep the color palette consistent, black and white photos, warm wood frames, or all gold frames.

    Tip: hang the frames at eye level for each specific step, not one flat line, so it feels intentional as you walk up or down.

    In a traditional home, use ornate frames and family portraits. In a modern space, stick to abstract prints and thin metal frames. This wall becomes a visual bridge, and it sets you up perfectly for the next idea about lighting.

    3. Layer Lighting for Each Zone Separately

    Story Pin image
    Credit: Suaiba Akter

    Split level rooms need light plans for two separate spaces, not one ceiling fixture trying to do everything. The lower level often feels darker because it’s farther from windows, so add a floor lamp or two down there. The upper level can handle a pendant or chandelier since it’s usually closer to natural light.

    Actionable tip: use warm bulbs (2700K to 3000K) in both zones so the light temperature matches and the room feels unified.

    Coastal homes might use rattan pendants. Modern homes lean toward sculptural sconces. Farmhouse spaces love a black metal chandelier. Once your lighting is sorted, let’s talk about how color can also unify these two levels.

    Lighting Options by Zone

    ZoneBest Light TypeBulb TempApprox Cost
    Lower/sunken areaFloor lamps, table lamps2700K$40-$150
    Upper levelPendant or chandelier3000K$80-$400
    Stairs/transitionRecessed step lights2700K$15-$30 per light
    Reading nookAdjustable arc lamp3000K$60-$200

    4. Pick One Flooring Material for Visual Flow

    Credit: Anupama Shetty

    Here’s a mistake I see a lot. People put carpet on one level and hardwood on the other, and it makes the split feel like two totally different rooms. Instead, use the same flooring material throughout, even if the levels are different heights. This keeps your eye moving smoothly instead of stopping at the step.

    Tip: if budget is tight, at least match the flooring color tone even if the material changes slightly.

    Modern homes look great with polished concrete or wide plank oak on both levels. Traditional homes might use the same wool carpet on both floors. Coastal spaces love light washed wood everywhere. With flooring settled, rugs become your next tool for defining each zone.

    5. Use Rugs to Define Each Level Without Dividing Them

    Credit: Carla Décor Inspirations

    Since the step already separates your split level living room, you don’t need walls or furniture to divide things further. Instead, use rugs. A large rug under the lower seating area and a different (but coordinating) rug upstairs can define each zone while still feeling like part of the same room.

    Practical tip: choose rugs in the same color family but different patterns, like a solid on one level and a subtle stripe on the other.

    Boho spaces can layer a vintage Persian rug downstairs with a jute rug upstairs. Minimalist homes might use two solid rugs in slightly different shades. Now that your zones are defined, let’s talk about furniture placement near that tricky step.

    6. Angle Furniture Toward the Step, Not Away From It

    Story Pin image
    Credit: Nora Interiors

    A lot of people make the step in a split level room feel like an obstacle instead of a feature. I say lean into it. Angle a chair or small sofa so it faces toward the step, making it a natural focal point instead of something to avoid. This also helps guide foot traffic safely.

    Tip: add a small accent light near the step’s edge so nobody trips at night. Function and style at once.

    Modern homes might treat the step like a mini stage with a statement chair facing it. Traditional homes can flank it with matching wingback chairs. This naturally leads into how to treat the step itself as a design feature.

    7. Turn the Step Into a Built-In Bench or Shelf

    Credit: Venom .D. Series

    If your split level living room has a step wider than a normal stair, use that width. Build a bench seat right into the step, or add short bookshelves along the side of it. This turns wasted space into storage or extra seating instantly.

    Actionable tip: use the same wood tone as your other furniture on this built-in piece so it doesn’t look like an afterthought.

    Coastal homes can paint the bench a soft blue and add striped cushions. Farmhouse spaces might use raw wood with a distressed finish. Once the step is working for you, it’s time to think about how color ties the whole room together.

    8. Choose a Color Palette That Flows Between Levels

    Story Pin image
    Credit: Color Harmony Palettes

    Since your split level living room is technically one space, the color scheme should flow, not clash. Pick three main colors and use them on both levels in different ratios. Maybe the lower level is 60% neutral and 40% accent color, while the upper level flips that ratio.

    Tip: paint any connecting walls (like the ones near the stairs) in a color that appears on both levels to reinforce the flow.

    Color Palette Combos That Work Well in Split Level Rooms

    StyleMain ColorAccent ColorTrim/Wood Tone
    ModernWarm grayCharcoalBlack metal
    CoastalSoft whiteOcean blueLight oak
    TraditionalCreamDeep burgundyDark walnut
    BohoTerracottaMustardNatural rattan
    FarmhouseOff-whiteSage greenWeathered oak

    This table should give you a solid starting point no matter your style. Next, let’s talk about window treatments since split level rooms often have oddly placed windows.

    9. Match Window Treatments Even If Window Sizes Differ

    Story Pin image
    Credit: BestHomeBlinds

    Split level homes often have mismatched window sizes between the two zones, which can throw off the whole vibe. The fix is simple: use the same curtain style and fabric on every window, even if you have to adjust the length. This creates consistency even when the architecture doesn’t cooperate.

    Practical tip: hang curtain rods a few inches above each window frame to make ceilings feel taller in the lower, more closed-in zone.

    Modern homes might use simple linen panels in white or gray everywhere. Traditional spaces can use heavier drapes with matching tiebacks. Now let’s look at how to handle the ceiling, which is often overlooked in split level design.

    10. Add Visual Interest to the Lower Ceiling

    Story Pin image
    Credit: Minimalist Living Decor

    The sunken part of a split level living room usually has a lower ceiling, which can feel a little cave-like if you’re not careful. Instead of fighting it, decorate it. Add exposed beams, a fun paint color, or even wallpaper on the ceiling to make it feel intentional instead of cramped.

    Tip: a matte black or deep navy ceiling paired with warm lighting actually makes low ceilings feel cozy instead of oppressive.

    Farmhouse homes love exposed wood beams here. Modern spaces might do a matte black ceiling with recessed lights. This cozy feeling sets up nicely for our next idea about creating a reading nook.

    11. Carve Out a Reading Nook on the Upper Level

    Story Pin image
    Credit: Houxii

    Since the upper level of a split level room often gets more natural light, it’s the perfect spot for a small reading nook. A single armchair, a side table, and a floor lamp are all you need. This gives the upper zone its own clear purpose separate from the main lounge area below.

    Actionable tip: position the chair near a window but at an angle, not facing it directly, so glare doesn’t ruin your reading time.

    Coastal homes can use a rattan chair with striped pillows. Traditional spaces might choose a tufted wingback chair. With both zones now purposeful, let’s talk about how plants can soften the whole space.

    12. Use Tall Plants to Soften the Transition Between Levels

    Story Pin image
    Credit: Bambrise

    Plants are honestly one of the easiest ways to make a split level living room feel less choppy. Place a tall plant, like a fiddle leaf fig or a snake plant, right near the step where the two levels meet. It softens the hard edge of the stair and adds a natural visual bridge.

    Tip: choose plants that can handle lower light if you’re placing them in the sunken zone, since it often gets less sun.

    Boho rooms can go heavy with plants everywhere. Minimalist spaces might use just one or two statement plants. Once your plants are placed, let’s think about how to handle the railing if your split level has one.

    13. Update the Railing to Match Your Design Style

    Credit: Karen Hurd

    A lot of split level homes have an old, dated railing separating the two levels, usually plain wood or boring metal. Swapping it out (or even just painting it) can instantly modernize the whole room. Black metal railings feel modern and sleek. White painted wood feels more traditional or coastal.

    Practical tip: if you can’t replace the railing, sand it down and repaint it in a color that matches your trim for an easy refresh.

    Farmhouse homes love a mix of black metal and wood cap rails. Modern spaces might go fully glass for an open feel. This leads perfectly into our next idea about using mirrors to open up the lower level.

    14. Hang a Large Mirror in the Sunken Zone

    Credit: Saca Home

    The lower level of a split level living room can feel a little dark and boxed in since it’s below grade or further from windows. A large mirror on the wall opposite the biggest window bounces light around and makes the space feel roomier immediately.

    Tip: lean a floor mirror against the wall instead of hanging it if you want a more casual, layered look.

    Modern homes love a thin black frame. Traditional spaces might choose an ornate gold frame instead. Mirrors handled, let’s move on to how furniture scale changes between the two levels.

    15. Scale Furniture Down on the Upper Level

    Story Pin image
    Credit: Home by Yeli

    Since the upper level of a split level room is often smaller and more open to the rest of the house (like a dining area or entryway), keep the furniture there a bit smaller and lighter. Think an accent chair instead of a full sofa, or a slim console table instead of a bulky cabinet.

    Actionable tip: measure your upper level’s width and keep any single piece of furniture under half that width so the space doesn’t feel crowded.

    Coastal homes might use a rattan accent chair. Modern spaces can use a slim leather chair with metal legs. Furniture scale sorted, let’s talk about how to zone the room with a console table.

    16. Use a Console Table as a Soft Divider

    Story Pin image
    Credit: young chen

    Instead of a wall or full furniture barrier, place a slim console table at the top of the stairs facing the lower level. This creates a soft visual boundary between the two zones without blocking sightlines or light. It also gives you a spot for a lamp, some books, or a small plant.

    Tip: keep the table under 12 inches deep if the space at the top of the stairs is tight, so it doesn’t become a hazard.

    Traditional homes might use a carved wood console. Modern spaces can go with a simple metal and glass one. With your divider in place, let’s talk texture, which is often forgotten in split level design.

    17. Mix Textures So Each Level Feels Complete, Not Empty

    Story Pin image
    Credit: decordelights

    Because a split level living room has two zones to fill, it’s easy to make one feel more “finished” than the other. Fix this by mixing textures deliberately in both spaces, velvet pillows, a chunky knit throw, a smooth leather ottoman, a woven basket. This keeps both levels feeling rich and considered.

    Practical tip: aim for at least three different textures per zone (soft, hard, woven) so nothing feels flat.

    Boho spaces can go wild with texture mixing. Minimalist homes should pick just two textures per level and repeat them. Textures sorted, let’s finish with how to handle the ceiling height difference between levels.

    18. Highlight the Height Difference With a Statement Light Fixture

    Story Pin image
    Credit: Expromt

    Instead of hiding the fact that your split level living room has different ceiling heights, celebrate it. Hang a long pendant light or a dramatic chandelier that spans both levels visually, drawing the eye up and down the stairs. This turns an architectural quirk into the room’s best feature.

    Tip: choose a fixture with a chain or cord long enough to work with the taller ceiling area, then let it hang down toward the lower zone.

    Modern homes might choose a sculptural black fixture. Traditional spaces can go with a crystal chandelier. This statement piece is a great way to wrap up your whole design plan, tying both levels together with one unified moment.

    Tips for Success

    • Always measure both zones separately before buying furniture, since sizes and proportions rarely match between levels.
    • Keep a “shared” color or material (like a rug color or wood tone) that appears in both zones to visually connect the space.
    • Add a light source near every step edge for safety, not just style.
    • Don’t overfill the sunken zone since low ceilings feel cramped fast with too much furniture.
    • Use vertical elements like tall plants or long curtains to draw the eye upward and balance low ceilings.
    • Test paint colors in both zones at different times of day, since natural light hits each level differently.
    • Leave at least one clear walking path between the levels that’s free of furniture or decor.

    Common Mistakes and How to Avoid Them

    Using different flooring on each level
    : Stick to one flooring material or at least match the color tone so the room reads as one connected space.

    Ignoring lighting differences between zones
    : Plan separate light sources for each level since one ceiling fixture rarely reaches both areas evenly.

    Overcrowding the lower, sunken area
    : Choose fewer, larger furniture pieces instead of many small ones to avoid a cluttered, cave-like feel.

    Treating the step as dead space
    : Add built-in seating, shelving, or accent lighting to make the step part of the design instead of an afterthought.

    Skipping a visual connector between levels
    : Use a gallery wall, matching rug colors, or a shared color palette so the two zones feel like one room.

    Forgetting safety on the stairs
    : Add a railing update or step lighting so the transition between levels is safe as well as stylish.

    Similar Variations

    • Sunken Living Room – A single lowered seating area within an otherwise flat-floor home, often used to create a cozy conversation pit.
    • Bi-Level Great Room – A larger open concept version of split level living, often combining kitchen, dining, and living zones across two heights.
    • Mid-Century Split Level – Leans into original 1960s and 70s design with warm wood tones, low furniture, and retro color palettes.
    • Modern Farmhouse Split Level – Combines the split layout with shiplap, black metal accents, and neutral color schemes.
    • Coastal Split Level – Uses light woods, blue and white palettes, and airy textures to soften the architectural height changes.
    • Industrial Loft Split Level – Pairs exposed brick, metal railings, and concrete flooring with the natural zoning of a split level layout.

    Split level living rooms have this reputation for being awkward, but honestly, once you work with the layout instead of against it, they turn into some of the coziest, most interesting spaces in a home. The key is treating both levels like they belong together, same colors, matching materials, connected lighting, while still letting each zone have its own little job to do. Whether you’re renovating an old mid-century home or just trying to make sense of a quirky floor plan, these 18 split level living room ideas give you a real starting point you can actually use.

  • 14 Warm Rustic Living Room Ideas That Feel Like a Hug

    14 Warm Rustic Living Room Ideas That Feel Like a Hug

    If you’ve been hunting for 14 Warm Rustic Living Room ideas that actually work in a real home (not just a magazine spread), you’re in the right place. I’ve pulled together everything I know from years of obsessing over cozy spaces, and I’m going to walk you through it like I would with a friend over coffee. By the end of this, you’ll know exactly how to pull off this look without guessing.

    A warm rustic living room combines natural materials like wood, stone, and leather with soft textiles and a earthy color palette to create a cozy, inviting space. The style blends farmhouse charm with cabin comfort, focusing on texture, warmth, and function over sleek modern lines.

    Stick around, because I’m about to show you 14 ways to turn any boring living room into a space that feels like a warm cabin retreat, plus some mistakes to dodge along the way.

    What Even Is a Warm Rustic Living Room?

    Okay, let’s back up for a second. Rustic doesn’t mean “stuck in a log cabin from 1985.” It means raw materials, honest textures, and colors pulled from nature. Think worn wood, chunky knits, and stone that still looks like stone.

    The “warm” part is key too. Some rustic rooms feel cold and empty, like an abandoned barn. We’re not doing that. We’re adding layers, soft lighting, and rich colors so the room feels lived-in and hugged, not staged. It’s the difference between a museum and a home your dog actually wants to nap in.

    Ready? Let’s get into the ideas.

    1. Anchor the Room With a Reclaimed Wood Coffee Table

    Story Pin image
    Credit: Suite 101

    Nothing says rustic quite like a coffee table that looks like it survived a few decades in a barn. Reclaimed wood has knots, cracks, and color variation that new furniture just can’t fake. It becomes the heart of the room, the spot where everyone puts their feet up.

    Pick a table with visible grain and a slightly rough finish. Pair it with a neutral rug so the wood grain pops instead of competing with patterns.

    Practical tip: Rub a little butcher block oil on the surface every few months to keep the wood looking rich instead of dry and dull.

    This idea works in modern farmhouse spaces too, just pair the table with cleaner-lined furniture around it. Once your table anchors the room, it’s time to think about what surrounds it.

    2. Layer a Chunky Knit Throw Over Your Sofa

    Credit: Nature Creatures

    A throw blanket sounds small, but it does a lot of heavy lifting. Chunky knits in cream, oatmeal, or rust orange instantly make a sofa look softer and more inviting.

    Drape it over one arm instead of folding it flat. That casual, lived-in look sells the rustic vibe way better than a perfectly folded blanket.

    Practical tip: Buy two throws in slightly different textures (one knit, one faux fur) and layer them together for depth.

    Coastal homes can swap the rust tones for sandy neutrals and still keep this trick. Once your sofa feels cozy, your seating area needs a rug that matches the mood.

    3. Choose a Wool or Jute Area Rug for Texture

    Credit: Cheap Rugs Australia

    Rugs ground the whole room, literally and visually. Wool rugs feel soft underfoot and hold up well in high-traffic areas. Jute rugs bring a more raw, natural texture that fits perfectly with rustic style.

    Go for earthy tones like terracotta, moss green, or deep brown instead of bright colors. Pattern-wise, simple stripes or subtle geometric shapes work better than busy florals.

    Practical tip: Size your rug so all the front legs of your furniture sit on it. A too-small rug makes the whole room feel disconnected.

    Traditional homes can use the same rug logic with more ornate border patterns. With the floor sorted, let’s talk about walls.

    4. Add a Stone or Brick Accent Wall

    Story Pin image
    Credit: Saca Home

    An accent wall made of stacked stone or exposed brick brings serious texture without adding clutter. It’s a focal point that does the work for you, so you don’t need to overdecorate the rest of the room.

    Behind a fireplace is the classic spot, but it also works well behind a media console or sofa. Keep the rest of the walls a simple, warm white or beige so the texture wall doesn’t fight for attention.

    Practical tip: If real stone isn’t in the budget, stone veneer panels give the same look for a fraction of the cost and weight.

    Industrial-style homes can use exposed brick the same way for a grittier feel. Once your walls have texture, lighting becomes even more important.

    5. Warm Up the Room With Layered Lighting

    Credit: Learn California

    Harsh overhead lighting kills a cozy vibe fast. Warm rustic rooms rely on layered lighting instead, meaning a mix of table lamps, floor lamps, and maybe a dimmable overhead fixture.

    Choose bulbs labeled “warm white” or “soft white,” somewhere around 2700K to 3000K. That amber glow does wonders for making a space feel relaxed instead of clinical.

    Practical tip: Put your lamps on a smart plug or dimmer so you can adjust the mood without buying new fixtures.

    Modern rustic spaces can use sleeker lamp bases while keeping the same warm bulb temperature. Now that the lighting sets the mood, let’s talk color.

    Warm Rustic Color Palette Guide

    Palette NameWall ColorAccent ColorsBest For
    Cabin ClassicWarm WhiteRust, Forest Green, Chestnut BrownTraditional rustic
    Desert WarmSandy BeigeTerracotta, Clay, CreamSouthwestern rustic
    Mountain LodgeCharcoal GrayDeep Brown, Burnt Orange, OliveCabin-style rooms
    Soft FarmhouseCreamSage Green, Tan, Dusty BlueModern farmhouse

    6. Bring In a Stone Fireplace as a Focal Point

    Story Pin image
    Credit: Space and Style

    If your room already has a fireplace, don’t hide it. A stone or brick fireplace surround is basically the poster child for rustic style. It gives the eye somewhere to land and instantly makes the room feel warmer, even when the fire isn’t lit.

    Add a wood mantel on top for extra texture, and style it with a few candles, a small plant, or an old clock.

    Practical tip: Keep mantel decor to three or fewer items so it doesn’t look cluttered.

    Traditional and lodge-style homes can go bigger with the stone, while modern rustic spaces can keep the stone minimal and paired with clean lines. With your focal point set, let’s fill the room with furniture that fits.

    7. Pick Leather Furniture With Some Age to It

    Credit: Maya Schopmeyer

    Leather sofas and chairs, especially ones in cognac or worn brown, bring instant rustic charm. The slightly distressed look works in this style’s favor. You want it to look like it’s been sat on and loved, not fresh off a showroom floor.

    Pair leather seating with wood and metal accents so the room doesn’t feel too formal.

    Practical tip: Look for “top grain” leather instead of “genuine leather” labels. Top grain ages better and develops a nicer patina over time.

    Industrial rustic spaces can pair leather with black metal frames for extra edge. Once your seating is set, think about how you’ll dress the windows.

    8. Use Linen or Burlap Curtains for Softness

    Credit: Jean Combs

    Heavy, structured curtains feel too formal for this look. Linen and burlap have a relaxed, slightly wrinkled texture that fits right into a warm rustic room. They let in soft, filtered light too, which adds to the cozy feeling.

    Stick with neutral tones like oatmeal, taupe, or soft gray so the curtains don’t distract from the room’s other textures.

    Practical tip: Hang curtain rods closer to the ceiling than the window frame. It makes ceilings look taller and windows feel bigger.

    Coastal rustic spaces can use lighter, breezier linen in white or pale blue. Now that your windows are dressed, let’s talk about the ceiling itself.

    9. Expose or Fake Wood Beams Overhead

    Story Pin image
    Credit: Home Decor

    Exposed wood beams add serious rustic charm and draw the eye upward. If your home doesn’t have real structural beams, faux beams made from polyurethane look surprisingly convincing and are way lighter to install.

    Stain the beams a shade darker or lighter than your floor to create contrast instead of blending in completely.

    Practical tip: Add small can lights along the beams to highlight their texture at night.

    Mountain lodge and farmhouse styles both lean heavily on this trick. With the ceiling handled, let’s add some greenery to soften things up.

    10. Add Greenery in Wood or Woven Planters

    Story Pin image
    Credit: CozyCasa Living

    Plants bring life into a rustic room, but the pot matters just as much as the plant. Skip the shiny ceramic pots and go for wood planters, woven baskets, or terracotta instead.

    Larger plants like fiddle leaf figs or snake plants work well in corners, while smaller succulents can sit on shelves or the coffee table.

    Practical tip: Group plants in odd numbers (three or five) at different heights for a more natural, less staged look.

    Boho and coastal spaces can lean into more woven texture with the planters. Once your greenery is in place, let’s think about wall art.

    11. Hang Nature-Inspired or Vintage Art

    Story Pin image
    Credit: AuralinePaintings

    Skip the generic canvas prints and go for art that feels earthy and personal. Vintage landscape paintings, botanical prints, or black and white nature photography all fit the warm rustic mood.

    Frame pieces in raw or dark wood instead of shiny metal or plastic frames.

    Practical tip: Create a small gallery wall using odd-shaped frames mixed with one or two mirrors to bounce light around.

    Traditional homes can go bigger and more ornate with frames, while modern rustic spaces can keep frames thin and simple. With the walls dressed, let’s talk storage.

    12. Use Wood and Wicker Storage Pieces

    Credit: My Beach Lifestyle

    Baskets and wood crates aren’t just decor, they’re storage heroes. Use them to hold blankets, magazines, or the kids’ toys without breaking the room’s aesthetic. A metal or plastic storage bin sticks out like a sore thumb in a rustic room, but a woven basket blends right in.

    Practical tip: Label baskets on the inside (not the outside) so they stay functional without looking cluttered.

    Farmhouse and coastal styles both use woven storage heavily, just in different color tones. Now let’s bring in some metal accents for balance.

    13. Mix In Black or Bronze Metal Accents

    Credit: Mindful Hues

    Wood and leather need a little contrast, and metal accents do that job well. Black iron light fixtures, bronze drawer pulls, or a wrought iron plant stand all add a bit of edge without pulling away from the warmth.

    Keep metal finishes consistent throughout the room. Mixing gold, silver, and black all in one space can look messy fast.

    Practical tip: Start with one metal finish and repeat it in at least three spots (lighting, hardware, decor) for a cohesive look.

    Industrial rustic spaces can lean harder into black metal, while soft farmhouse spaces can use it sparingly. Last but not least, let’s talk about scent and sound.

    14. Add Wood-Scented Candles and Soft Ambient Sound

    Story Pin image
    Credit: Easy Living

    This one’s easy to overlook, but it matters. Candles that smell like cedar, sandalwood, or fireside smoke add another sensory layer to the room. Pair that with a small fountain, soft instrumental music, or even a crackling fire sound playlist, and the room feels even cozier.

    Practical tip: Rotate candle scents seasonally, warmer scents like cinnamon in fall and winter, lighter scents like sage in spring and summer.

    This idea works in literally every home style since it’s about atmosphere, not furniture.

    Budget Tiers for a Warm Rustic Living Room Makeover

    Budget LevelWhat You Can DoEstimated Cost
    Small ($200-$500)New throws, rug, candles, plant swaps$200-$500
    Mid ($500-$2,000)Add coffee table, curtains, lighting, wall art$500-$2,000
    Full Room ($2,000-$6,000)New sofa, fireplace surround, beams, storage$2,000-$6,000
    High-End ($6,000+)Custom stonework, built-ins, real reclaimed wood everything$6,000+

    Tips for Success

    • Start with one big anchor piece, like a coffee table or fireplace, before adding smaller decor.
    • Stick to three or four main colors max so the room doesn’t feel chaotic.
    • Mix textures on purpose: wood, wool, leather, and metal should all show up somewhere.
    • Don’t buy everything new. Thrifted and vintage pieces add authentic rustic character.
    • Test paint colors on the wall at different times of day before committing.
    • Keep a few surfaces empty. A rustic room should feel relaxed, not crammed.
    • Let natural light in when you can. It makes warm tones look even richer.

    Common Mistakes and How to Avoid Them

    Too much matching wood tones
    : Mix at least two different wood shades in the room so it doesn’t look like a furniture showroom set.

    Cold, sterile lighting
    : Swap bright white bulbs for warm white ones (2700K-3000K) in every fixture.

    Overdoing the “cabin” theme with antlers and plaid everywhere
    : Pick one or two rustic symbols max and let textures do the rest of the talking.

    Skipping soft textures
    : Add at least one knit throw, one wool rug, and one set of linen curtains so the room doesn’t feel harsh.

    Ignoring scale
    : Measure your space before buying a coffee table or rug. Oversized furniture in a small room kills the cozy feeling fast.

    Forgetting a focal point
    : Choose one main feature, like a fireplace or accent wall, so the room doesn’t feel scattered.

    Similar Variations

    • Modern Farmhouse: Cleaner lines, more white and black contrast, still keeps wood texture.
    • Mountain Lodge: Heavier on stone, timber, and deep greens for a true cabin feel.
    • Desert Rustic: Warmer terracotta and clay tones with Southwestern-inspired textiles.
    • Coastal Rustic: Lighter wood tones mixed with rope, linen, and sandy neutrals.
    • Industrial Rustic: Adds black metal, exposed brick, and rougher, edgier finishes.
    • Boho Rustic: Mixes woven textures, layered rugs, and more eclectic patterns.

    Pulling off a warm rustic living room really comes down to layering natural materials with soft textures and keeping your color palette grounded in earthy tones. Start small if you need to, maybe just a throw blanket and a new rug, and build from there as your budget allows. Whatever pace you go at, these 14 Warm Rustic Living Room ideas give you a real roadmap to a space that finally feels as cozy as it looks.

  • 16 Bedroom Lighting Ideas

    16 Bedroom Lighting Ideas

    These 16 Bedroom Lighting Ideas will help you build a bedroom that feels calm, useful, and personal instead of flat or overly bright. I’ll cover fixture choices, bulb color, placement, safety, and ways to match lighting with your furniture and decor.

    Bedroom lighting works best in layers: ambient light for overall visibility, task light for reading and dressing, and accent light for mood. Use warm LED bulbs, dimmers, and fixtures sized to the room for safe, even coverage.

    You’ll also see simple ways to make a small room feel larger, give a large bedroom more balance, and fix common lighting problems without a full remodel.

    Understanding Bedroom Lighting Layers

    I like to think of bedroom lighting as a small team. The ceiling fixture handles general light. Bedside lamps help with reading and winding down. Accent lights draw attention to art, curtains, plants, or architectural details.

    The best rooms use all three layers at different times. You might use bright ambient lighting while making the bed, a task lamp while reading, and soft accent lighting when you are ready to sleep. Warm bulbs between 2,700K and 3,000K usually create a relaxed feel. Cooler bulbs can work near a vanity or closet, where color accuracy matters more.

    Before buying anything, notice how you use the room. Do you read in bed? Get dressed near a mirror? Need better light for makeup? Your daily habits should guide the layout.

    1. Install a Dimmable Flush-Mount Ceiling Light

    Story pin image
    Credit: Phanchan

    A flush-mount fixture is a smart choice when your bedroom has a low ceiling. It sits close to the ceiling, so it does not compete with tall furniture or make the room feel cramped. Choose a shade that spreads light evenly rather than creating a harsh spotlight.

    For a soft look, try frosted glass, linen, or fabric. A matte black fixture suits modern furniture, while aged brass works well with wood nightstands and traditional bedding. I recommend a dimmable LED model so you can switch from bright cleaning light to a softer evening glow.

    Place the fixture near the center of the room. Use a wall dimmer instead of relying only on a remote if you want easy access when entering the room. This idea fits modern, farmhouse, classic, and minimalist bedrooms with the right finish.

    Next, consider how a pendant can add more visual interest without taking over the space.

    2. Hang Pendant Lights Over the Nightstands

    Story pin image
    Credit: Cozy Studio

    Pendant lights can replace table lamps and free up valuable nightstand space. This works especially well when your bedside tables are narrow or already crowded with books, glasses, and chargers.

    Hang one pendant on each side of the bed. The bottom should sit high enough that you will not hit it while sitting up. In many bedrooms, placing the bottom of the shade about 18 to 24 inches above the nightstand works well, but adjust for your bed height and shade size.

    Choose simple glass pendants for a modern room, woven shades for a relaxed space, or aged metal for an industrial bedroom. Keep the finish consistent with other hardware, such as drawer pulls and curtain rods. Use warm bulbs and separate switches if possible, so each side can be controlled independently.

    Once the bedside surface is clear, you can use it for a more decorative lighting feature.

    3. Use Matching Table Lamps for a Balanced Bed Wall

    Story pin image
    Credit: Veloura | Everyday Home Inspo

    A pair of table lamps creates an easy sense of order. I often use this approach when the bed is the main focal point and the room needs symmetry. Matching lamps do not have to look old-fashioned. Look for clean ceramic bases, ribbed glass, natural wood, or sculptural metal.

    Choose nightstands that are wide enough to hold the lamp base without crowding the bed. The lampshade should be around two-thirds the height of the base, and the light should fall near shoulder level when you are sitting in bed. This makes reading more comfortable.

    For color, repeat one shade from the room, such as the clay tone in a quilt or the cream color in a rug. Add dimmable bulbs for a gentler bedtime setting. This setup suits traditional, coastal, transitional, and contemporary rooms.

    If your bedroom has a strong focal wall, the next idea helps draw attention upward.

    4. Add Picture Lights Above Bedroom Art

    Story pin image
    Credit: Estilo Casa & Moda

    A picture light gives artwork a soft, focused glow. It can make a simple print, painting, or photo wall feel more intentional without flooding the entire bedroom with light. This is especially useful when the room has one large blank wall.

    Choose a fixture slightly narrower than the artwork. Brass adds warmth to neutral decor, while black or brushed nickel feels more modern. Mount the light above the frame and angle it toward the center of the piece. LED picture lights stay cooler and use less energy than older bulbs, which helps protect art and keeps the wall safer.

    Use this lighting with a quiet palette, such as cream bedding, walnut furniture, and muted green walls. It also works with gallery walls if you use one long fixture or several small ones. The result can feel modern, vintage, or hotel-inspired depending on the frame style.

    Before choosing more fixtures, use the guide below to match bulb color with bedroom activities.

    Bedroom Bulb Color Guide

    Bedroom useRecommended color temperatureAppearanceBest placement
    Winding down and sleep routines2,200K to 2,700KAmber and very warmBedside lamps, sconces, accent lights
    General bedroom lighting2,700K to 3,000KSoft warm whiteCeiling fixtures, pendants, floor lamps
    Reading in bed2,700K to 3,000KWarm but clearAdjustable sconces and task lamps
    Makeup and grooming3,000K to 3,500KBalanced whiteVanity mirror and dressing table
    Closet organization3,500K to 4,000KCrisp whiteCloset strips and overhead lights

    5. Mount Swing-Arm Sconces Beside the Bed

    Credit: mooiehome 

    Swing-arm sconces are one of my favorite bedroom lighting ideas because they combine style with flexibility. You can pull the light closer for reading, then push it back against the wall when you need more open space.

    Install one on each side of the bed. A typical mounting point is about 6 to 12 inches above the top of the mattress, but your sitting position matters most. Sit on the bed and mark the height where the light will shine over your shoulder. Choose shades that direct light downward and away from your eyes.

    Black metal suits a modern bedroom, polished brass adds a classic touch, and white ceramic works with soft coastal decor. If hardwiring is not practical, plug-in sconces can still look neat when cords are hidden in a cord cover.

    Now let’s make a similar bedside solution work without electrical installation.

    6. Try Plug-In Wall Sconces in a Rental Bedroom

    Credit: SaveNest Studio

    Plug-in sconces give you the look of built-in lighting without opening the wall. They are useful in apartments, guest rooms, and bedrooms where you want a quick update. Many designs attach with screws or removable hardware, depending on the wall surface and rental rules.

    Look for sconces with fabric or metal shades and a visible cord that matches the wall. You can run the cord straight down inside a paintable raceway. Secure it neatly so it does not hang near the floor or become a trip hazard.

    Use two sconces above simple wood or painted nightstands. Keep bedding calm if the sconces have a bold shape. If the fixture is plain, add interest with patterned pillows or a textured headboard. Plug-in sconces work with boho, modern, Scandinavian, vintage, and cottage styles.

    A bedroom also needs a good answer for dark corners, so the next idea moves beyond the bed.

    7. Place a Slim Floor Lamp in a Dark Corner

    Story pin image
    Credit: Maria Home

    A floor lamp can spread light through an underused corner while adding height to the room. This is a good choice near a reading chair, dresser, or tall plant. It helps keep the room from feeling heavy around the bed.

    Choose an arc lamp if you need light to reach over a chair. Pick a tripod lamp for a relaxed, decorative look. A narrow uplight works well beside a dresser or in a tight corner. Make sure the base does not block a walking path, and use a weighted design if children or pets share the home.

    Match the lamp to the room’s main finishes. A linen shade softens dark wood furniture, while a metal shade looks sharper with white or gray furniture. Add a warm LED bulb and a foot switch for easy control.

    Once the corners glow, you can use hidden light to create a softer atmosphere.

    8. Add LED Strip Lighting Behind the Headboard

    Story pin image
    Credit: Home decor

    LED strip lighting can create a gentle halo behind the headboard. It adds depth without taking up floor or table space. I like this option when the bed wall is painted a deep color or covered in textured wallpaper.

    Attach the strip to the back of the headboard, not directly where it can be seen. Choose a warm white version instead of bright color-changing lights if you want a restful bedroom. Hide the power cord behind the bed or along the wall using a tidy cable channel.

    This idea looks best with simple bedding and a headboard in wood, fabric, or rattan. It can also make a low platform bed feel more substantial. Use a dimmer or smart control so the light stays low at night. The same trick works in modern, Japandi, industrial, and contemporary rooms.

    Next, compare several fixture materials before you choose the look of your bedside lighting.

    Bedroom Lighting Material Comparison

    MaterialLight effectBest withCare and practical note
    Frosted glassSoft, even glowModern and transitional roomsEasy to clean; hides harsh LED points
    LinenWarm, diffused lightCottage, coastal, and classic decorDust gently; avoid damp cleaning
    Rattan or woven fiberPatterned shadowsBoho, coastal, and organic stylesKeep away from hot bulbs
    Opal acrylicSmooth, glare-reduced lightMinimalist and small bedroomsLightweight and often budget-friendly
    MetalMore directed, focused lightIndustrial and modern roomsCan create glare if the bulb is exposed
    CeramicSoft light with a decorative baseTraditional and eclectic roomsStable on larger nightstands

    9. Outline a Tray Ceiling With Cove Lighting

    Story pin image
    Credit: Small room decor

    Cove lighting hides the light source near the edge of a ceiling, ledge, or molding. The light bounces off the ceiling and creates a calm wash instead of a sharp beam. It is a strong choice for bedrooms with tray ceilings or decorative crown molding.

    Use warm white LED tape and an aluminum channel for a cleaner installation. The channel helps keep the strips straight and can improve heat control. Place the lighting where it will not be visible from the bed. A dimmer is essential because indirect lighting can feel bright even when the source is hidden.

    Keep the rest of the room simple. Low furniture, soft curtains, and a restrained color palette let the ceiling detail stand out. This works best in renovated, modern, traditional, and hotel-style bedrooms, though a smaller version can suit a cozy cottage room.

    If your ceiling does not have architectural detail, you can still create a glowing focal point.

    10. Choose a Statement Chandelier Over the Bed

    Story pin image
    Credit: Ruffled 

    A chandelier can turn the ceiling into the room’s main feature. It works best when the bedroom has enough ceiling height and the fixture is centered carefully over the bed. Avoid oversized designs that make the room feel crowded.

    For a calm look, choose a chandelier with linen shades, slim branches, or clear glass. A woven pendant adds texture to a boho or coastal room. Leave enough clearance so the fixture does not feel too low, especially if someone may sit up quickly in bed. The bottom should generally be well above head level.

    Let the chandelier guide the rest of the decor. Pair a bold black fixture with simple white bedding and dark wood accents. Balance a brass fixture with cream, taupe, or muted blush. Use a dimmer to soften the light at night. This idea adapts to glam, farmhouse, traditional, and modern interiors.

    For low ceilings, a semi-flush fixture gives you a similar focal point with less risk.

    11. Use a Semi-Flush Fixture in a Low-Ceiling Room

    Credit: Lowe’s

    A semi-flush fixture hangs slightly below the ceiling but takes up less vertical space than a pendant or chandelier. It offers more shape and style than a basic flush mount without making the room feel squeezed.

    Look for a shallow drum shade, rounded opal globe, or compact multi-light fixture. Frosted glass is helpful because it spreads the light across the room. If your ceiling is white, a white or pale fixture will blend in. If you want a focal point, choose a finish that repeats the hardware on your furniture.

    Place the fixture at the room’s center, not automatically over the bed. It should light the walking areas and closet path as evenly as possible. Use a warm, dimmable LED bulb or integrated LED system. This option suits small modern rooms, guest bedrooms, classic spaces, and rental-friendly updates.

    Good overhead light helps, but a dressing area needs more precise illumination.

    12. Light the Vanity From Both Sides

    Story pin image
    Credit: Esthetic Vibes

    A vanity mirror looks better and works better when light comes from both sides. Side lighting reduces shadows across the face, which helps with makeup, shaving, and hair styling. A single ceiling light often shines from above and creates dark areas under the eyes.

    Mount vertical sconces beside the mirror, keeping them close to face level. If the mirror is wide, add a light above it as well. Choose bulbs around 3,000K to 3,500K for a clear but not overly cool appearance. A high color-rendering LED helps clothing and makeup colors look more natural.

    Keep the vanity furniture simple if the sconces are decorative. A white table works with brass fixtures and a warm beige wall, while walnut furniture pairs well with black or bronze. This setup fits contemporary, vintage, traditional, and minimalist bedrooms.

    The table below can help you plan fixture size and spacing before shopping.

    Bedroom Fixture Size and Placement Guide

    Fixture or areaUseful starting pointPlacement guidance
    Flush-mount ceiling light12 to 20 inches wide for many bedroomsCenter over the main room area
    Pendant over nightstand6 to 12 inches wideCenter over the table; keep clear of head movement
    Bedside table lampBase about 20 to 28 inches tallShade near shoulder height when seated
    Wall sconce4 to 8 inches wide for bedside useMount based on seated reading position
    Vanity side sconce18 to 30 inches tallPlace at face level on both sides
    Floor lamp55 to 68 inches tallSet beside a chair or in a corner, outside walkways
    Chandelier over bedChoose based on room scaleKeep high enough to avoid contact when sitting up

    13. Use Closet Lighting That Turns On Automatically

    Story pin image
    Credit: RoomDecorDaily

    A dark closet is frustrating, especially early in the morning. Motion-activated LED lights solve the problem with little effort. You can install rechargeable bars under shelves, magnetic strip lights on side walls, or hardwired fixtures during a remodel.

    Choose a light with a simple sensor and an adjustable shutoff time. Place it where clothing will not block the sensor. For a walk-in closet, use more than one fixture so shelves and corners do not disappear into shadows.

    Use neutral white light if you need to compare clothing colors. Keep the bedroom itself warmer so the closet does not make the whole room feel clinical. White shelving reflects more light, while wood shelving creates a warmer look but may need brighter fixtures. This solution suits modern, traditional, small-space, and built-in closet designs.

    After the practical zones are covered, decorative light can bring more personality into the room.

    14. Hang a Small Cluster of Decorative Pendants

    Story pin image
    Credit: Calm Indoors

    A cluster of small pendants adds movement and personality without requiring one oversized fixture. Hang three or five pendants at slightly different heights in an empty corner, beside a tall headboard, or near a reading chair.

    Use similar shapes in different sizes, or repeat one material for a cleaner arrangement. Clear glass feels light and airy. Ceramic adds color. Woven shades bring softness and texture. Keep the bulbs warm and use low-wattage LEDs so the cluster does not become too bright.

    Plan the layout on the floor first. Tape the proposed positions on the wall or ceiling before drilling. Make sure cords and fixtures stay away from curtains, bedding, and walking paths. This idea can look eclectic, coastal, Scandinavian, or modern depending on the materials.

    If you prefer something even simpler, a small accent lamp can create a similar mood.

    15. Add a Small Lamp to a Dresser or Shelf

    Story pin image
    Credit: The Designer Diary

    A small lamp on a dresser, bookcase, or floating shelf creates a low pool of light. It is perfect for evenings when you want to see without turning on the main ceiling fixture. This small detail can also make a large bedroom feel more layered.

    Choose a lamp that fits the scale of the surface. A tiny lamp can disappear on a wide dresser, while a tall lamp may look unstable on a narrow shelf. Use the lamp to repeat a room color, such as terracotta, sage, navy, or warm cream.

    Place it beside a small stack of books, a framed photo, or a ceramic vase, but leave enough open space for balance. Hide the cord behind the furniture and use a warm bulb around 2,200K to 2,700K. This approach works in nearly any style, from vintage to minimalist.

    One final idea helps make the whole lighting system easier to control.

    16. Connect Bedroom Lights to Smart Controls

    Story pin image
    Credit: NordicNestHomeDecor

    Smart bulbs and smart switches let you control lighting from bed, a phone, or a voice assistant. They are useful when the ceiling switch is far from the door or when you want preset scenes for morning, reading, and sleep.

    Set up at least three scenes. A “morning” setting can use brighter, neutral light. A “reading” setting can brighten the bedside lamps while keeping accent lights low. A “rest” setting can use only warm bedside or hidden lighting. Make sure the physical wall switch stays on if your smart bulbs need constant power.

    Use smart controls with simple fixtures so the technology does not dominate the decor. A traditional lamp can still work with a smart bulb. Check product compatibility before mixing brands, especially for dimming. This idea fits modern and tech-friendly homes, but it can also quietly improve a classic bedroom.

    Tips for Success

    • Use warm bulbs in the main bedroom and reserve cooler bulbs for closets or grooming areas.
    • Put bedside lights on separate controls so each person can choose their own brightness.
    • Test a bulb in the room before buying several. Wall color changes how light appears.
    • Keep cords away from walkways, heating vents, and areas where they can be pulled.
    • Use dimmers whenever possible. Brightness matters as much as fixture style.
    • Choose frosted or shaded bulbs when an exposed bulb creates glare.
    • Take measurements before shopping, including ceiling height, nightstand width, and bed height.

    Common Mistakes and How to Avoid Them

    Using only one ceiling light

    Add bedside lamps, sconces, or accent lighting so the room has more than one brightness level.

    Choosing bulbs that are too cool

    Replace blue-white bulbs with warm LEDs around 2,700K to 3,000K for a calmer bedroom atmosphere.

    Hanging fixtures too low

    Sit on the bed before finalizing the height. Make sure the fixture will not interfere with sitting up or moving around.

    Ignoring the scale of the furniture

    Match lamp and fixture size to the bed, nightstands, and room dimensions. Tiny lights disappear, while oversized pieces can feel heavy.

    Creating glare near the bed

    Use shades, frosted glass, or adjustable fixtures that direct light away from your eyes.

    Forgetting the switch location

    Plan how you will turn the light on when entering and off when lying down. Add a smart control, remote, or bedside switch when needed.

    Similar Variations

    • Coastal Bedroom Lighting: Use woven pendants, pale wood, frosted glass, and soft blue or sand-colored accents.
    • Modern Minimalist Lighting: Choose clean-lined fixtures, hidden LED strips, white walls, and simple black or brass details.
    • Moody Bedroom Lighting: Pair dimmable warm bulbs with deep green, navy, charcoal, or brown walls.
    • Boho Bedroom Lighting: Layer rattan shades, ceramic table lamps, string lights, and natural wood furniture.
    • Traditional Bedroom Lighting: Use matching lamps, fabric shades, brass finishes, and a classic chandelier.
    • Japandi Bedroom Lighting: Select paper, linen, bamboo, and light wood fixtures with a quiet neutral color palette.

    The best bedroom lighting plan is not about filling every corner with brightness. It is about using the right light for each task, then lowering the intensity when the day winds down. Start with a ceiling fixture, add useful bedside lighting, and finish with one or two decorative layers.

    Think about comfort first. A beautiful lamp that shines into your eyes will not feel beautiful for long. With the right placement, warm bulbs, and simple controls, these 16 Bedroom Lighting Ideas can make your room feel calmer and work much better.

  • 25 Wardrobe Design Bedroom Ideas for a Stylish and Practical Space

    25 Wardrobe Design Bedroom Ideas for a Stylish and Practical Space

    25 Wardrobe Design Bedroom ideas can help you turn unused wall space into smart storage that looks beautiful and feels easy to use. I’ve gathered practical layouts, materials, colors, and decorating tips so you can choose a wardrobe that truly fits your room.

    The question is which wardrobe designs suit a bedroom best. The answer includes sliding, hinged, mirrored, built-in, freestanding, modular, glass-front, corner, loft, and minimalist wardrobes, selected by room size, storage needs, style, and budget.

    Keep reading to see how small details can change the whole room. I’ll also share useful size guides, material choices, and mistakes worth avoiding.

    Understanding Bedroom Wardrobe Design

    A bedroom wardrobe is more than a place to hang clothes. It can shape the room’s layout, brighten a dark corner, and make daily routines smoother. When I plan one, I first look at the wall length, ceiling height, door swing, and walking space around the bed.

    Then I think about what needs storage. Long dresses need hanging height. Shoes need shallow shelves. Bags and folded clothes need different compartments. A good wardrobe design combines all of these without making the bedroom feel crowded.

    Your personal style matters, too. Warm wood suits traditional rooms, while flat panels and hidden handles work well in modern bedrooms. The best design is the one that looks right and makes everything easy to find.

    1. Install a Full-Height Built-In Wardrobe

    Story pin image
    Credit: Ellorie Lane

    A full-height built-in wardrobe uses the entire wall from floor to ceiling. This creates a clean, custom look and gives you valuable upper storage for suitcases, blankets, and seasonal clothing. I like this design for bedrooms where every inch matters.

    Choose simple doors in white, beige, soft gray, or natural wood. Inside, combine hanging rails, drawers, shoe shelves, and adjustable shelves. Add a narrow open section for books or decor if you want the wardrobe to feel less solid.

    Before ordering, measure the wall at several points. Walls are not always perfectly straight. This design suits modern, traditional, Scandinavian, and transitional homes, depending on the door style and finish. Next, let’s look at a solution for rooms where door clearance is tight.

    2. Choose Space-Saving Sliding Doors

    Story pin image
    Credit: modern vibes

    Sliding wardrobe doors move along tracks instead of opening into the room. They are useful beside a bed or in a narrow bedroom where hinged doors may block the walkway. I recommend leaving enough front clearance for comfortable access, even though the doors do not swing outward.

    Use two or three wide panels rather than many narrow ones. Large panels create a calmer appearance. You can choose wood veneer, matte laminate, frosted glass, or a combination of materials.

    Add soft-close tracks if your budget allows. They reduce noise and protect the doors from hard slams. Sliding wardrobes work in modern, industrial, coastal, and minimalist rooms. If you prefer a more classic look, the next design offers a familiar solution.

    3. Add Classic Hinged Wardrobe Doors

    Story pin image
    Credit: Cozy Home Finds

    Hinged wardrobes remain a practical choice because each section opens fully. You can see the entire interior at once, which makes organizing easier. They also offer many decorative options, including shaker panels, cane inserts, painted wood, and simple flat doors.

    For a balanced look, divide a long wardrobe into equal door widths. Use black knobs for a modern farmhouse room or brushed brass handles for a warmer traditional style. Inside, place drawers at waist height so you do not need to bend often.

    Check the door swing before installation. It should not hit the bed, dresser, or nearby wall. Hinged wardrobes fit traditional, cottage, farmhouse, and contemporary bedrooms. Now let’s use the wardrobe itself to make the room feel larger.

    4. Use Mirrored Doors to Reflect Light

    Story pin image
    Credit: Aesthetics415

    Mirrored wardrobe doors can make a small bedroom feel brighter and more open. They also give you a full-length dressing mirror without taking up separate wall space. I prefer using mirrors on one or two panels rather than covering every door, especially in rooms that already have many reflective surfaces.

    Pair the mirrors with a simple frame in white, black, champagne, or wood. Keep the area around the wardrobe uncluttered so the reflection feels calm. Position the doors where they can reflect a window or a light-colored wall, not a messy corner.

    Clean the tracks and mirror surface regularly. Mirrored wardrobes suit modern, glam, compact, and minimalist interiors.

    Wardrobe Door Comparison

    Door typeBest forFront clearanceMaintenance
    Sliding laminateSmall bedrooms600 to 750 mmLow
    Hinged woodTraditional rooms900 to 1,000 mmLow to medium
    Mirrored slidingDark or compact rooms600 to 750 mmMedium
    Glass panelModern bedrooms600 to 750 mmMedium to high
    Cane or rattanBoho and coastal rooms900 to 1,000 mmMedium

    With the right door choice, storage can also become part of the room’s visual design. The next idea adds warmth through natural materials.

    5. Bring Warmth with Wood-Finish Panels

    Story pin image
    Credit: Cozy Haven Interiors 

    Wood-finish wardrobe panels make a bedroom feel comfortable and grounded. Oak, walnut, ash, and teak-inspired laminates all create different moods. Light oak keeps the room airy, while walnut adds a richer and more dramatic feel.

    Use wood on the main doors and a lighter color inside the wardrobe. Pair the design with linen bedding, woven baskets, and warm bedside lighting. Avoid matching every wooden item in the room exactly. Slight differences make the space feel more natural.

    Choose textured laminate if real wood is outside your budget. It is easier to clean and often resists scratches well. Wood wardrobes adapt to rustic, Scandinavian, traditional, Japandi, and contemporary styles. Next, we’ll look at a lighter finish for a softer bedroom.

    6. Try Soft White or Cream Wardrobe Doors

    Story pin image
    Credit: Alexita

    White and cream wardrobe doors can make a bedroom look fresh, calm, and spacious. They are especially useful in small rooms with limited natural light. I prefer warm white or ivory over very bright white when the bedroom has beige flooring or warm wood furniture.

    Add slim handles, push-to-open doors, or small brass knobs. For interest, use vertical grooves or thin frame details. Keep the rest of the room simple with soft bedding and one or two muted accent colors.

    Wipe the doors often, since pale finishes show dust and fingerprints. Satin or eggshell finishes are usually easier to live with than high-gloss surfaces. This idea works with coastal, modern, cottage, and Scandinavian styles. If you want stronger character, color can do the job.

    7. Paint the Wardrobe in a Deep Accent Color

    Story pin image
    Credit: NESTLY HOME

    A dark wardrobe can become a strong focal point in the bedroom. Navy, forest green, charcoal, and deep brown feel rich without needing lots of decoration. This approach works best when the room has enough daylight or a good layered lighting plan.

    Balance the dark doors with pale walls, light bedding, and warm wood or brass details. If the wardrobe is very large, use a matte finish so it does not feel too heavy. Add internal lighting to make the storage easier to use.

    Test a sample color in both daylight and evening light before painting or ordering panels. This design fits moody modern, traditional, art deco, and eclectic homes. Next, we’ll soften storage with a fabric-inspired detail.

    8. Add Cane or Rattan Inserts

    Story pin image
    Credit: LifeMadeEasier

    Cane and rattan wardrobe panels bring texture and airflow to the bedroom. They work well when you want storage that feels lighter than solid doors. A cane insert can cover the center of a framed door, while the outer frame stays wood, white, or black.

    Use cane with woven baskets, linen curtains, jute rugs, and indoor plants. Avoid placing it where it may catch on bags or clothing. A protective finish helps keep the material looking fresh, especially in humid areas.

    For a more modern result, choose a simple rectangular frame and minimal handles. This design suits boho, coastal, tropical, farmhouse, and relaxed contemporary interiors.

    Useful Wardrobe Color Pairings

    Wardrobe finishWall colorAccent materialsOverall mood
    Light oakWarm whiteLinen and rattanCalm and natural
    NavyPale grayBrass and creamRefined and bold
    CreamSoft beigeLight woodGentle and classic
    WalnutDusty blueBlack metalRich and balanced
    Forest greenWarm ivoryAged brassCozy and elegant
    Matte blackWhite or clayOak and leatherModern and dramatic

    Texture and color can make a wardrobe beautiful, but its inside layout decides how useful it will be. Let’s focus on organization now.

    9. Build a Wardrobe with Double Hanging Rails

    Credit: Blogging Perspective 

    Double hanging rails use vertical space efficiently. Place one rail for shirts, jackets, and folded trousers, then add a second rail below for shorter garments. This layout can nearly double hanging capacity compared with one long rail.

    Keep one taller section for dresses, coats, and long skirts. Use the lower area for shoes or pull-out baskets if the height allows. I suggest measuring your longest garments before fixing the rails.

    Choose adjustable systems so you can change the layout later. Double rails work in built-in, freestanding, sliding, and hinged wardrobes. They fit nearly every home style because the organization is hidden behind the doors. Next, we’ll give folded clothing a better home.

    10. Add Deep Drawers for Folded Clothes

    Story pin image
    Credit: Victoria Hagan 

    Drawers are useful for T-shirts, underwear, pajamas, workout clothing, and accessories. They protect soft items from dust and make it easier to see what you own. I prefer wide drawers with full-extension runners so the back section is not wasted.

    Place everyday drawers between knee and shoulder height. Keep heavy items lower and delicate items higher. Drawer dividers can separate socks, belts, and smaller pieces without taking much space.

    Avoid making drawers too deep. Clothes can become buried in tall stacks. A depth of about 450 to 600 mm is practical for many bedroom wardrobes, depending on the overall cabinet design. This feature suits modern, classic, and modular wardrobes. Now let’s make use of awkward corners.

    11. Fit a Corner Wardrobe Around the Room

    Story pin image
    Credit: Zenova Living 

    A corner wardrobe can connect two walls and create more storage than a straight cabinet. It is helpful in square bedrooms where one wall has a difficult corner or an unused section beside the door.

    Use the corner for shelves, pull-out rails, or less-used clothing. Keep frequently worn items on the easier-to-reach outer sections. Matching the doors across both walls helps the design feel intentional rather than bulky.

    Leave enough space for doors, drawers, and movement around the bed. A corner unit works in traditional, modern, farmhouse, and compact apartment bedrooms. If you have a high ceiling, the next idea can take storage upward.

    12. Use Loft Storage Above the Main Wardrobe

    Story pin image
    Credit: SOPHIE Noireaux Deschamps

    A loft section above the wardrobe gives you extra room for luggage, bedding, winter coats, and storage boxes. It is a smart choice when the bedroom has a high ceiling or when floor space is limited.

    Use matching doors so the upper units blend with the main wardrobe. Add labels to boxes because high shelves are easy to forget. Keep a small folding step stool nearby, but do not store everyday items above your head.

    Make sure the cabinets are securely fixed to the wall. Avoid placing very heavy objects in units that are difficult to access. Loft storage suits minimalist, contemporary, traditional, and apartment interiors.

    Basic Wardrobe Size Guide

    Storage areaRecommended clear heightHelpful depth
    Shirts and folded trousers900 to 1,050 mm450 to 600 mm
    Long dresses and coats1,500 to 1,800 mm550 to 600 mm
    Shoe shelves150 to 250 mm per level300 to 400 mm
    Drawers150 to 250 mm each450 to 600 mm
    Loft storage350 to 600 mm450 to 600 mm

    A tall wardrobe can store a lot, but light inside the cabinet makes every shelf more useful. Let’s add that small upgrade.

    13. Install Motion-Sensor Interior Lighting

    Story pin image
    Credit: CozyVibez Hub

    Interior wardrobe lighting saves time when the room is dark. LED strips, small spotlights, and motion-sensor bars can brighten shelves and hanging sections without adding much heat.

    Place vertical lights near the front edges of deep compartments. Use warm white light for a cozy bedroom or neutral white light when you need accurate clothing colors. Hide wires inside the side panels for a clean finish.

    Choose rechargeable lights for a simple retrofit, or use wired lighting during a new installation. Check that the lights turn off when the doors close. This feature fits modern, luxury, minimalist, and practical family bedrooms. Next, we’ll make the wardrobe more useful for dressing.

    14. Create a Built-In Dressing Nook

    Credit: Sinead Barden

    A dressing nook can sit between two wardrobe towers or beside a built-in cabinet. Include a small desk-height counter, mirror, drawer, and stool. It becomes a useful place for skincare, jewelry, hair tools, or a quick outfit check.

    Keep the counter shallow so it does not steal too much floor space. Add a wall sconce or concealed LED strip around the mirror. Use the same finish as the wardrobe, or choose a contrasting wood for interest.

    Secure the mirror and keep electrical outlets away from water sources. A dressing nook works in modern, glam, traditional, and compact bedrooms. If your room needs a softer look, consider a curtain instead of solid doors.

    15. Hide Storage Behind Fabric Curtains

    Credit: Your House and Garden

    Fabric curtains offer a relaxed alternative to cabinet doors. They are helpful for renters, low-cost updates, and open wardrobes that need a softer appearance. Choose linen, cotton, canvas, or a washable blend.

    Install a sturdy ceiling track or curtain rod. Use full-length curtains in a calm color such as oatmeal, cream, olive, or dusty blue. Make sure the fabric can move fully aside so you can reach every shelf.

    Washable curtains are easier to maintain than delicate fabric. This idea suits boho, cottage, coastal, rustic, and small-space bedrooms. Now let’s look at glass, which can show off a carefully arranged wardrobe.

    16. Use Fluted or Frosted Glass Panels

    Story pin image
    Credit :OlgaOzerova_interiors

    Fluted and frosted glass add light while keeping clothing partly hidden. Fluted glass creates vertical texture, while frosted glass gives a smooth, quiet appearance. Both options feel lighter than heavy wood doors.

    Use black, bronze, or brushed metal frames depending on your style. Keep the inside of the wardrobe neat because some shapes and colors may still show through. Add warm lighting inside for a soft glow at night.

    Choose toughened safety glass from a reliable supplier. Clean it with a soft cloth to avoid scratches. Glass panels work especially well in modern, industrial, art deco, and boutique-style bedrooms.

    Wardrobe Material Comparison

    MaterialStrengthsWatch-outsBest style matches
    LaminateAffordable and easy to cleanEdges may chip if poorly madeModern, practical
    VeneerNatural wood appearanceNeeds careful moisture controlJapandi, classic
    Solid woodDurable and repairableCosts more and is heavierTraditional, rustic
    AcrylicSmooth, bright, glossyShows fingerprintsContemporary, glam
    CaneLight and texturedNeeds gentle careBoho, coastal
    GlassReflects light and feels openShows marks and needs safety glassModern, art deco

    Material affects the feel of the bedroom, but small decorative choices create the final personality. Let’s add one with real visual impact.

    17. Frame the Wardrobe with Wall Molding

    Story pin image
    Credit: Jas Decor Studio

    Wall molding can make a standard wardrobe look custom-built. Add narrow trim around the outer edge or create simple rectangles on flat doors. Paint the molding and wardrobe in the same color for a subtle finish.

    Use slim profiles in small rooms. Heavy molding can make a compact bedroom feel crowded. Pair the design with classic lamps, upholstered furniture, and simple bedding.

    Measure carefully and use a level before fixing trim. Fill nail holes and paint the entire surface for a smooth result. This idea suits classic, Parisian, transitional, and modern farmhouse bedrooms. If you prefer a cleaner look, hidden handles may be the answer.

    18. Select Handleless Push-to-Open Doors

    Story pin image
    Credit: Ellorie Lane

    Handleless wardrobes create a smooth, uncluttered wall. Push-to-open hardware lets you open the doors with a light press. This is useful when you want the wardrobe to blend into the background.

    Choose matte laminate, soft wood, or painted panels. Add a recessed shadow gap between doors if you want more definition. Keep the panels clean because there are no handles to draw attention away from fingerprints.

    Use quality hardware and check that the doors align properly. Cheap mechanisms may become frustrating with daily use. Handleless doors fit modern, minimalist, Scandinavian, and Japandi rooms. Next, let’s use the wardrobe to divide space.

    19. Use a Wardrobe as a Room Divider

    Credit: Jonathan Marquez

    A wardrobe can separate a sleeping area from a dressing zone, home office, or entry passage. This works especially well in studio apartments or large bedrooms with an open plan.

    Choose a finished back panel if both sides will be visible. Add open shelves, a niche, or a television panel to make the divider serve two purposes. Keep the unit anchored securely, especially if it is tall.

    Leave pathways wide enough for easy movement. A room-divider wardrobe fits modern, industrial, contemporary, and small apartment styles. If you want the wardrobe to feel more personal, display a few favorite items in open niches.

    20. Include Open Niches for Decor and Daily Items

    Story pin image
    Credit: aestheticarchive6

    Open niches break up a large wardrobe and give you a place for books, framed art, perfume bottles, or a small plant. They also make useful landing spots for items you reach for every day.

    Limit the display to a few pieces. Too many objects can make the wardrobe look messy. Use warm LED lighting inside the niche and repeat one color from the bedding or curtains.

    Keep open shelves away from dusty floor-level areas when possible. This design suits modern, eclectic, boho, and transitional homes.

    Budget Planning Guide

    Project levelTypical featuresBest way to save
    BasicModular cabinet, laminate doors, standard shelvesUse ready-made units
    Mid-rangeCustom layout, drawers, soft-close hardwareMix open shelves with doors
    PremiumFull-height build, lighting, glass, specialty fittingsInvest in high-use sections
    Rental updateFreestanding unit, curtains, removable lightsAvoid permanent changes

    A small display niche can add charm, but a well-planned shoe section can save even more daily frustration. Let’s organize footwear next.

    21. Design a Dedicated Shoe Cabinet Section

    Credit: victoriakrupko

    Shoes need their own space because they can quickly crowd the bottom of a wardrobe. Add adjustable shelves, angled racks, or pull-out trays. Keep everyday pairs between waist and knee height for easy access.

    Allow more height for boots and high-top shoes. A ventilated compartment can help reduce trapped odors. Use washable mats on the bottom shelf to protect the cabinet from dirt.

    Measure your shoe collection before fixing the shelves. Do not assume every pair needs the same space. Dedicated shoe storage works in modern, traditional, industrial, and family bedrooms. Now let’s give accessories a more orderly home.

    22. Add Pull-Out Trays for Jewelry and Accessories

    Credit: Mattress Nut

    Pull-out trays are ideal for watches, sunglasses, ties, belts, scarves, and jewelry. They use shallow spaces that might otherwise be wasted. Lined trays also protect delicate pieces from scratches.

    Place the tray near eye level if you use it daily. Add small dividers so items do not mix together. For jewelry, choose felt or velvet lining and keep the tray away from direct sunlight.

    Do not overload the runners. Check the hardware’s weight rating before filling the tray. This detail suits luxury, modern, classic, and compact wardrobe designs. Next, let’s plan a wardrobe that can change with your life.

    23. Choose a Flexible Modular Wardrobe

    Story pin image
    Credit: Chahat Collection

    A modular wardrobe uses separate units that can be rearranged or expanded. It is useful if you rent, move often, or expect your storage needs to change. You can begin with hanging space and add drawers, shelves, or a shoe unit later.

    Choose modules with matching heights and finishes so the design looks planned. Secure tall pieces to the wall to prevent tipping. Leave a little room for future additions if the bedroom layout allows it.

    Modular storage fits practical, contemporary, Scandinavian, and student bedrooms. If you have limited floor space, the next idea takes storage upward and inward.

    24. Build a Wardrobe Under a Sloped Ceiling

    Story pin image
    Credit: SOPHIE Noireaux Deschamps

    Bedrooms in lofts and attic spaces often have awkward sloped ceilings. A custom wardrobe can follow the roofline, turning difficult areas into useful storage. Use the tallest section for hanging clothes and the lower sections for drawers or shoes.

    Choose sliding doors where hinged doors may be hard to operate. Keep the lowest compartments easy to reach, especially if children use the room. Light colors can help the built-in unit blend with the ceiling.

    Use a detailed template before cutting panels. Small measurement errors become obvious under a slope. This design works in modern lofts, rustic homes, Scandinavian spaces, and compact apartments. Finally, let’s create a wardrobe that feels like part of the architecture.

    Planning Checklist by Bedroom Size

    Bedroom typeRecommended approachUseful priority
    Small roomSliding or handleless doorsClear walking space
    Medium roomBuilt-in with drawers and shelvesBalanced storage
    Large roomWardrobe wall or room dividerZoning and display
    Attic roomSloped custom cabinetsUse difficult corners
    Rental roomFreestanding or curtain storageEasy removal

    25. Match the Wardrobe to the Bedroom Architecture

    Story pin image
    Credit: Cozy Home Finds

    The most polished wardrobe design feels connected to the room. Match its color, trim, or proportions with the walls, flooring, doors, and ceiling. In a classic room, use framed panels and traditional hardware. In a modern room, choose flat fronts and simple lines.

    You can also make the wardrobe disappear by painting it the same color as the wall. This is helpful when the cabinet is large. Alternatively, make it a feature with contrasting wood, lighting, or decorative panels.

    Stand in the doorway and look at the whole room before choosing finishes. The wardrobe should support the space, not compete with the bed. This approach adapts to modern, traditional, coastal, rustic, and eclectic homes, which makes it a dependable final choice.

    Tips for Success

    • Measure the room, wall corners, ceiling height, and door swings before buying materials.
    • Keep at least 600 mm of clear walking space in front of most wardrobe doors when possible.
    • List every storage need, including shoes, bags, long clothes, folded items, and accessories.
    • Place everyday items between knee and shoulder height.
    • Use adjustable shelves and rails so the interior can change later.
    • Add warm LED lighting to deep or full-height wardrobes.
    • Order finish samples and view them in both daylight and evening light.
    • Anchor tall freestanding wardrobes securely to the wall.
    • Choose easy-clean finishes for homes with children or pets.
    • Leave room for ventilation if the wardrobe sits against a damp outside wall.

    Common Mistakes and How to Avoid Them

    Choosing a wardrobe before measuring the bed area
    Measure the bed, bedside tables, doors, windows, and walking routes first. A beautiful cabinet is not useful if it blocks movement.

    Using only one type of storage
    Combine hanging rails, shelves, drawers, and shoe storage. Clothing comes in different shapes, so the interior should do the same.

    Making every shelf the same height
    Adjustable shelves are more practical. Fixed spaces may waste room or fail to hold boots, bags, and folded blankets.

    Ignoring interior lighting
    Deep wardrobes can become dark and frustrating. Add sensor lights or rechargeable LED bars where natural light cannot reach.

    Picking a finish that is hard to maintain
    High-gloss doors and mirrors show fingerprints quickly. If you dislike frequent cleaning, choose matte laminate, textured wood, or satin paint.

    Forgetting the door mechanism
    Sliding doors need clean tracks and careful alignment. Hinged doors need swing space. Choose the system after checking the room layout, not before.

    Similar Variations

    • Japandi Wardrobe Design: Combines pale wood, simple panels, soft colors, and calm uncluttered lines.
    • Coastal Wardrobe Design: Uses white, pale blue, light oak, rattan, and relaxed hardware.
    • Boho Wardrobe Design: Mixes cane, woven textures, warm wood, plants, and handmade accents.
    • Modern Luxury Wardrobe Design: Pairs glass, dark finishes, brass details, lighting, and smooth cabinetry.
    • Scandinavian Wardrobe Design: Focuses on light colors, practical storage, clean shapes, and natural materials.
    • Traditional Wardrobe Design: Uses framed doors, rich wood, classic handles, molding, and balanced proportions.

    The right wardrobe should solve a real storage problem while supporting the mood of your bedroom. Start with measurements and daily habits, then choose the doors, colors, materials, and details that fit your space.

    Whether you need a compact sliding cabinet or a full wardrobe wall with custom lighting, small planning choices make a big difference. Use these ideas as a guide while creating your own 25 Wardrobe Design Bedroom.